A
B
1 2
3
C D
4
5
E
A
B
C
D
12 – Preparations
English
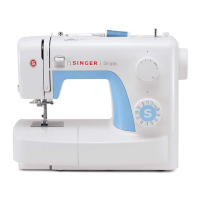
1. Place the thread spool on the spool pin. Slide a spool cap
rmly against the spool.
2. Place the thread into the thread guide (A) from front to the
back. Bring the thread clockwise around the bobbin wind-
ing tension disc (B), making sure that the thread is pulled
snuggly between the discs.
3. Thread through the hole in the bobbin (C) from the inside to
the outside.
4. Place the bobbin on the bobbin winding spindle. Make sure
the bobbin is pushed down rmly.
5. Push the bobbin winding spindle to the right. Hold the
thread end, and press the foot control to start winding.
After a few turns, take your foot o the foot control to
stop winding. Cut the excess thread tail above the bobbin,
making sure to trim it close to the bobbin. Step on the foot
control to resume winding. When the bobbin is full, the
bobbin winding will slow down and stop automatically.
Note: You can also start the winding by long pressing the
start/stop button.
When the winding spindle is pushed to the right, a bobbin
winding icon is shown on the display (D).
6. Push the bobbin winding spindle to the left. Remove the
bobbin and cut the thread.
Wind the Bobbin
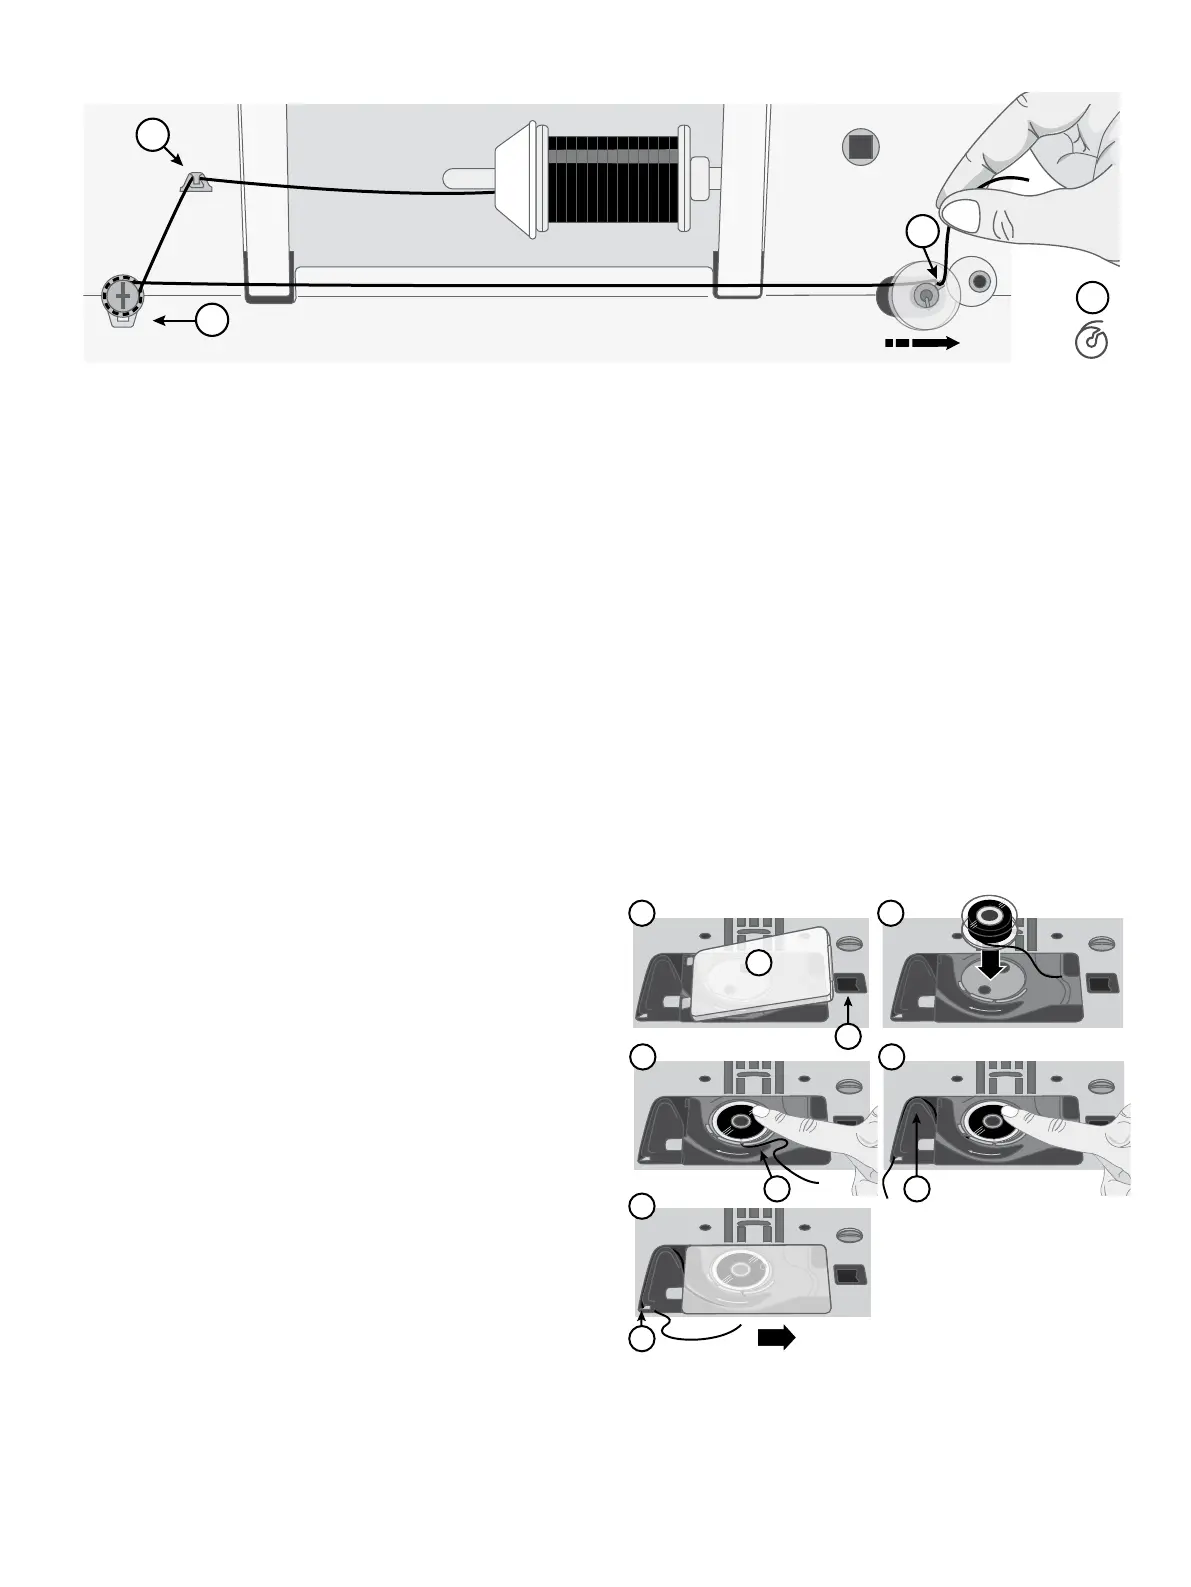
Insert the Bobbin
Note: Make sure that the needle is fully raised and the machine
is turned o before inserting or removing the bobbin.
1. Remove the bobbin cover (A) by pushing the small button
to the right of the cover (B) towards the right.
2. Insert the bobbin in the bobbin case with the thread running
in a counterclockwise direction.
3. With the tip of your nger on the bobbin, pull the thread
slightly to the right and under the guide (C) then towards
the left.
4. Continue guiding the thread up toward the left and around
the curve (D).
5. Bring it down the channel toward the front and into the
bobbin thread knife (E). Replace the bobbin cover and pull
the thread to the right to cut o the excess thread.
Note: When the bobbin winding spindle is pushed to the right, the machine will not sew. Make sure to push the bobbin spindle back to
the sewing position (left) before sewing.