1
3
2
Operating Your Machine – 19
English
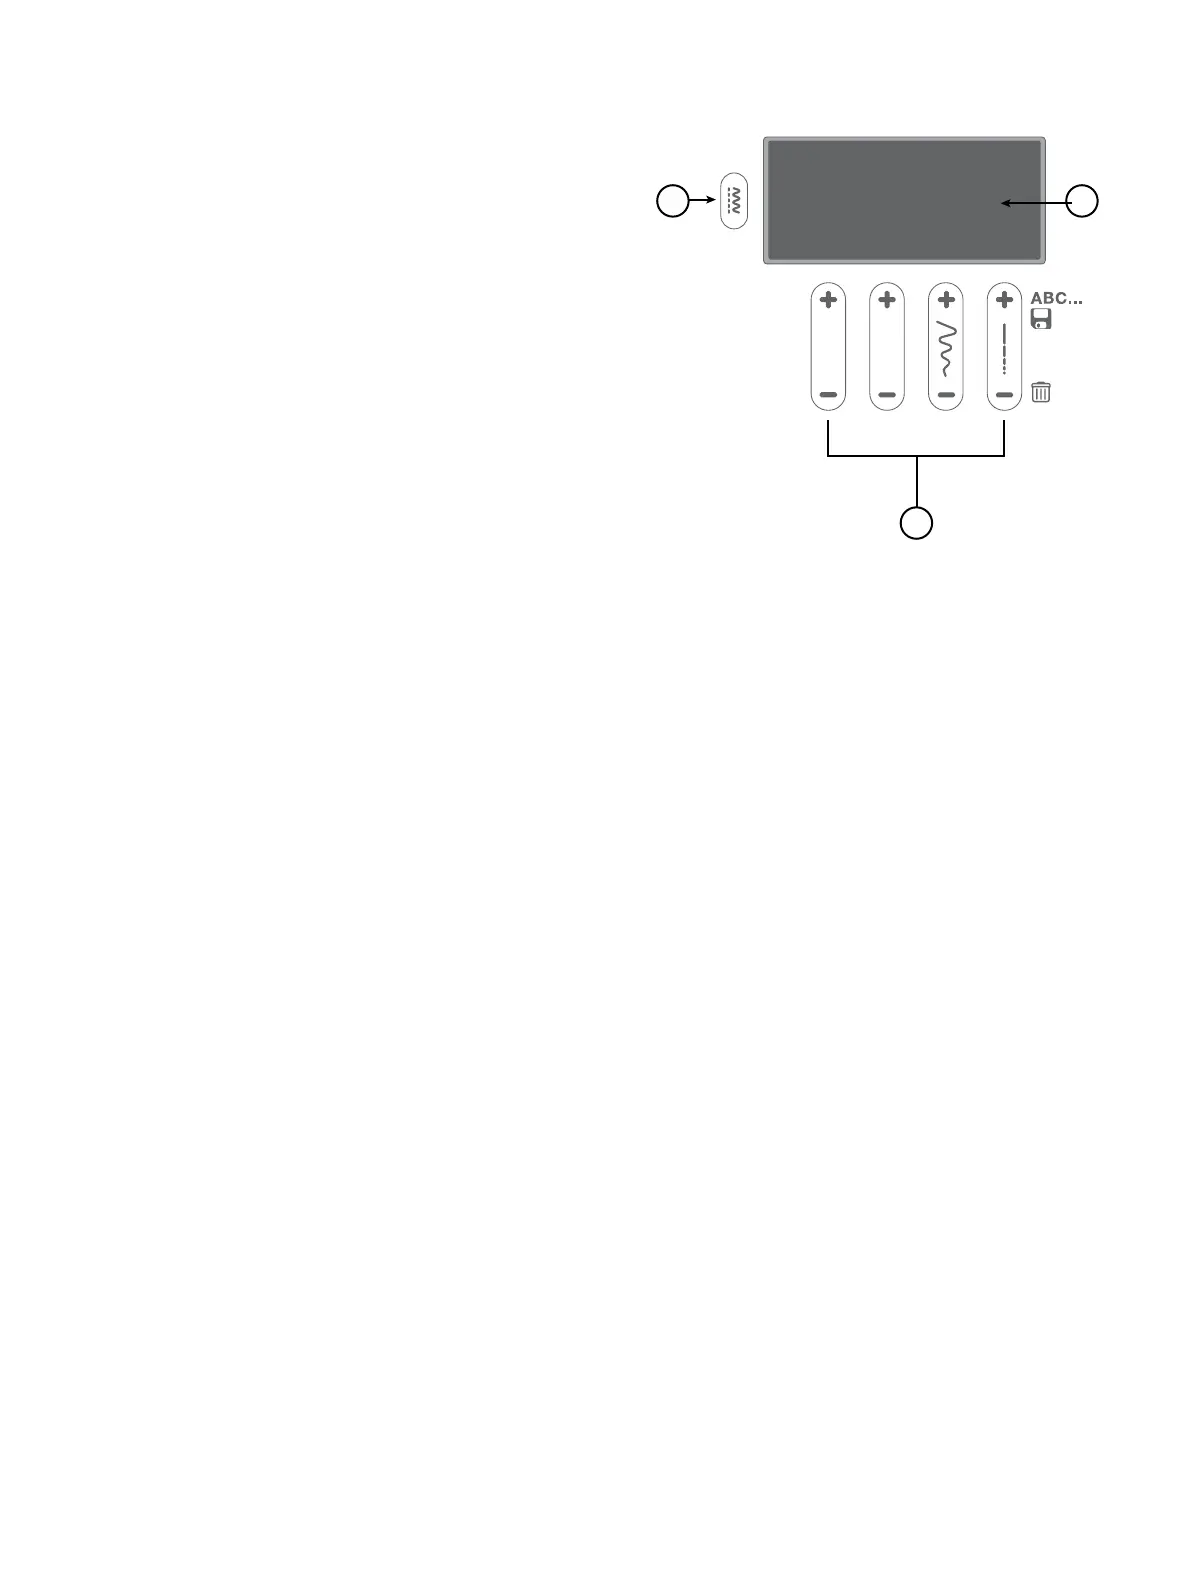
Stitch Control Panel
The functions on the Stitch Control Panel are used to select and
adjust stitches and program fonts. Each functionality is listed
and described further below.
1. Mode Button
2. Display
3. Function Buttons
On the display, you can see the current stitch with the set
length, width and presser foot recommendation. You can also-
see activated functions such as buttonhole sewing and bobbin
winding.
Press to toggle between the Stitch Menus. There are three stitch menus, 1. Utility Stitches, 2. Utility & Decorative Stitches, 3. Alpha-
bet. The selected menu is shown on the display.
When you select a stitch, your machine automatically sets the best stitch width. The default setting is indicated on the display. The
stitch width can be adjusted between 0–7mm. Some stitches have a limited stitch width. Increase the stitch width by pressing “+”, de-
crease it by pressing “-”. When a straight stitch or a reinforced straight stitch is selected, the Stitch Width button is used to adjust the
needle position. When pressing “+”, the needle position is moved to the right. When pressing “-”, the needle moves to the left.
When you select a stitch, your machine automatically sets the best stitch length. The default setting is indicated on the display. The
stitch length can be adjusted between 0–4.5mm. Some stitches have a limited stitch length. Increase the stitch length by pressing “+”,
decrease it by pressing “-”.
The corresponding stitch numbers are shown on the Stitch Charts available at the lower right of the machine, under the Stitch Control
Panel. Choose the mode and then press the + or - Pattern Adjustment Buttons to select the number of the stitch that you desire.
Display
Stitch Menus
Stitch Width / Needle Position
Stitch Length
Stitch Selection Buttons