CHASSIS AND TURNTABLE ASSEMBLY
GTZZ14EJ&16EJ Maintenance Manual
41
© May 2023
Table 5-5 Slewing mechanism
No.
Description
A
Slewing bearing
(slewing reducer)
B
Slewing motor
Lubricate Slewing Bearing
Regular lubrication of slewing bearing is essential to
maintain machine uptime and extend service life. Failure
to lubricate the slewing bearing regularly may lead to
abnormal operation of the machine and accelerated
component damage. It is recommended to lubricate the
slewing bearing every 3 months or 250 hours of opera-
tion, and when the machine is operated in multiple shifts
or exposed to harsh environments, the lubrication fre-
quency and amount of lubricant should be increased
accordingly.
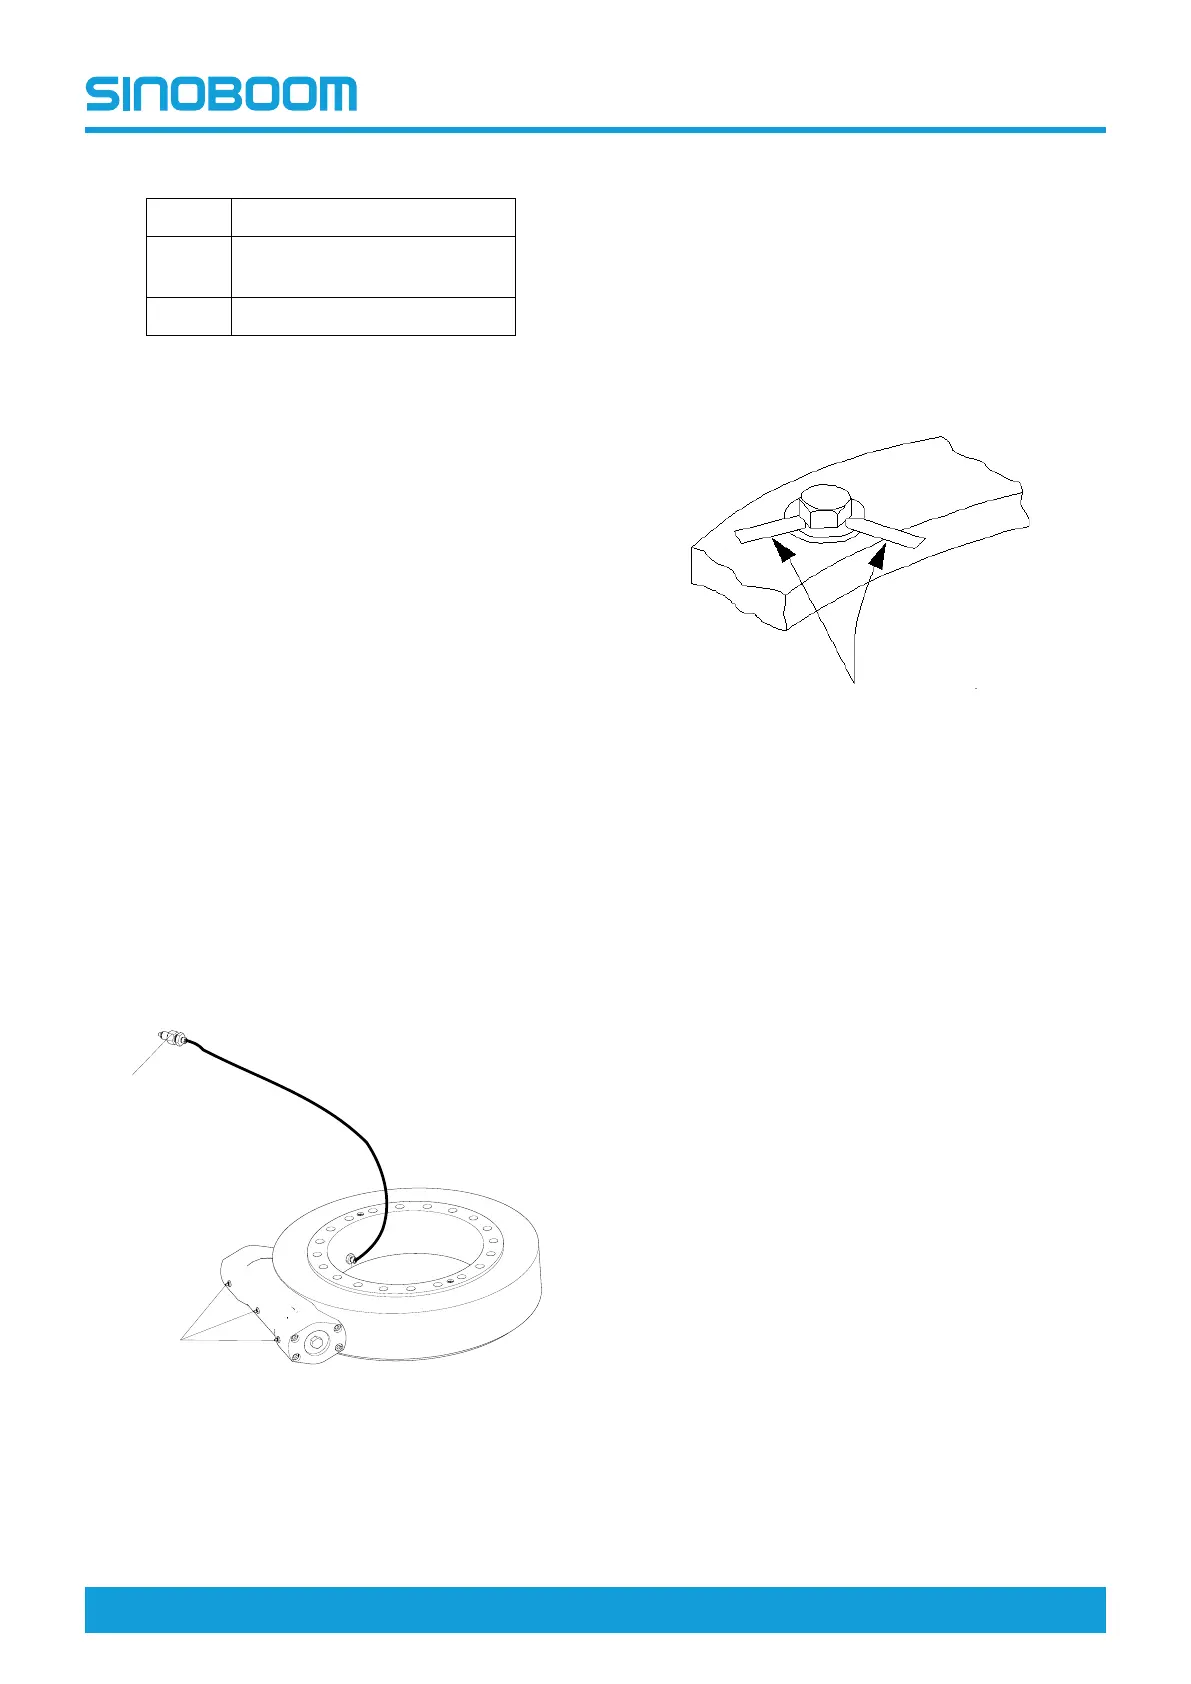
1. As shown in the figure below, connect the grease
nipple on the slewing bearing and the nipple at posi-
tion #1 with a hose.
2. Position the oil gun nozzle on the grease nipple at
position #1 and fill with ZL-3 lithium-based grease
which will be transported to the turntable slewing
bearing through the hose.
3. Then, rotate the turntable by 100-130mm (4-5in)
each time until the whole slewing bearing is fully
lubricated.
4. Position the oil gun nozzle on the grease nipple at
position #2 and fill with ZL-3 lithium-based grease
until the worm is fully lubricated.
5. Remove excess grease.
Fig 8 Diagram of lubricating slewing bearing
Inspect Slewing Bearing Bolts
It is recommended to check the slewing bearing bolts
after the first 50 hours of operation, and every 3 months
or 250 hours of operation thereafter.
If any bolt is found to be missing or slack, replace it with
a new bolt, apply Loctite 272 threadlocking adhesive to
the bolt thread and tighten the bolt with the torque speci-
fied in the Torque Specifications section. After replac-
ing and tightening the slewing bearing bolt, re-inspect
the bolt for tightness.
Fig 9 Instruction for inserting feeler gauge
Check the connecting bolt between the chassis
and the slewing bearing
1. Adjust the machine to the position as shown in the
Figure (b) below.
2. Locate the connecting bolt between the chassis and
the slewing bearing.
3. As indicated by Page 41, Instruction for inserting
feeler gauge, insert the 0.04mm (0.0016in) feeler
gauge between the bolt and washer in the quadrant
opposite to the turntable counterweight.
4. Make sure that the feeler gauge will not penetrate
under the bolt head to the bolt shank.
5. Rotate the turntable 90° to check the bolts in the
next quadrant.
6. Rotate the turntable 90°again until all bolts have
been inspected.
Check the connecting bolts between the turnta-
ble and the slewing bearing
1. Adjust the machine to the position as shown in the
Figure (b) below.
2. Locate the connecting bolt between the turntable
and the slewing bearing.
3. As indicated by Page 41, Instruction for inserting
feeler gauge, insert the 0.04mm (0.0016in) feeler
gauge between the bolt and washer in the semi-
circle opposite to the turntable counterweight.
4. Make sure that the feeler gauge will not penetrate
under the bolt head to the bolt shank.
 Loading...