EasyManua.ls Logo

Sinocare TRUE METRIX AIR - User Manual

Sinocare TRUE METRIX AIR
78 pages
Print Icon
To Next Page IconTo Next Page
Loading...
一、适用范围、规格型号、配套试纸、检测方法和原理
1.1 适用范围
1.2 规格型号
1.3 配套试纸
1.4 检测方法和原理
二、血糖仪主要结构及其各配件组成结构和示意图
2.1 主要结构组成
2.2 血糖仪及各配件组成示意图
三、显示说明
四、使用操作
4.1 安装电池
4.2 血糖仪设置
4.3 测试
4.4 结果查询
五、省电功能
六、检查系统
6.1 自动自测
6.2 质控液测试
1
3
3
3
3
3
3
3
3
6
10
10
10
12
14
15
15
15
16
目录

Table of Contents

Question and Answer IconNeed help?

Do you have a question about the Sinocare TRUE METRIX AIR and is the answer not in the manual?

Overview

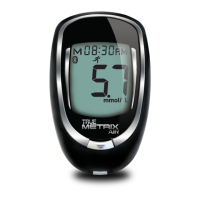
This document describes the Sinocare True Metrix and True Metrix Air blood glucose meters, which are in vitro diagnostic medical devices designed for self-testing of blood glucose levels.

Function Description

The True Metrix and True Metrix Air blood glucose meters are used with compatible test strips to measure glucose in whole blood samples. They are intended for blood glucose monitoring by healthcare professionals in medical institutions and by individuals with diabetes or other conditions requiring self-monitoring. The devices are for monitoring blood glucose levels only and are not intended for the diagnosis of diabetes. The True Metrix Air model also features Bluetooth connectivity for data transmission.

Important Technical Specifications

  • Models: True Metrix, True Metrix Air
  • Test Strips: True Metrix blood glucose test strips (contact Sinocare or authorized dealer for purchase)
  • Measurement Principle: Electrochemical. The reaction zone of the test strip contains special chemicals. When a blood sample comes into contact with these chemicals, glucose in the blood reacts to produce a microcurrent. The meter detects this microcurrent and converts it into a blood glucose concentration, displayed as a plasma glucose value.
  • Test Range: 1.1 mmol/L - 33.3 mmol/L (20 mg/dL - 600 mg/dL)
  • Blood Sample Volume: Approximately 0.5 µL
  • Sample Type: Fresh capillary whole blood from fingertip, capillary whole blood from forearm, venous whole blood, control solution.
  • Test Time: 4-7 seconds
  • Result Display: Plasma glucose value
  • Power Supply: One 3V CR2032 lithium button battery (non-disassemblable, non-rechargeable)
  • Maximum Rated Current: True Metrix: 8 mA, True Metrix Air: 10 mA
  • Service Life: 10 years (based on 7 tests per day). The product's service life is determined by the frequency of use. Regular maintenance is required to ensure safety and effectiveness.
  • Battery Life: Approximately 1000 tests or 1 year
  • Software Version: True Metrix: V02, True Metrix Air: V02
  • Memory Capacity: True Metrix: 500 blood glucose test results; True Metrix Air: 1000 blood glucose test results.
  • Dimensions: 87mm × 55mm × 18mm
  • Operating Environment: Relative humidity: 10%-80% RH (non-condensing), Temperature: 5°C-40°C
  • Storage and Transportation Conditions: Relative humidity: 10%-93% RH (non-condensing), Temperature: -20°C-55°C
  • Hematocrit Range: 20%-70%
  • Altitude: Up to 3108 meters
  • Bluetooth (True Metrix Air only): Built-in Bluetooth (4.2) pass-through module based on Bluetooth Low Energy standard for two-way data transmission with other Bluetooth devices.
  • Data Interface (True Metrix Air only): Serial port communication (8 data bits, 1 stop bit, no parity, no flow control, baud rate fixed at 9600bps) for data transmission in hexadecimal format.

Usage Features

  • Simple Operation: The meter is designed for ease of use, requiring a small blood sample and no coding.
  • Battery Installation: Uses one 3V CR2032 button battery. Users are instructed to lift the battery cover, remove the old battery, insert the new battery with the positive side up, and close the cover. If the meter does not turn on, check battery polarity.
  • Meter Setup: Factory pre-set time and date. Event tags, ketone test alerts, and test reminders are initially off. Bluetooth is initially on for True Metrix Air. Users should check and adjust settings (time, date, reminders, Bluetooth) after battery changes or first use.
  • Setting Time/Date: Press and hold the "•" button to enter setup mode. Use "◀" or "▶" buttons to adjust hours, minutes, month, day, and year, and "•" to confirm.
  • Setting Bluetooth (True Metrix Air only): After setting the year, use "◀" or "▶" to toggle Bluetooth on/off, and "•" to confirm.
  • Event Tags: Allows users to mark test results with specific events (e.g., before meal, after meal, exercise, medication, sickness, other). These tags help healthcare professionals manage blood glucose.
  • Ketone Test Alert: Reminds users to test for blood ketones if blood glucose results exceed 13.3 mmol/L.
  • Test Reminders: Up to four daily test reminders can be set, with the meter beeping for 10 seconds at the set time.
  • Blood Glucose Testing Procedure:
    1. Check test strip expiration and open-vial date.
    2. Allow meter and strips to adjust to room temperature for 10 minutes.
    3. Clean and dry the lancing site.
    4. Remove one test strip from the vial and immediately close the vial. Use the strip quickly.
    5. Insert the test strip into the meter's test port. The meter turns on. Keep the strip in the meter until testing is complete.
    6. Optional: Mark the test as an alternate site (forearm) result using the "▼" button. Use "◀" to remove the mark.
    7. Wait for the drop symbol to appear. Do not apply blood before inserting the strip.
    8. Use a lancing device to obtain a blood sample. Gently massage the lancing site to encourage blood flow.
    9. Touch the sample tip of the test strip to the blood drop. The strip will draw in the blood.
    10. Remove the strip from the blood drop immediately when the meter beeps.
    11. The result is displayed. Record the result.
    12. Optional: Mark the result with an event tag (if enabled) using "▼" or "◀" to select and "•" to confirm. Event tags can only be marked before removing the strip.
    13. Point the meter downwards, press the strip release button to discard the strip into an appropriate container. The meter turns off, and the result is stored.
  • Result Query:
    • Average Values: From the off state, press "•" to view 7-day, 14-day, 30-day, 60-day (True Metrix Air only), and 90-day (True Metrix Air only) average results. If no average, three dashes are displayed.
    • Test Results: After viewing averages, press "•" again to view the most recent test result, displayed with storage symbol, time, and date. Use "▼" or "◀" to browse results.
  • Power Saving Function: The meter automatically turns off after 2 minutes of inactivity (e.g., if no blood sample is applied, if the strip is not removed after a test, or during result query/setup). If an error (E-2) occurs due to delayed blood application, the meter turns off after 10 seconds.

Maintenance Features

  • Storage: Store the meter in its carrying case to protect it from dust, liquids, and dirt. Avoid crushing or severe vibrations.
  • Cleaning: If the meter surface is dirty or has blood on it, clean it immediately. Ensure the meter is off and no test strip is inserted. Wipe with a clean, lint-free cloth or swab dampened with 75% alcohol or a neutral cleaner. Allow to air dry thoroughly. Do not use bleach. Do not clean during a test.
  • Long-Term Storage: If not using the meter for a long time, clean it as described above, allow it to air dry, and remove the battery before storing.
  • Avoid Contamination: Do not allow dirt, dust, blood, or liquids to enter the test port or any crevices of the meter.
  • System Check (Quality Control):
    • Automatic Self-Test: The meter performs an automatic self-test every time a test strip is inserted. This cannot replace control solution testing.
    • Control Solution Test: Use True Metrix Control Solution (available in 3 concentrations; use at least 2 for testing).
      1. Check expiration dates of control solution and test strips.
      2. Allow control solution, strips, and meter to adjust to room temperature for 10 minutes. Mark the open date on the control solution bottle.
      3. Gently swirl (do not shake) the control solution.
      4. Insert a test strip into the meter.
      5. Open the control solution bottle, squeeze out a drop onto a clean tissue and discard, then squeeze another drop onto a small piece of unused aluminum foil.
      6. Touch the test strip's sample tip to the control solution drop.
      7. Remove the strip when the meter begins testing.
      8. Compare the result with the control range printed on the test strip vial label. If within range, the meter is working correctly. If out of range, retest with a new strip. If still out of range, do not use the meter and contact customer service.
      9. Discard the used strip and recap the control solution bottle tightly.
  • Warranty: Sinocare offers a 10-year warranty for product failures under normal use. Only Sinocare or its authorized agents can inspect or provide spare parts. If returning the meter for repair, clean it with 75% alcohol.

Important Safety Notes

  • Use only as prescribed by the manufacturer to avoid damage or inaccurate results.
  • For in vitro diagnostic use with whole blood samples only.
  • Do not use after xylose absorption tests.
  • Test results are for monitoring only, not for diabetes diagnosis. Consult a doctor for treatment decisions.
  • If test results are inconsistent with symptoms, seek medical attention immediately.
  • Not for use on critically ill patients or newborns.
  • Blood contact during testing poses an infection risk. Follow infection control procedures (e.g., wearing gloves) in medical settings.
  • Children or special users must use the meter under adult supervision, and the meter must be kept out of reach of children.
  • Avoid strong electromagnetic interference sources (e.g., shortwave high-frequency equipment) during testing to prevent inaccurate results.
  • Do not recharge the battery. USB cables are for data transmission only, not charging. Improper battery handling can lead to explosion or leakage.
  • Do not use test strips from other companies or other models from Sinocare.
  • Do not apply blood outside the sample area of the test strip.
  • Do not remove the test strip before the result is displayed, as this will lead to an error and the result will not be saved.
  • Venous blood samples should be collected by trained medical personnel.
  • When comparing results with laboratory tests, perform meter tests within 30 minutes of the laboratory test.
  • If the test strip is exposed to air for too long, the meter will display an error. Discard the strip and retest with a new one.

Sinocare TRUE METRIX AIR Specifications

General IconGeneral
BrandSinocare
ModelTRUE METRIX AIR
CategoryBlood Glucose Meter
LanguageEnglish

Related product manuals