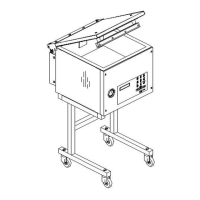
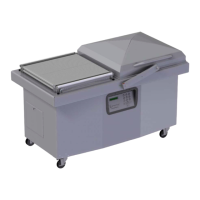
This document provides an owner's manual for the VACUUM PACKAGING MACHINE MODELS 350 & 350D, offering comprehensive instructions for operation, maintenance, and troubleshooting.
Function Description
The vacuum packaging machine operates through a three-stage cycle. Initially, it creates a vacuum by completely removing air from the chamber and the product bag. Following this, neutral gas can be injected through nozzles, a process known as gas flushing, which extends product shelf life and provides a cushion for delicate items. Finally, a mechanism pushes the sealing bar against a rubber support to seal the bag. The machine is designed to produce well-packaged products, provided the items and bags are proportionally sized. The bag's opening should not extend more than 5 cm (2 inches) past the seal bars, and the product should be centered vertically in relation to the seal bar using the provided spacers. For an effective seal, it is crucial to ensure no fat residue is left between the inner sides of the bag where the seal is formed.
Important Technical Specifications
The normal operating temperature for models 350/350D ranges from 4°C to 32°C (39°F to 90°F). The vacuum pump is pre-filled with synthetic oil suitable for this temperature range. Electrical connections must be performed by qualified personnel, ensuring that the machine's voltage and amperage requirements are met. The appliance must be grounded to prevent electric shock in case of malfunction. The grounding conductor is insulated with a green and/or yellow striped outer surface.
For gas flushing (an optional feature), an atmospheric pressure of 1 kg/cm² (14 PSI) is used for products that are fully evacuated. For products requiring partial vacuum or counterbalancing, the pressure must be maintained by inflating the bag with neutral gas. The gas flushing process involves placing bags on the sealing bars, with open ends positioned over the gas nozzles. After evacuation, the vacuum valve closes, and the gas valve opens. The gas quantity is programmable. The gas pressure regulator, if installed, should be set at approximately 1/3 kg/cm² (5 PSI).
An optional electrical bag cut feature allows for trimming excess bagtail close to the seal. The pressure regulator option is used to obtain more sealing pressure between the sealing bar jaws, recommended for low vacuum level packaging or high-level gas flushing. For hard-to-seal laminated bags, a compressed air connection is required for the pressure regulator option, with a maximum setting of 1.3 kg/cm² (20 PSI).
Usage Features
The machine is equipped with a control panel featuring a numeric keyboard for program selection and parameter adjustment.
- Power Key: Used to power on the machine. The last executed program is displayed on the LCD screen. To disconnect power, use the power key, then remove the plug from the outlet.
- ESC Key: Allows navigation between the programs menu and the functions menu.
- Select Key: Used to select a function or program and the Enter key to execute or modify the selection.
- Program Submenu: Parameters blink to indicate acquisition mode. Returning to the programs menu automatically follows the last parameter acquisition.
- Creating a Program: Access the "create a program" function, and the program submenu is accessed with an identification. The initial identification "Pxx NO NAME" is given, and all parameters are set to zero. The program number is automatically allocated.
- Deleting a Program: Access the "delete a program" function, and the programs menu is accessed. The number of the first program in memory blinks to indicate the deletion mode. Use the select key to choose a program and the Enter key to confirm deletion. The ESC key can be used to unconfirm a deletion and leave the function.
- Program Identification: For a selected program, set the identification using the numeric keyboard. The Enter key validates the character and the character string. The ESC key allows going back or erasing characters.
- Vacuum Level Setting: For a selected program, set the vacuum level. The decimal point is automatically inserted, and validation occurs after the second digit entry. The Enter key validates the vacuum level, and the ESC key allows going back and starting over. A vacuum set point over 99.5% is not recommended. Hot or humid products may require a lower set point.
- Vacuum Plus Setting: For a selected program, set the vacuum plus time in seconds. Validation is automatic after the second digit entry.
- Gas Flush Level Setting: Follows the same procedure as vacuum level setting. The maximum recommended gas flushing level is 80%. A compressed air regulator option is recommended for this feature.
- Sealing Time Setting: For a selected program, set the sealing time. Validation is automatic after the third digit entry.
- Packaging Cycle: To initiate a vacuum cycle, close the cover. The operation status is sequentially displayed on the LCD screen, except for parameters set to zero. During the cycle, pressing "1" aborts the vacuum sequence and executes the next sequence (gas flush or sealing). The Enter key allows access and modification of the program, with changes valid for subsequent cycles.
- System Monitor and Diagnostic Menu: Access by powering up the machine while holding the ESC key. The select key navigates through functions, and the Enter key accesses and visualizes monitored parameters. A password is required for some menus. The select key changes software revision, working hours, and the number of complete cycles.
Maintenance Features
Regular maintenance is crucial for the longevity and optimal performance of the machine.
- Daily Cleaning: For hygienic cleanliness, the chamber and spacers should be cleaned daily. The lid rubber should be cleaned by hand with a damp cloth. Water should not be applied directly to the machine.
- Gas Injection Nozzles (Option): Periodically, on a regular basis, the gas injection nozzles must be removed from the connection tube and soaked in a food-grade soap and water solution, then dried and re-installed.
- Troubleshooting: The manual provides guidance for common issues such as "COVER DOWN ERROR" (indicating a lost down position switch), insufficient vacuum (due to bag leakage, faulty machine, or damaged product), faulty seal (damaged Teflon, silicone rubber, or sealing wire), faulty valve (no voltage on magnetic valves or air entry issues), and control board failure (accessing the "Diagnostics Menu" with a security password).
- Routine Controls:
- Check Teflon for wear.
- Check silicone rubber for burnt spots and smooth, even position.
- Check pressure bar for jamming.
- Check lid sealing for damage and hardened spots.
- Check switch-point of micro switch, adjust if necessary.
- Check evacuation hose for damage (contraction of diameter or abrasions).
- Check vacuum connections for tightness.
- Check oil in pump (level in view glass; add if necessary. Regular change of oil is indicated by color change). Follow the Busch maintenance schedule.
- Check vacuum in chamber with a precision vacuum meter.
- Check desiccant filter for proper color; change if necessary.
- Check function of cycle with various settings of timers. The board software allows access to a "Diagnostics Menu," but only qualified service technicians are authorized to access this menu by entering a security password.