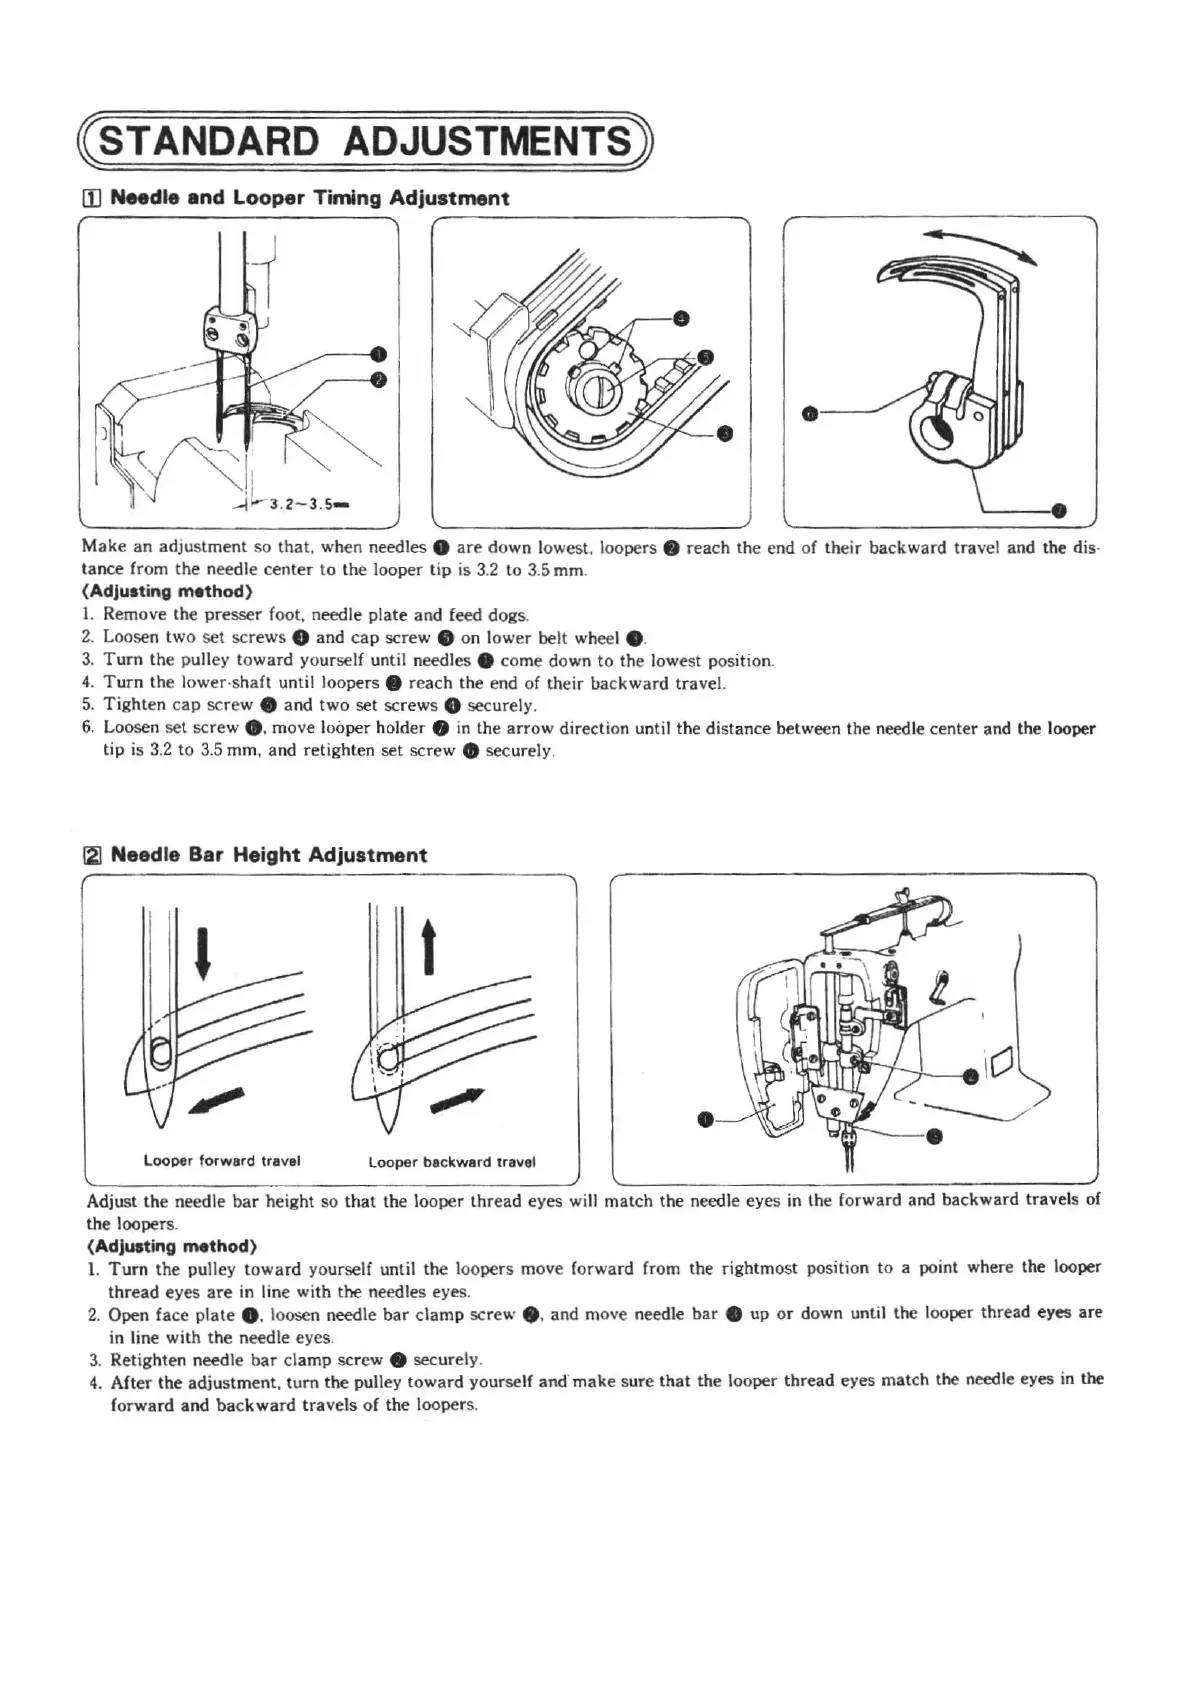
~7~
~STANDARD
ADJUSTMENTS)
·---'
Make
an
adjustment so
that.
when needles e
are
down lowe
st
, loopers . reach
th
e end of their backward
trav
el and the dis·
tance
fr
om
the
n
ee
dle
ce
nter
to
the
looper
tip
is 3.2 to 3.5 mm.
(Adjusting
m•thod)
I.
Remove the
pr
esser foot, needle pl
ate
and
feed d
ogs
.
2. Loosen
two
set
sc
rews 8
and
cap
screw e on lower belt wheel e.
3.
Turn
the
pulley toward yourself until needles e come down
to
the lowest pos
it
ion.
4.
Turn
the lower-sh
aft
until loopers 8 reach the end of
th
eir
bac
kward
travel.
5.
Tight
en
ca
p
sc
rew
e and
two
set
screws 8 securely.
6. Loosen
set
screw
•.
move looper holder 8
in
the
arr
ow direction until the distance between the needle cen
ter
and the looper
tip
is 3.2
to
3.5 mm, and
ret
ighten set
sc
rew • securely.
f2]
Needle Bar Height Adjustment
•
Looper
forward
travel
Looper
backward
travel
Adju
st
the
needle bar height so
that
the looper thread eyes will
match
the needle
eyes
in the f
or
ward and backward travels of
the
loopers.
(Adjusting
m•thod)
1.
Turn
the pulley
toward
yo
ur
self until the loopers move forward from the rightmost position to a point where the looper
thread
eyes
are
in line with the needles eyes.
2.
Open face
plate
e. loosen needle
bar
clamp
screw e. and move need
le
bar
e up
or
down until the looper thread eyes
are
in line with
the
n
ee
dle eyes.
3. Retighten needle
bar
cl
amp
screw e securely.
4.
After
the adjus
tment
,
tum
the
pulley t
owa
rd yourself and·
mak
e sure
that
the looper thread eyes
mat
ch the needle eyes in the
forward and
backward
travels
of
the loopers.
From the library of: Superior Sewing Machine & Supply LLC