17
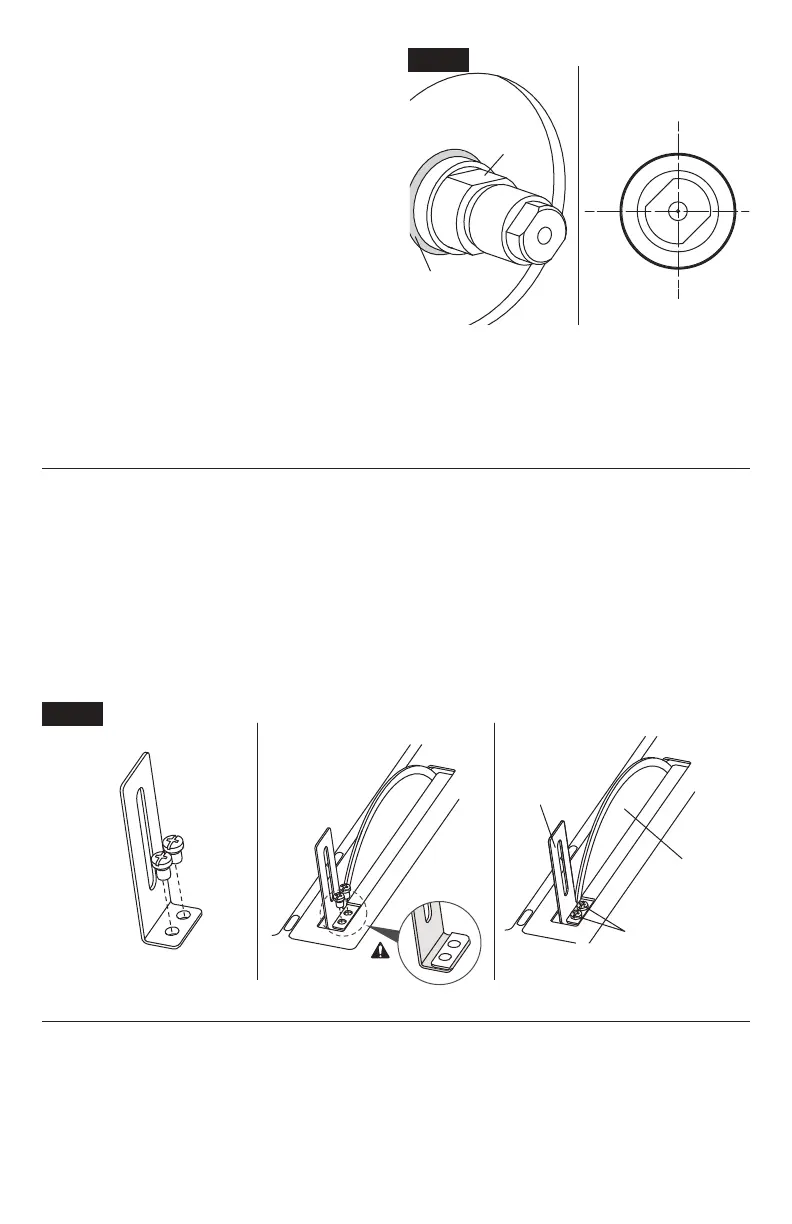
7. Install the new blade, making sure that the
arbor of the blade is mounted onto the rib of
the ange (Fig. 3A).
8. Install the outer ange on to the shaft.
9. Ensure that the openings in the anges
and the arbor of the blade are aligned
and the anges and blade are positioned
concentrically relative to each other.
10.
Holding the tile saw blade rmly by hand,
install and tighten the nut with the wrench
in a clockwise direction (Fig. 2) DO NOT
OVERTIGHTEN.
11.
Ensure that the tile blade is secure.
12.
Reattach the lower guard by using a number
2 screwdriver (not provided) to loosen the
two securing screws (Fig. 1).
Notice:
To reduce the risk of vibration and to make sure the blade is properly aligned, the
metal anges on either side of the blade and the blade must be concentric on the shaft.
Top Guard Installation
Place bottom edge of top guard arm underneath table top at rear of blade. Insert and tighten
the two securing screws (Fig. 4).
Top Guard arm adjustment
1. Remove the top guard by loosening the knob that secures it in place.
2. Loosen the two securing screws (Fig. 4) and ensure that the arm is in alignment with the tile
blade.
3. Tighten the two securing screws.
a b c
Fig. 4
Top Guard
Arm
Tile Blade
Securing Screws
Fig. 3A
Shaft
The Rib of
Flange