7
1,Connect goggles to the computer.
2,Hold the left wheel then turn on the goggles, the usb cable will power the goggles, release the left
wheel, computer will automatically install the driver , computer will show a new removable storage .
3, copy the Firmware(A/B) File to stortage. goggles will installing the update at the same time.
DVR
1,Take a SD card and format the card to FAT32.
2,Copy the DVR Firmware to the SD card , insert it in the goggles and turn it on.
3,Go to the system menu and choose DVR FM upgrade.
Receiver Firmware
1, Take the receiver out, hold the boot button when connect the receiver to the computer.
2,Computer will automatically install the driver , computer will show a new removable storage .
3, Copy the Firmware File to the folder(Not the SD card). goggles will installing the update at the same
time. when the copying is done, the firmware upgrade is done.
This content is subject to change, download latest version from:
Firmware Update
www.skyzonefpv.com
BOOT
Goggles
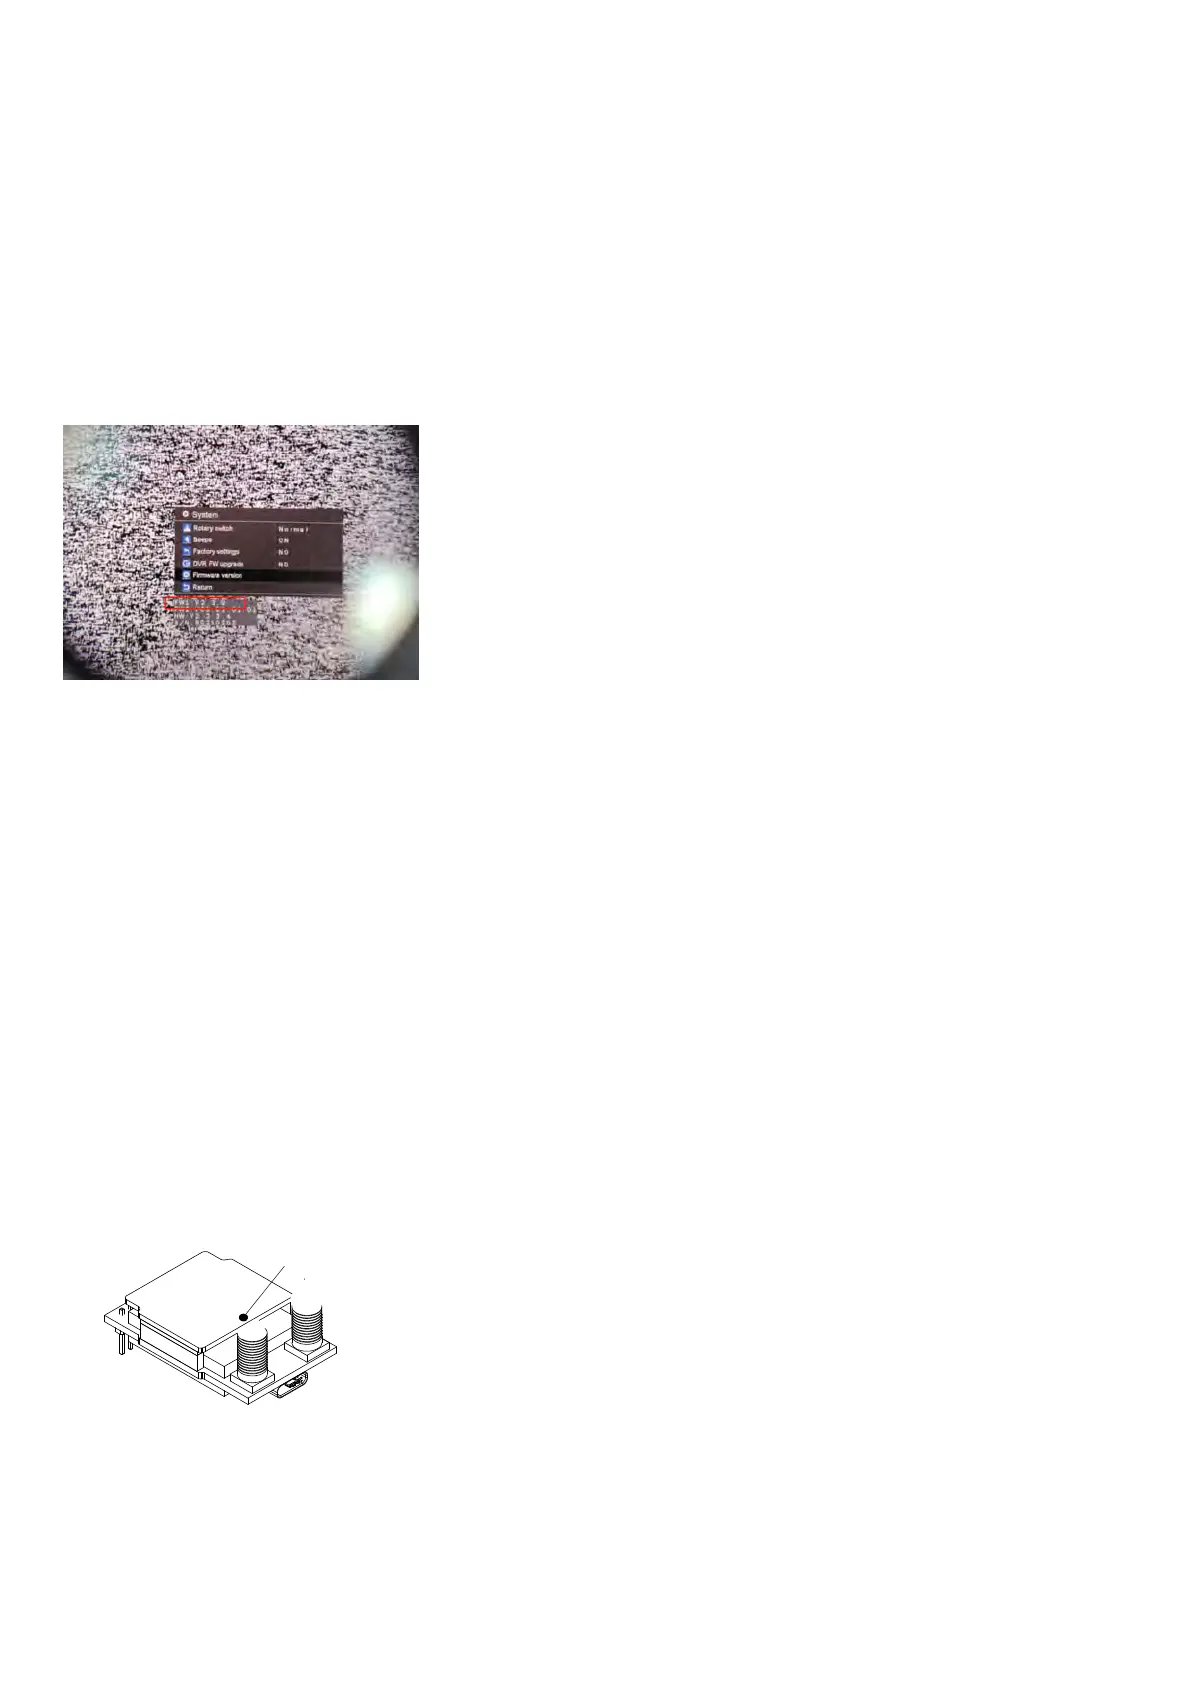
the goggles have 3 different hardware due to global chip shortage, before flashing the firmware, user
must check their hardware version of the goggles in the system menu.
V1 orignail
V2 60FPS DVR, if user bought the 60FPS DVR kit, the V1 goggles will upgrade to V2, and firmware also
need flash to V2.
V3 new MCU due to chip shortage. due to the performance is same, we didnt name the goggles V3, only
hardware is named V3.
if FW1: Start with V1.3.9, means V1 hardware
If FW1: Start with V2.3.9, means V2 hardware,
If FW1: Start with V3.3.9, means V3 hardware