© 2008 SMART Technologies ULC. All rights reserved. SMART Board, Notebook and the SMART logo are trademarks of SMART Technologies ULC. All other third-party product and
company names may be trademarks of their respective owners. Printed in Canada 03/2008.
Using Notebook Print Capture
Notebook print capture allows you to add multi-page files from other
applications like Microsoft Word and PowerPoint
®
, or even a long
Web page, to a Notebook file. In other words, print capture is similar
to printing to paper; one printed page is equal to one Notebook page.
1 Open a file you want to capture into Notebook software
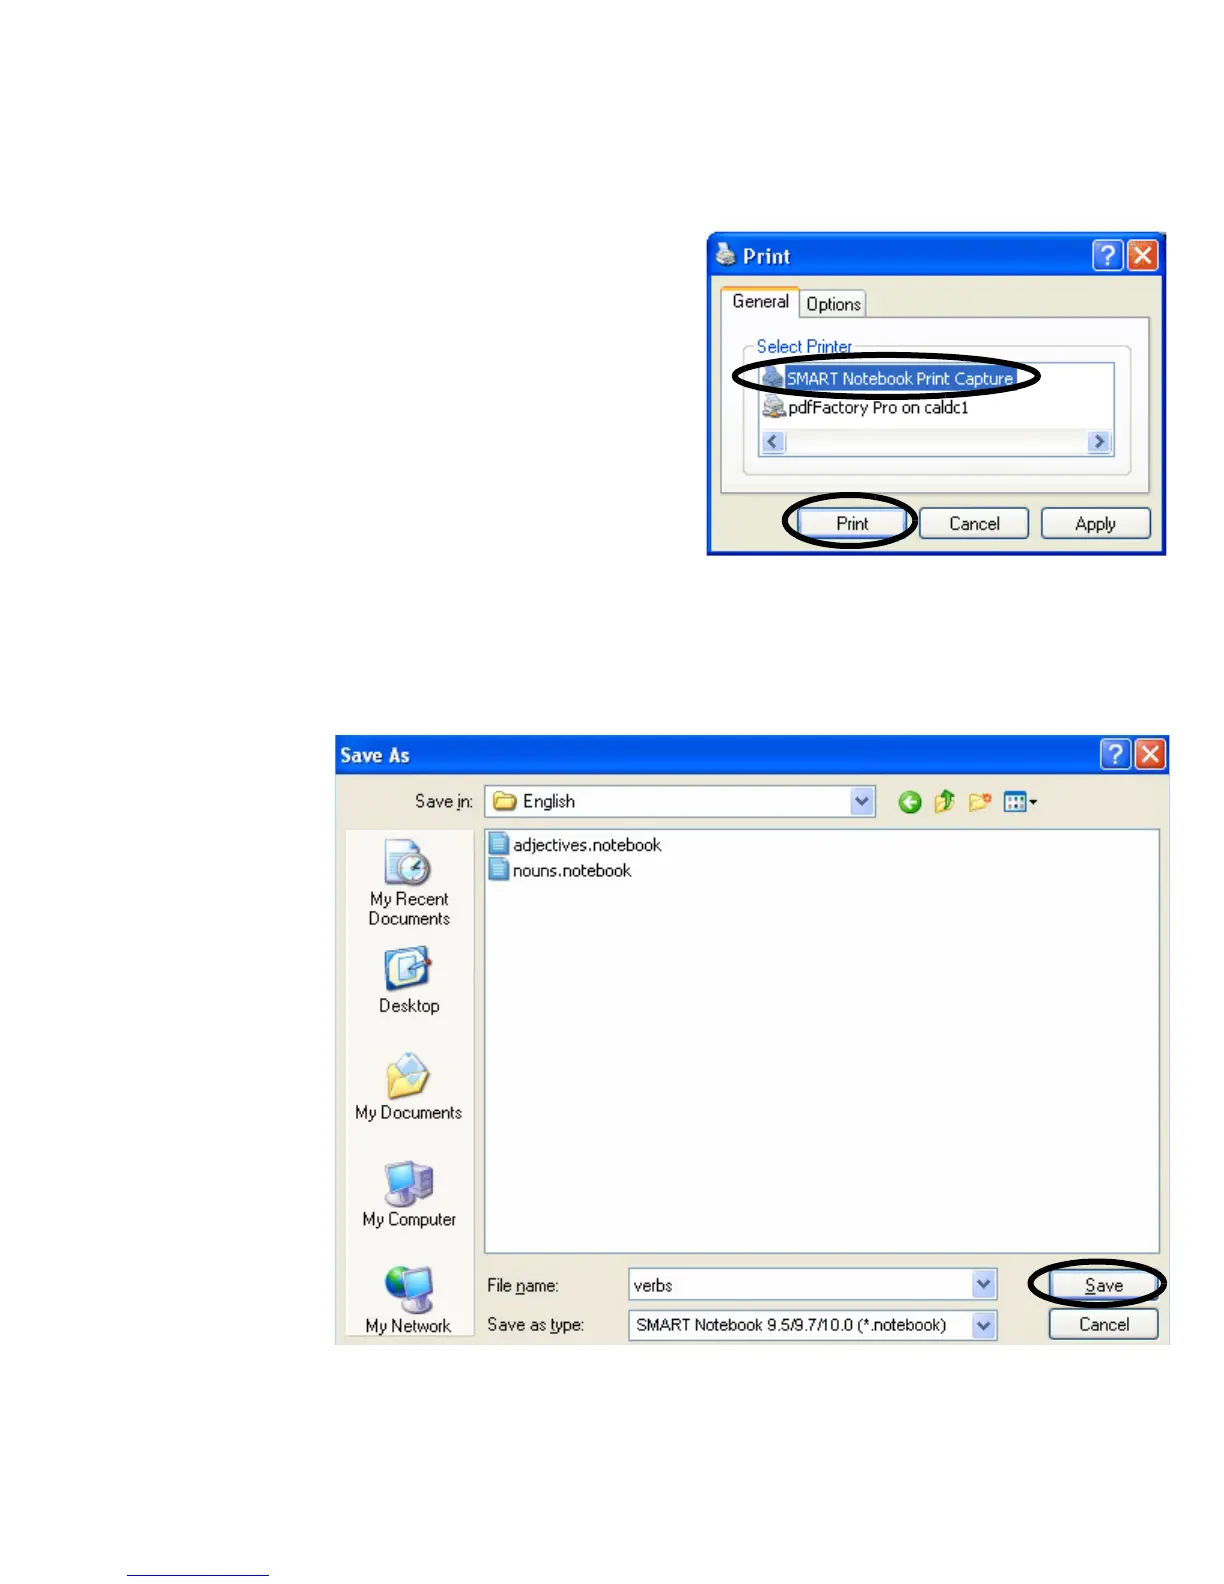
2 Select File > Print from the application’s main menu. The Print
dialog box will appear. Select SMART Notebook Print
Capture from your list of available printers
3 Press Print to capture the page as an image to a Notebook
file. Notebook software will launch automatically if it’s not open
TIP: Occasionally, the image may appear blurry in your
Notebook file. Select View > Zoom > 100% from the Notebook menu to clearly view the captured image in the
Notebook work area.
Saving in SMART Notebook File Format
Save your current Notebook file for future reference or to share the file with others using Notebook software.
1 Select File > Save
from the Notebook
menu or select File >
Save As to save
revisions as a new
Notebook file. Your
original Notebook file
will not be changed
2 The Save As dialog
box will appear
3 Browse to the location
where you want to
save your Notebook
file
4 Type a name of your
file in the File name
text field, then click
Save


 To Next Page