Hands-On Practice
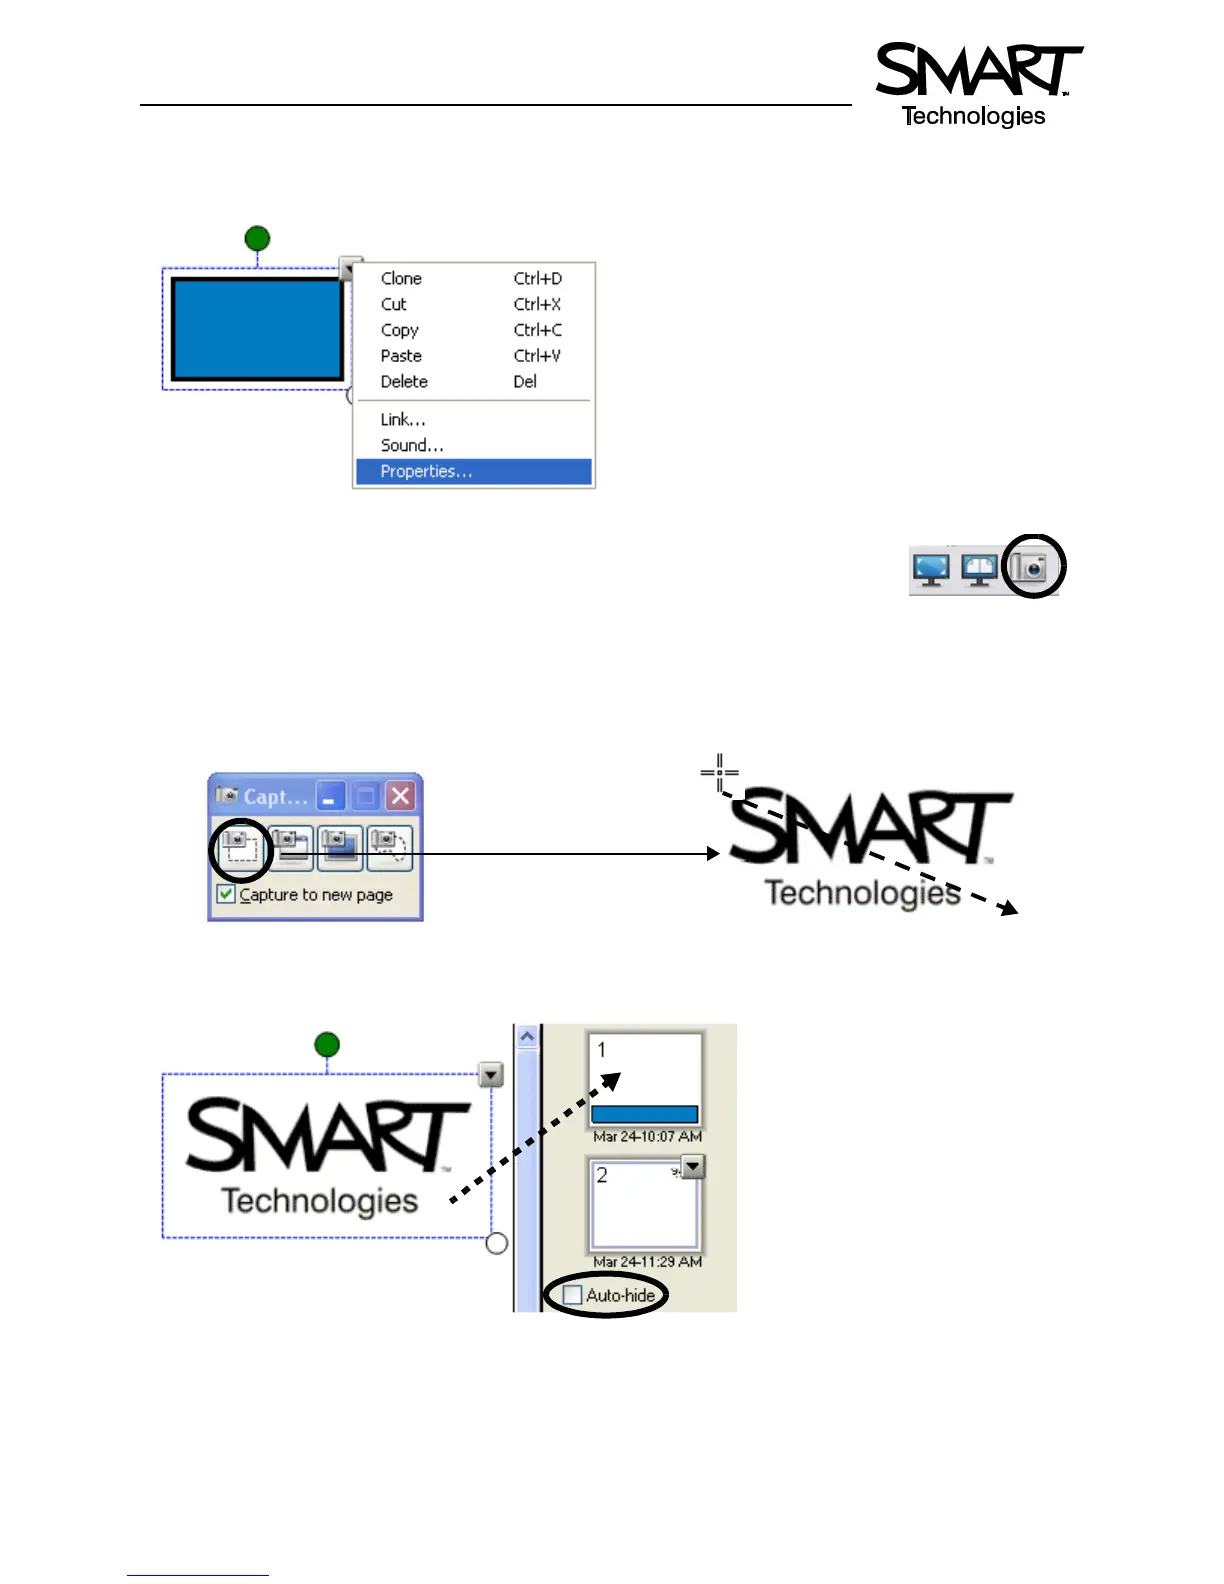
3 Select the Pointer tool from the Notebook software toolbar. Click on your rectangle and select the
object’s drop-down menu in the upper-right-hand corner of the shape. Choose Properties and change
the Fill Color to blue, then click OK.
4 Click the Capture button on the Notebook software toolbar to launch the
Capture toolbar. Open your corporate Internet or Intranet site. The Capture
toolbar will float over your Internet browser.
NOTE: For this exercise, SMART’s corporate logo will be used.
5 Select the Area Capture button. Click and drag your cursor to outline your company’s logo. Release
pressure once the area has been selected. Your selection will be captured as a graphic and placed
directly into your Notebook file. It will appear on a new Notebook page.
6 Return to your Notebook file and drag your logo to the Notebook page on which you drew the
rectangle
NOTE: If the Page Sorter tab closes before you can drag the logo to the first Notebook page, deselect
the Auto-hide check box to keep it visible.


 To Next Page