Hands-On Practice
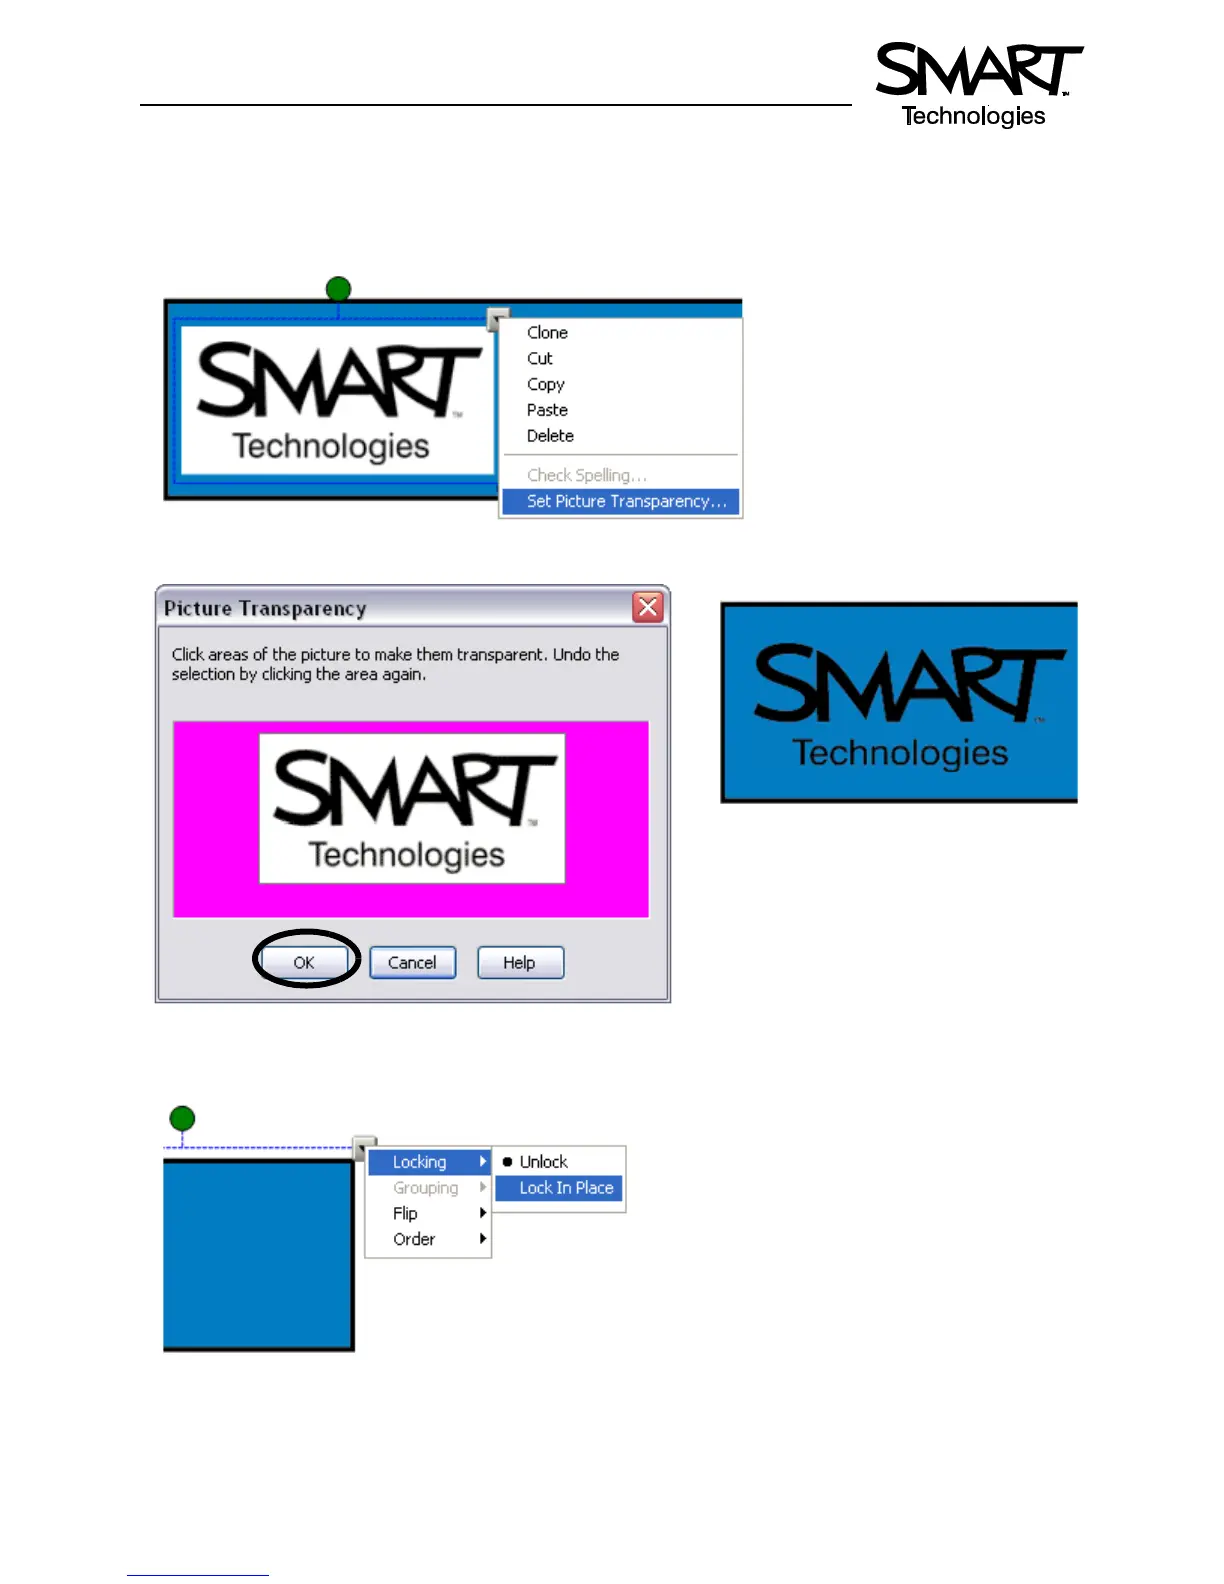
7 Select the Notebook page containing the blue rectangle and logo. Drag the logo to the bottom left
corner of the page so that it is positioned over the rectangle.
8 Click on the logo and select the drop-down menu. Choose Set Picture Transparency. The Picture
Transparency dialog box will appear.
9 Select the white background of the logo to make it transparent against the blue rectangle. Click OK.
10 Click on the blue rectangle and select the object’s drop-down menu. Choose Locking > Lock in
Place.
11 Click on the logo and select Locking > Lock in Place. This will keep the graphics consistent and in
the same position at the bottom of the Notebook page.
Logo with transparent background


 To Next Page