Preparation
Before installing SwitchLinc, please familiarize yourself with the following and take the nec-
essary precautions listed here:
• Be sure that the fuse has been removed or the circuit breaker is turned off to the cir-
cuit being controlled. Installing SwitchLinc with the power on will expose you to danger-
ous voltages.
• SwitchLinc Wiring Diagram on page 5 will help you to determine the wire colors of the
connections to the SwitchLinc and Multi-Way Companion Switch. Note: While the neu-
tral connection is optional on the Multi-Way Companion Switch, the SwitchLinc
2-Way requires a neutral connection.
• Wiring for 3-way, 4-way, & up switch circuits follow conventional (standard, non-remote)
wiring practice (plus the requirement for a neutral). Wiring the SwitchLinc Multi-Way
Companion Switch requires the Line (Black) wire be accessible and be the same 110V
leg of the house wiring. The White wire on the Multi-Way Companion Switch is connect-
ed to NEUTRAL ONLY. If neutral is not available, cap the White wire, which will simply
causes the nightlight LED not to function.
• The SwitchLinc may feel warm during operation. The amount of heat generated is with-
in approved limits and poses no hazards. To minimize heat build-up, ensure that the
area surrounding the rear of the SwitchLinc has adequate ventilation (i.e., clear away
excess insulation).
• Installation should be performed only by a qualified electrician, or by a homeowner
who is familiar and comfortable with electrical circuitry. If there are any questions, con-
sult an electrician or contact Smarthome's Tech Support department for guidance.
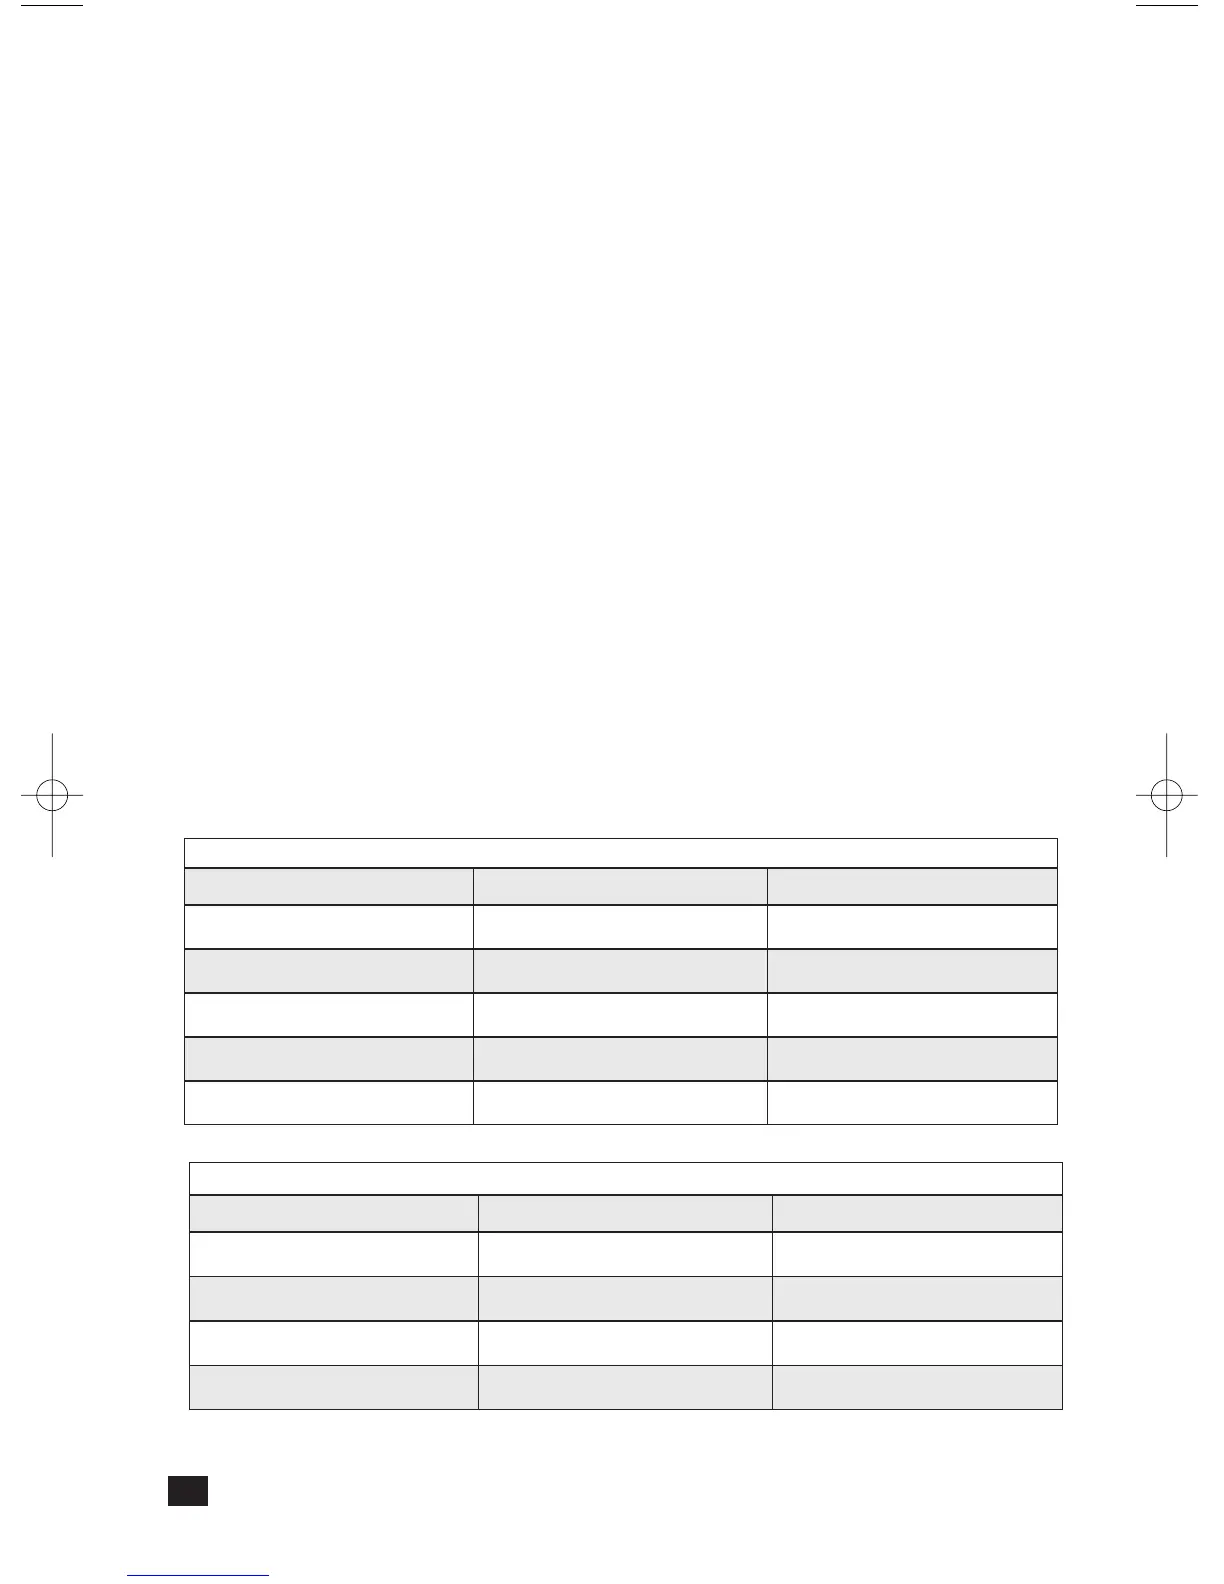
Using SwitchLinc
* Double or triple tapping a SwitchLinc will cause the light to ramp at a two-second
rate. Only programmed fade-on rates greater than two seconds are effected.
4
Input at Switch Output at Bulb PLC Transmission
Double-tap
top of rocker *
Light ramps fast to
full brightness
Housecode & Unit Code (once)
Housecode & ON (twice)
Triple-tap
top of rocker *
Light ramps fast to
full brightness
Housecode & Unit Code (once)
Housecode & ON (three times)
Double-tap
bottom of rocker *
Light dims fast
to OFF
Housecode & Unit Code (once)
Housecode & OFF (twice)
Triple-tap
bottom of rocker *
Light dims fast
to OFF
Housecode & Unit Code (once)
Housecode & OFF (three times)
Advanced Operations
Input at Switch Output at Bulb PLC Transmission
Tap top of rocker
(when light is off)
Light ramps up to
preset ON-level
Housecode & Unit Code
Housecode & ON
Tap top of rocker
(when light is on)
Light ramps up to
full brightness
Housecode & Unit Code
Housecode & ON
Press & hold
top of rocker
Light brightens until
rocker is released
Housecode & Unit Code
Preset Dim Level
Tap bottom
of rocker
Light ramps down
to OFF
Housecode & Unit Code
Housecode & OFF
Press & Hold
bottom of rocker
Light dims until
rocker is released
Housecode & Unit Code
Preset Dim Level
Basic Operations
 Loading...