31
3. Montaje de la barra frontal:
Inserte el conector de la barra frontal (18) dentro de la parte izquierda
(17.1) y derecha (17.2) de la barra frontal, atorníllelo con sus tornillos
correspondientes (9) ST4×15
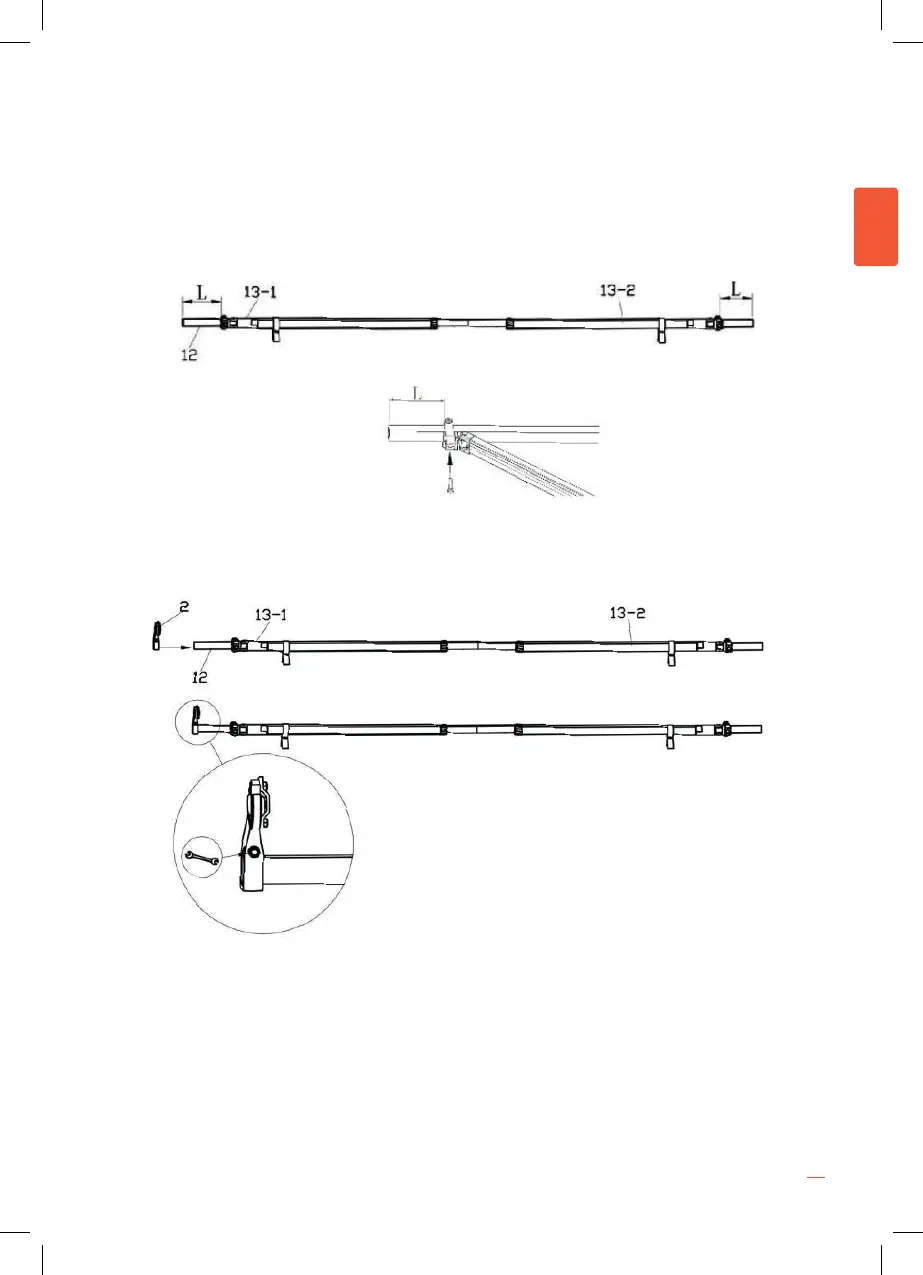
4. Montaje de la barra de torsión y brazos:
Instale los brazos (13.1 y 13.2) sobre la barra de torsión (12) y fije el tornillo
ajustable en el soporte a la distancia recomendada (L), como se muestra
en la figura.
!! NO DESATAR EL PLASTICO NI LA TELA PROTECTORA DE LOS
BRAZOS HASTA QUE EL TOLDO ESTE COMPLETAMENTE
INSTALADO.
!! LOS TORNILLOS TIENEN QUE ESTAR BIEN APRETADOS AL
FINAL DEL MONTAJE
Distancia recomendada (L):
30cm para toldos 3x2m · 50cm para toldos 4x2,5m
ES
5. Montaje del soporte izquierdo del roller:
ntroduzca con fuerza el soporte izquierdo del roller ayudándose de un
martillo (2) dentro de la barra de
torsión (13-1) y asegure el tornillo.
6. Montaje de la lona y el faldón:
Extienda la lona (15) y el faldón (15) y ayudándose de la guía (20)
introduzca la lona entre los surcos del roller y la barra frontal.
ATENCIÓN: la lona tiene 2 caras, fijese en el dobladillo para identificar la
cara que va hacia abajo. Repita la misma operación para instalar el faldón
sobre la barra frontal.
ES
NOTE. DO NOT UNTIE THE ARMS UNTIL THE AWNING INSTALLED COMPLETELY.
THE BOLT MUST BE TIGHTENED.
4. Torsion bar and arm shoulder assembly: Assemble the arms onto the connected torsion bar,
and x the bolt into the arm shoulder, the location dimension (L) of the arm shoulder as shown
in the picture.
5. Left roller support with gear box assembly: Hammer the left roller support with gear box (2)
into the torsion bar (13-1), and locking the x bolt.
Reference specications: (L):
For 3 x 2 M awning is 30cm ·
For 4 x 2.5 M awning is 50cm
ENGLISH