32
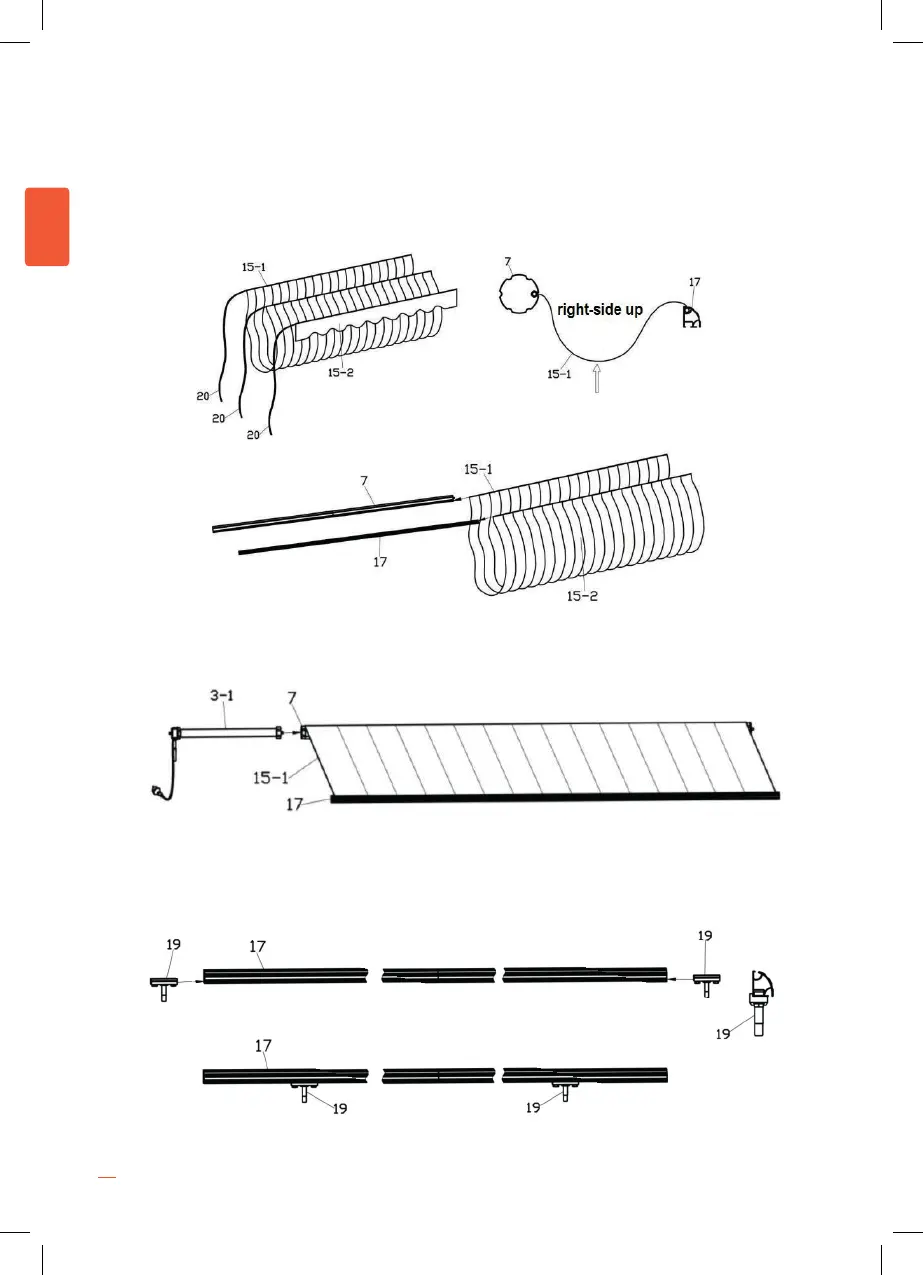
6. Fabric and valance assembly: Spread out both fabric (15) and valance (15) and with the fabric
liner (20) inserted from one end through the fabric into gauges on roller and front bar.
7. Mount the front bar foot on the front g bar without tightening, as shown:
Attention: The fabric has two sides: top and bottom. The bottom side with hem must face
downwards.
IN NORMAL CONDITIONS THE ENGINE COMES WITHIN THE ROLLER, BUT IN CASE NO, IN THIS STEP
INSERT THE ENGINE INSIDE THE ROLLER PIPE AS SHOWN BELOW.
!! IN NORMAL CONDITIONS THE ENGINE COMES WITHIN THE
ROLLER, BUT IN CASE NO, IN THIS STEP INSERT THE ENGINE
INSIDE THE ROLLER PIPE AS SHOWN BELOW.
EN
!! EN CONDICIONES NORMALES EL MOTOR VIENE DENTRO
DEL ROLLER, PERO EN CASO QUE NO, EN ESTE PASO INSERTE
EL MOTOR DENTRO DEL TUBO DEL ROLLER COMO SE
MUESTRA DEBAJO.
ES
CARA DE LA LONA CON DOBLADILLO
HACIA ABAJO
8. Montaje del soporte para brazos de la barra frontal:
Deslice el soporte dentro de la barra frontal sin forzarla, como se ve en la
foto
9. Cogemos el roller con el motor dentro y lo unimos al soporte del roller
(por favor, revise que la argolla para manivela de apertura manual quede
hacia abajo y el cable de la corriente hacia arriba) A continuación inserte
el extremo del soporte para rótula en el brazo, y ajústelo con la tuerca
autoblocante M12 (19). Haga lo mismo en los dos brazos.
ATENCIÓN: Antes de blocar la rosca asegúrese de que los brazos están
alineados.
ES
ENGLISH