34
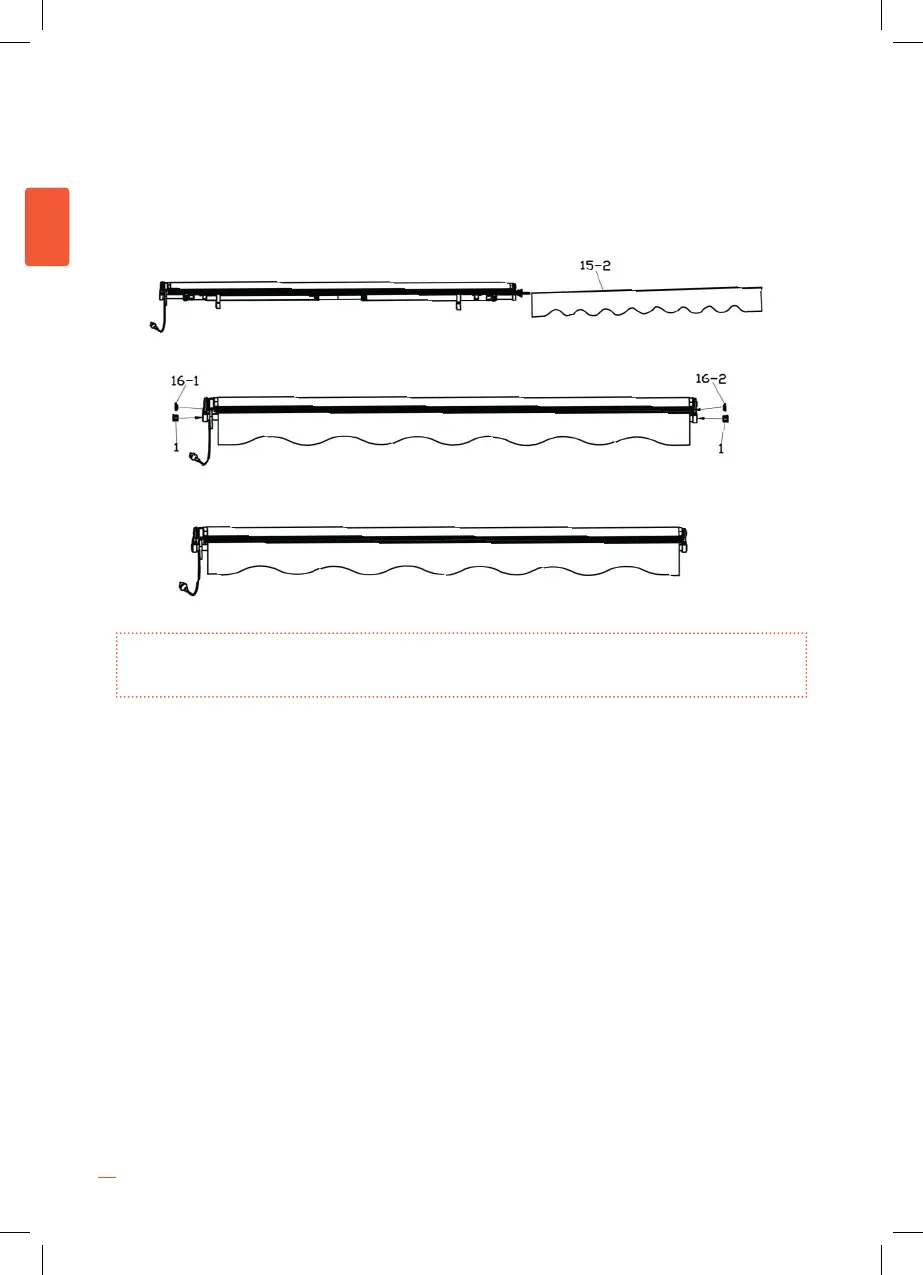
11. Introduce the ap on the front bar, both sides need be alignment with the fabric. Place the
covers of the front bar in order to nish the assembling of the awning.
ATTENTION: in this last step there’s needed to place also the covers of the torsion bar too, but in
case of installing Smartsun Semicassette, there’s no need to place the covers in torsion bar as they
are included in semicassette.
Until this point the awning has been assembled, check all connection locations are
tightened, check if missing parts.
12. Coloque el faldón en la barra frontal, ambos lados tienen que estar
alineados con la lona. Coloque los remates para la barra frontal para
finalizar con el montaje.
ATENCION: En este ultimo paso hay que poner los topes en la barra de
torsión tambien, pero en caso de instalar el semicofre Smartsun en el toldo,
no poner los topes, puesto que el semicofre los lleva integrados.
Hasta este punto el toldo debería quedar montado, chequea que las zonas
de conexión están bien tensas y unidas, revisa también que no faltan ni
sobran piezas del toldo
ES
ENGLISH