7008ABR – Manual
37
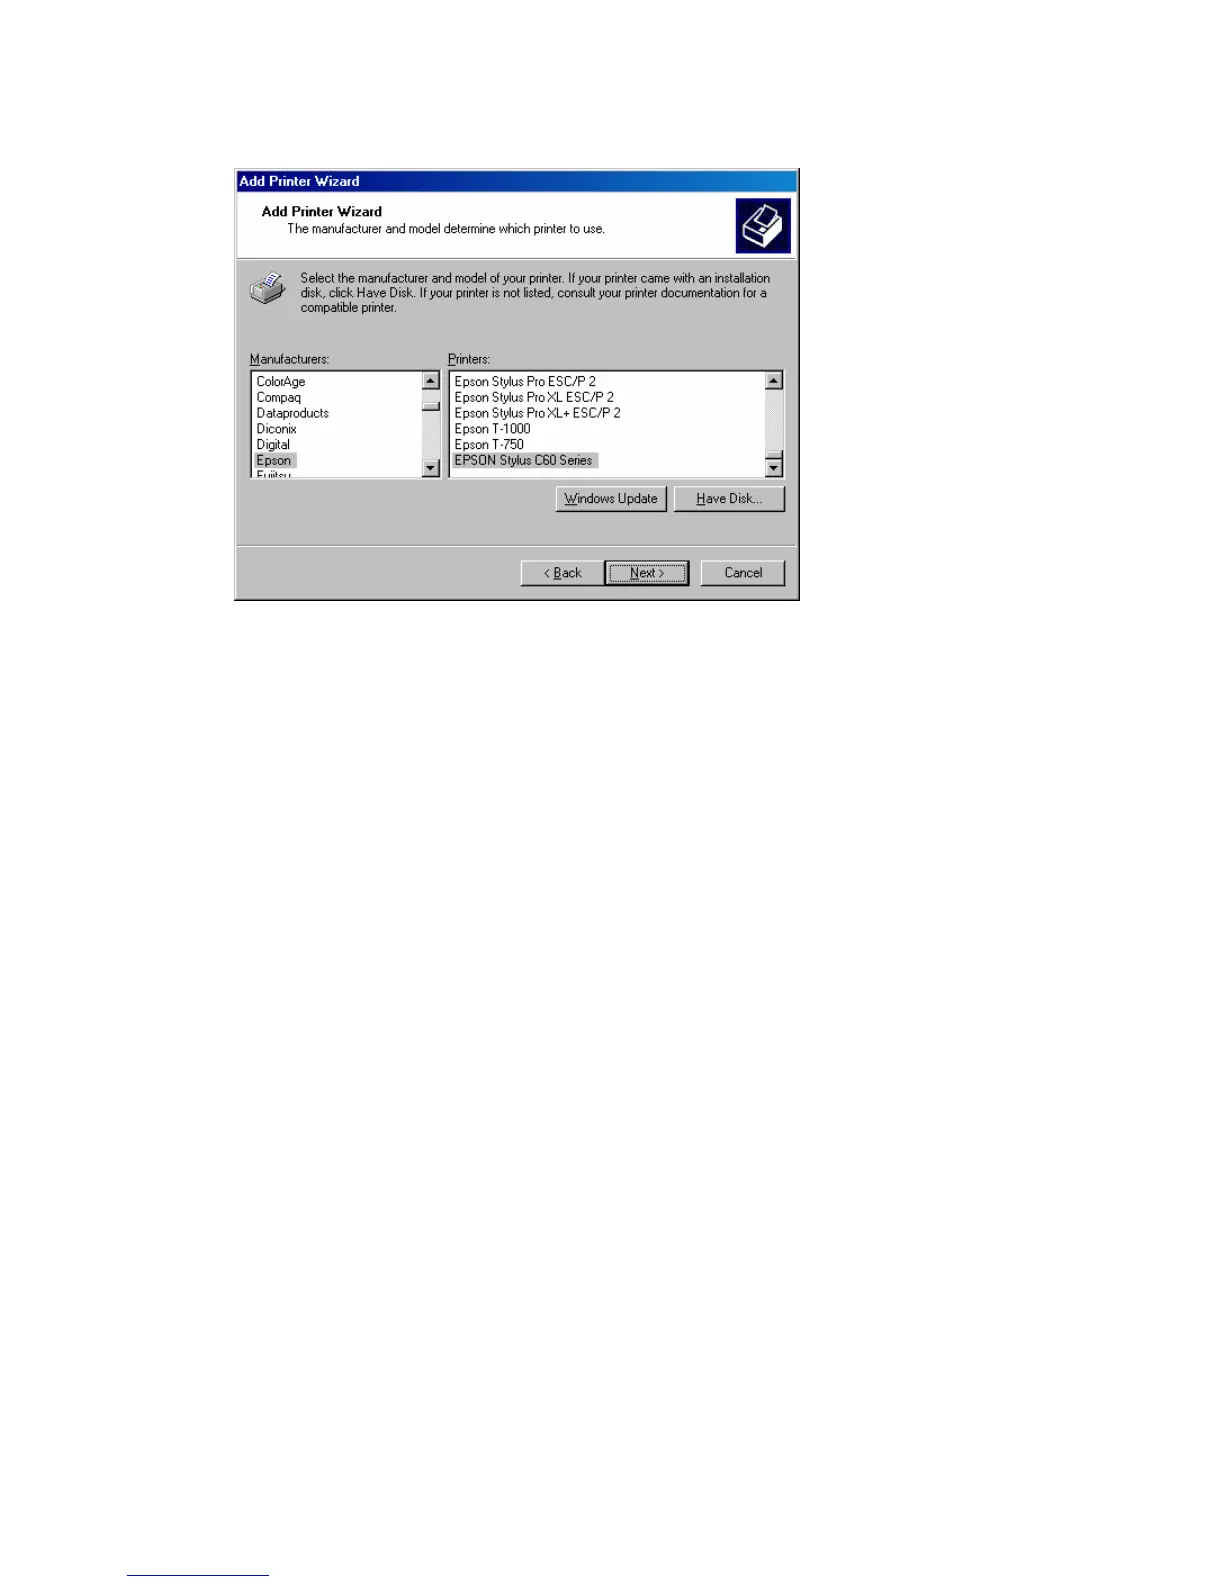
printer documentation to get your printer installed.
20. Once you have your printer listed and selected in this dialog box click the [Next] button.
21. Name your printer. In this dialog box you will give your installed printer a name; this will be
the name this printer is referred to in your Printer folder.
22. Once you have named your printer, click [Next] to continue.
23. Choose the [Do not share this printer] option and click the [Next] button.
24. Choose [No] to the Print Test Page option, and click the [Next] button.
25. On the next screen, you should now see a dialog box with a summary of all your printer
information that you just configured. To complete the installation, click the [Finish] button.
Once you have completed the printer installation, you will need to configure some properties on your
printer. To do so, please follow the steps listed below:
1. If you closed out the [Printers] window, please re-open it from the control panel.
2. Locate the printer that you just installed and right-mouse click on it and choose Properties.
3. Click on the [Advanced] tab and verify the following settings:
1. Both the [Spool print documents so program finishes printing faster] and the [Start
printing after last page is spooled] options are selected.
2. Both the [Print spooled documents first] and [Enable advanced printing features] options
are checked
3. All of the other options should be disabled or unchecked.
 Loading...