EasyManua.ls Logo

Smeg CX61VMLS8 - User Manual

Smeg CX61VMLS8
48 pages
Print Icon
To Next Page IconTo Next Page
Loading...
Contents
3
EN
1 Instructions 4
1.1 General safety instructions 4
1.2 Manufacturer’s liability 8
1.3 Appliance purpose 9
1.4 Identification plate 9
1.5 This user manual 9
1.6 Disposal 9
1.7 How to read the user manual 10
2 Description 11
2.1 General Description 11
2.2 Hob 12
2.3 Control panel 12
2.4 Other parts 13
2.5 Available accessories 14
3 Use 15
3.1 Instructions 15
3.2 Precautions 16
3.3 Using the accessories 17
3.4 Using the hob 18
3.5 Using the oven 19
3.6 Programmer clock 21
3.7 Cooking advice 24
4 Cleaning and maintenance 27
4.1 Instructions 27
4.2 Cleaning the surfaces 27
4.3 Cleaning the hob 28
4.4 Cleaning the door 28
4.5 Cleaning the oven cavity 30
4.6 Extraordinary maintenance 33
5 Installation 35
5.1 Gas connection 35
5.2 Adaptation to different types of gas 38
5.3 Positioning 43
5.4 Instructions for the installer 48
5.5 Electrical connection 49
We advise you to read this manual carefully, which contains all the instructions for
maintaining the appliance’s aesthetic and functional qualities.
For further information on the product: www.smeg.com
TRANSLATION OF THE ORIGINAL INSTRUCTIONS
Question and Answer IconNeed help?

Do you have a question about the Smeg CX61VMLS8 and is the answer not in the manual?

Overview

This document is a comprehensive user manual for a Smeg cooking appliance, likely a range cooker or a built-in oven with a hob. It covers instructions for safe use, detailed descriptions of its components and functions, guidance on operation, cleaning, maintenance, and installation.

General Description

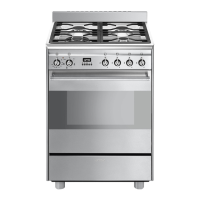
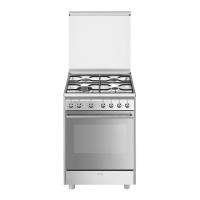
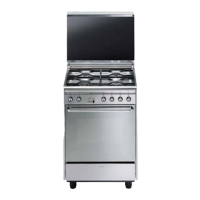
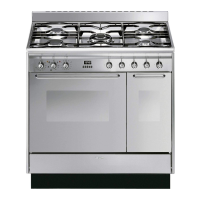
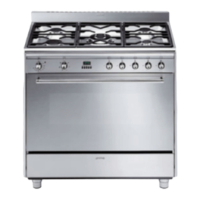
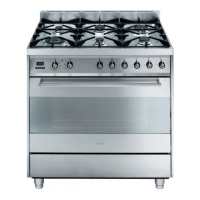
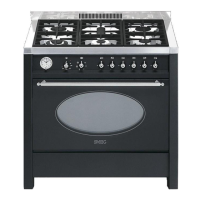
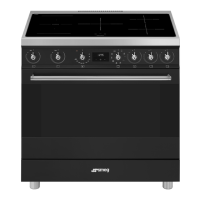
The appliance features a hob with multiple burners, a control panel, and an oven cavity with various functions. Key components include:

  • Upstand: A rear panel on the hob.
  • Hob: The cooking surface with burners.
  • Control panel: Houses knobs for temperature, function selection, and hob burner control, as well as a programmer clock display.
  • Left light: An internal light within the oven.
  • Seal: Ensures the oven door is properly sealed.
  • Door: The oven door.
  • Fan: For cooling and specific cooking functions.
  • Rack/tray support frames: Multiple levels for positioning trays and racks within the oven.

Hob Description

The hob features different types of burners:

  • AUX (Auxiliary burner): Typically the smallest burner, suitable for simmering or small pans.
  • SR (Semi-rapid Burner): A medium-sized burner for general cooking.
  • UR-3c (Ultra-rapid burner): The largest burner, designed for fast heating and large pans.

Control Panel

The control panel includes:

  • Temperature knob: Allows selection of cooking temperature, ranging from minimum to maximum settings. An indicator light illuminates when the oven is heating up and flashes to maintain the set temperature.
  • Function knob: Selects various oven cooking modes.
  • Programmer clock: Displays current time, sets programmed cooking operations, and functions as a minute minder timer.
  • Hob burner knobs: Used to light and adjust the hob burners. Pressing and turning anti-clockwise ignites the burner; adjusting between maximum and minimum flame symbols controls the flame intensity.

Oven Functions

The oven offers several cooking functions:

  • Static: Heat from above and below, ideal for roasts, bread, cakes, and fatty meats. Suitable for cooking one dish at a time.
  • Fan + lower element: Fan combined with the lower heating element for faster cooking, good for sterilizing or finishing foods cooked on the surface but not inside.
  • Grill: Heat from the grill element for browning thin to medium-thickness meats, sausages, spare ribs, and bacon. Can be used with or without rotisserie (if fitted).
  • Fan assisted: Fan combined with traditional cooking for consistent results with complex recipes, suitable for multiple-level cooking (2nd and 4th runners recommended).
  • Fan with circulaire: Fan combined with a circular heating element at the rear for cooking different foods simultaneously on multiple levels, provided they require the same temperature and cooking type. Ensures even heat distribution without mixing odours.
  • Eco: Suitable for single-shelf cooking with low energy consumption, ideal for meat, fish, and vegetables. Not recommended for leavened foods. Preheating is not necessary for maximum energy savings.
  • Vapor Clean: Steam-assisted cleaning function using a small amount of water in a bottom groove to soften dirt.

Programmer Clock Features

  • Setting the time: Essential for oven operation. If not set, the oven will not switch on. The digits flash on first use or after a power failure. Time is set using the decrease (-) and increase (+) keys.
  • Timed cooking: Allows setting a specific duration for cooking. The oven deactivates heating elements at the end, and a buzzer sounds. Maximum cooking time is 10 hours.
  • Programmed cooking: Starts a cooking operation at a set time and ends it after a specific duration.
  • Adjusting buzzer volume: Three levels available, adjusted using the decrease (-) key when the buzzer is active.
  • Deleting set data: Resets programmed settings by pressing the cooking duration and end of cooking keys simultaneously.
  • Minute minder timer: Informs the user when a set time has run out without stopping the cooking operation. Maximum time is 24 hours.

Accessories

  • Rack: For supporting food containers.
  • Tray: For collecting fat from foods or for cooking pies, pizzas, and baked desserts.
  • Tray rack: Placed over the tray for cooking foods that may drip.
  • Trivet: For small cookware.
  • WOK support: For using a wok. All accessories are made of food-safe materials and original accessories can be requested from Authorised Assistance Centres.

Usage Advice

  • General: Use fan-assisted functions for consistent multi-level cooking. Do not increase temperature to shorten cooking times. Larger pieces of food require longer cooking.
  • Meat: Cooking times vary. Use a meat thermometer or press on the roast to check doneness.
  • Grill: Preheat the oven for grilling with the fan-grill function. Place food at the centre of the rack. Set to maximum temperature for best results.
  • Desserts/Pastries/Biscuits: Use dark metal moulds. Cooking times depend on dough quality and consistency. For multi-level cooking, use 2nd and 4th shelves with fan functions. Use a toothpick to check doneness. Reduce temperature by 10°C and increase cooking time if desserts collapse.
  • Defrosting and Proving: Place frozen foods in lidless containers on the first shelf. Avoid overlapping. For meat, use a rack on the second level and a tray on the first to collect liquid. Bread and fruit defrost faster when divided. Cover delicate parts with aluminium foil. Place a water container at the bottom for proving.
  • Energy saving: Stop cooking a few minutes early, minimize door openings, keep the appliance clean, and remove the pizza stone when not in use (if fitted).

Cleaning and Maintenance

  • General: Always use specific non-abrasive, non-corrosive, non-chlorine-based cleaning products. Use wooden or plastic tools for food stains. Do not use steam jets, rough/abrasive materials, or sharp metal scrapers.
  • Surfaces: Clean regularly with a damp cloth and soft/microfibre cloth after cooling.
  • Hob: Knobs can be removed for cleaning with a soft cloth and lukewarm water. Pan support grids, flame-spreader crowns, and burner caps should be washed in lukewarm water with non-abrasive detergent and thoroughly dried. Do not wash removable parts in a dishwasher. Igniters and thermocouples must be kept clean.
  • Oven door: Can be removed for easier cleaning. Internal glass panes can also be removed. Clean glass with absorbent kitchen roll or a damp sponge and ordinary detergent.
  • Oven cavity: Clean regularly after cooling. Avoid letting food residue dry. Remove all removable parts (door, rack/tray support frames, oven seal) for easier cleaning. Operate the oven at maximum temperature for 15-20 minutes after using specific cleaning products to burn off residues.
  • Vapor Clean cycle: Remove all accessories (except upper guard). Pour 40 cc of water onto the oven floor. Spray a water and washing-up liquid solution inside the oven. Set the function knob to Vapor Clean symbol and temperature knob to the Vapor Clean symbol. Set a cooking time of 18 minutes. After the cycle, wipe away dirt, use a non-scratch sponge for stubborn deposits, and specific oven cleaning products for grease. Dry the oven with a fan-assisted function at 160°C for 10 minutes.
  • Seal: Release clips in the corners to remove. Keep soft and elastic; clean with a non-abrasive sponge and lukewarm water.
  • Internal light bulb: Unplug the appliance and wear protective gloves. Remove accessories and rack/tray support frames. Remove the bulb cover with a tool. Slide out and replace the 40W bulb (do not touch directly). Refit the cover, ensuring the moulded part of the glass faces the door.

Installation

  • Safety: Gas connections must be performed by authorised personnel. Check for leaks with soapy solution, never a flame. Hoses must not exceed 2 metres (steel) or 1.5 metres (rubber), avoid contact with moving/hot parts, crushing, kinks, or sharp objects. Electrical connections must be earthed and performed by authorised personnel. The plug must be accessible.
  • Gas connection: Appliance is preset for natural gas G20 (2H) at 20 mbar. Adaptations for other gas types require changing burner nozzles and adjusting minimum flame. Gas inlet is 1/2" external gas thread.
  • Room ventilation: Appliance must be installed in rooms with permanent air supply and adequate air flow for gas combustion. Air vents must be correctly sized and unobstructed. Ensure proper ventilation to eliminate heat and humidity from cooking.
  • Extraction of combustion products: Products can be extracted via a natural draught chimney or forced extraction system.
  • Replacing nozzles: Remove pan supports, burner caps, and flame-spreader crowns. Use a 7 mm socket wrench to replace nozzles according to the gas type.
  • Adjusting minimum flame: For natural/town gas, light burner, turn to minimum, extract knob, and turn adjustment screw until stable minimum flame is achieved. For LPG, tighten the screw clockwise all the way.
  • Lubricating gas cocks: Should be performed by a specialised technician if they become difficult to turn.
  • Positioning and levelling: Position with the help of a second person. Do not use the oven door to lever the appliance. Avoid excessive pressure on the open door. Ensure adjacent furniture is temperature-resistant (at least 90°C). Maintain minimum distances from walls (X mm) and wall units (Y mm). The appliance is a Class 1 (Free-standing) or Class 2 subclass 1 (Built-in) appliance.
  • Fastening to the wall: Install anti-tip devices. Screw the wall fastening plate to the rear, adjust leg height, assemble the fastening bracket, align the hook base, mark and drill holes in the wall, fasten the bracket, and push the cooker towards the wall to insert the bracket into the plate.
  • Electrical connection: 220-240 V 1N~, 3 x 1.5 mm² three-core cable. Ensure the plug and socket are of the same type. Avoid adapters and shunts. Fit an all-pole circuit breaker with at least 3 mm contact opening.

Smeg CX61VMLS8 Specifications

General IconGeneral
BrandSmeg
ModelCX61VMLS8
CategoryCookers
LanguageEnglish

Related product manuals