Previous Vehicle
and Data
Quick Lookups
To ol s
Scanner
OBD-II/EOBD
Scope Multimeter
Guided Component
Tests
r
v
n
t
uick L
canner
BD-II
E
BD
cope Multimeter
Guided Componen
4
5
Getting Started
This side up.
A
1
2
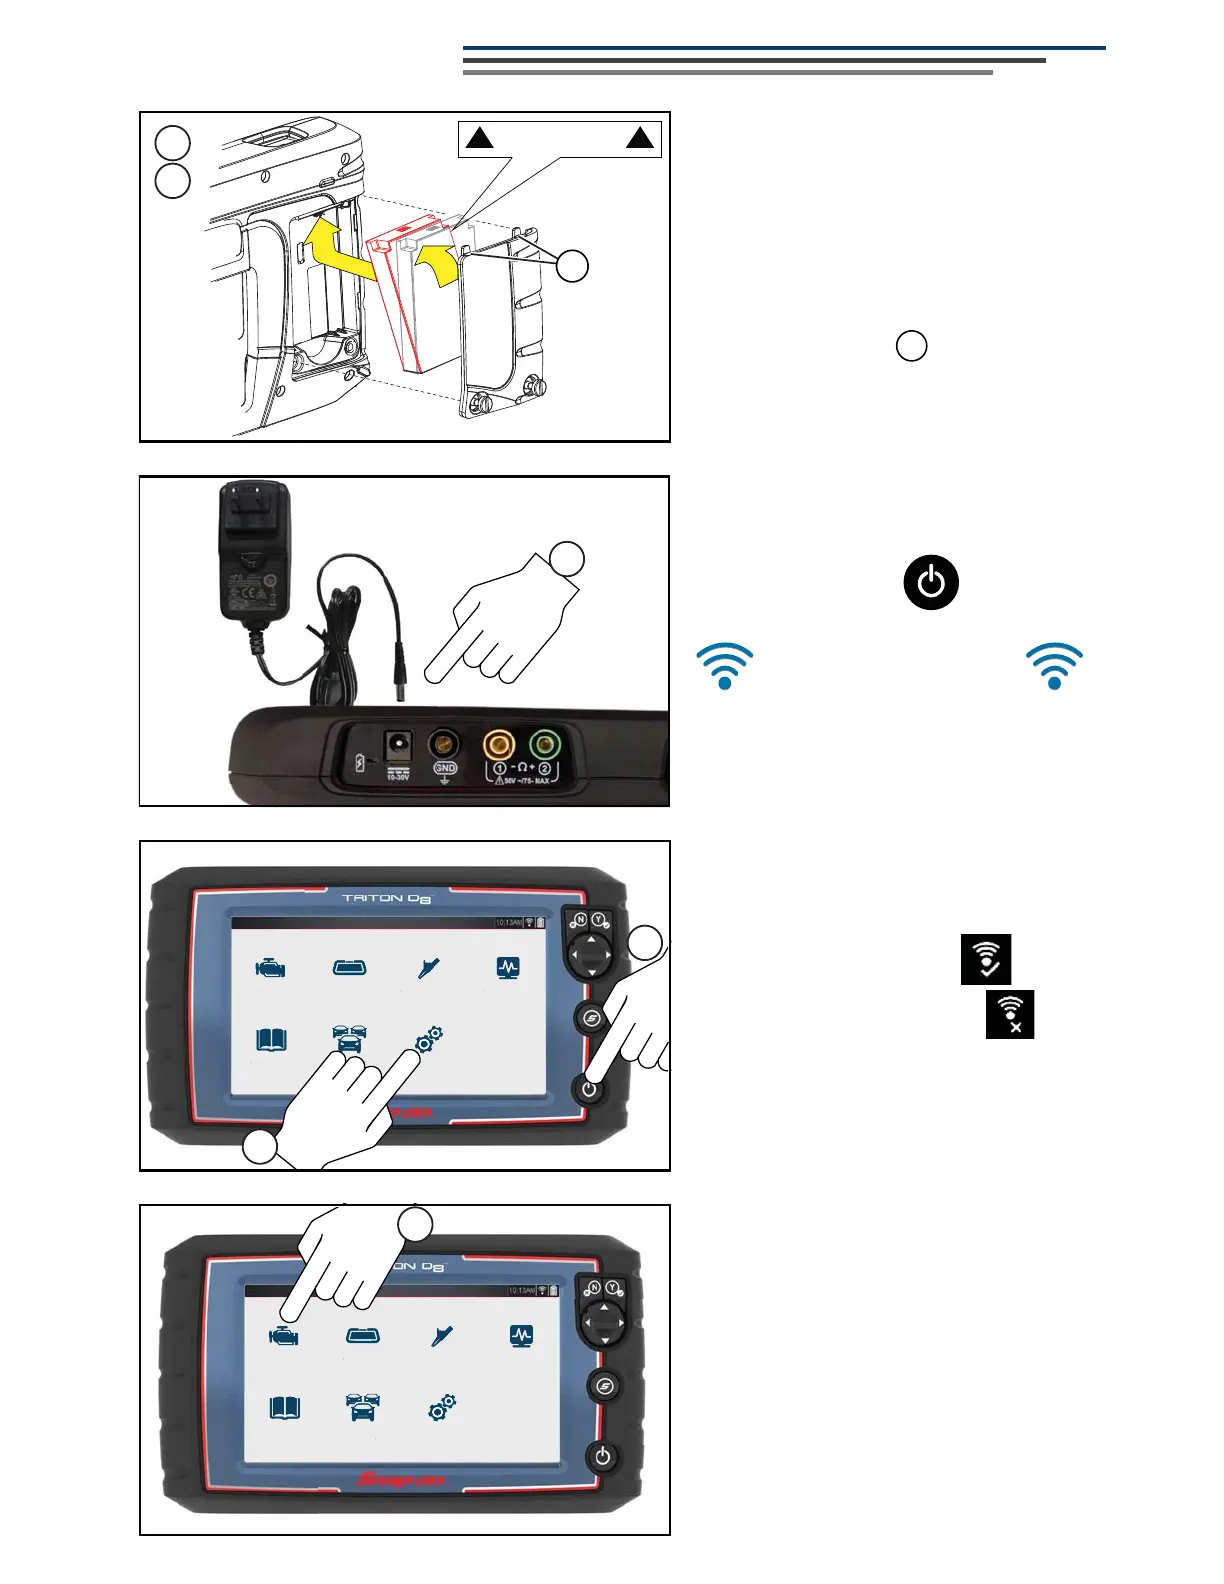
1. Remove the battery pack cover,
and install the battery pack
(as shown) with the arrows facing
up. Tilt the top of the battery in to
align the tabs, then down to install.
2. Install the battery pack cover,
aligning the tabs . Then tighten
the screws.
Note - Do not overtighten the screws.
4. Press the Power button.
Note - When you connect the Data Cable
to an OBD-II vehicle, the diagnostic tool is
powered by the vehicle.
6. To scan a vehicle:
a. Select Scanner.
b. Follow the screen prompts to ID
the vehicle and to connect the
Data Cable.
c. Select a test/service and follow
the screen prompts.
3. Connect the AC power supply, to
charge the battery.
3
Previous Vehicle
and Data
Quick Lookups
To ol s
Scanner
OBD-II/EOBD
Scope Multimeter
Guided Component
Tests
Pr
vi
V
hi
l
n
D
t
uick L
T
l
BD-II
cope Multimeter
Guided Componen
T
t
6
A
a. From the Home screen, select
Tools > Settings >
&RQ¿JXUH:L)L
.
b. Select the :L)Licon .
The icon will change to
indicating Wi-Fi is on.
c. Select a wireless network from
the list of available networks, then
select Connect.
***IMPORTANT***
Turn Wi-Fi on to use Intelligent
Diagnostics, Quick Lookups and
ALTUS.
5. To turn on Wi-Fi:

 Loading...


