5
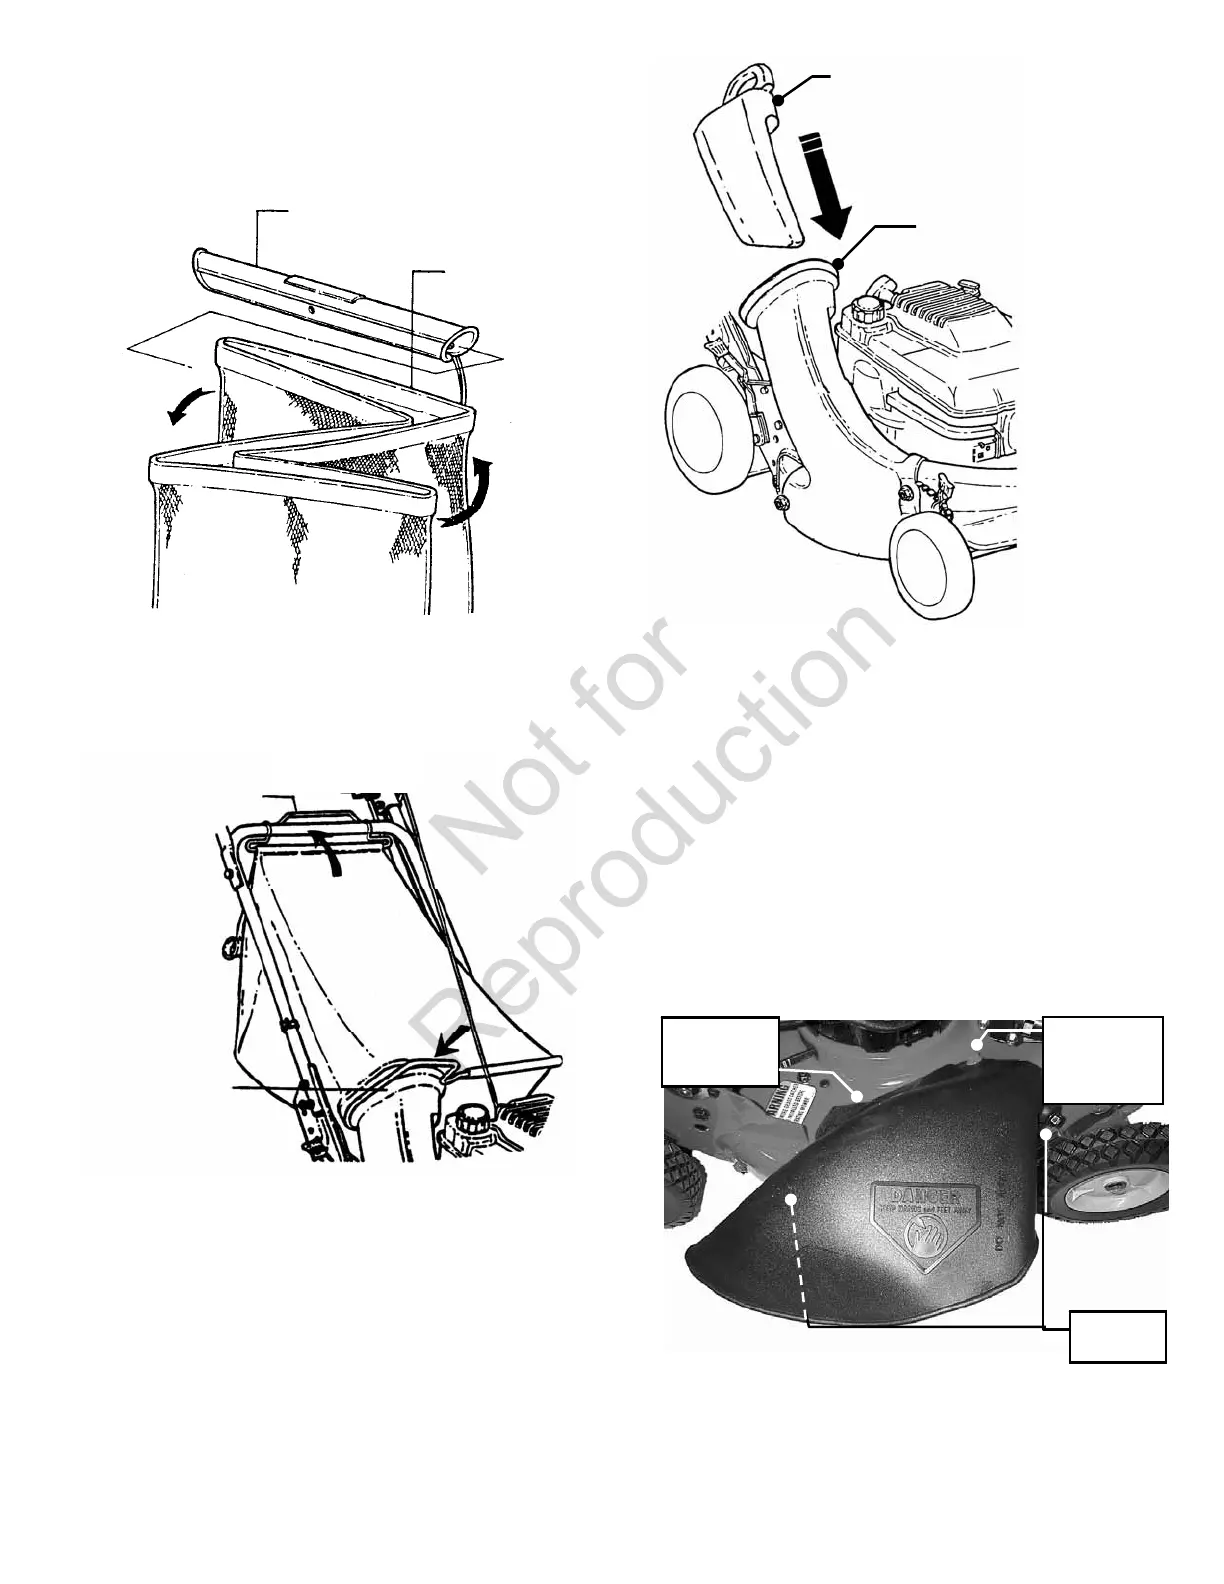
STEP 3: Install the top wire to the grass bag. Tie the
slider to the top wire. Fold bag opening into a "Z" and
install slider. See Figure 16.
FIGURE 16
STEP 4: Install grass bag on the mower as shown in
Figure 17.
FIGURE 17
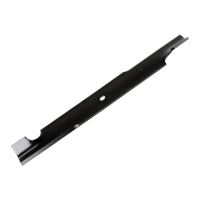
RECYCLING PLUG
(Optional Accessory on Some Models)
Once grass bag assembly has been installed, recycling
may be desired. Remove grass bag. Insert recycling
plug completely and securely into adapter. See Figure
18. Reinstall grass bag as a safeguard.
FIGURE 18
DISCHARGE DEFLECTOR
(Optional Accessory on Some Models)
Install discharge deflector if discharging is desired:
A. Remove grass bag from handle and bag
adapter.
B. Remove front and rear nuts attaching bag
adapter to deck, and remove bag adapter.
C. Install discharge deflector and secure to deck
using hardware just removed in Step B. Slot in front
edge of discharge deflector must be under nut as
shown and both bolts protruding through holes in
the side of the deflector. Secure nuts to the side of
deflector. Tighten nuts securely. See Figure 18.
FIGURE 18
BAG
SLIDER
“Z” FOLD BAG
AS SHOWN
SLIDE CONNECTOR
OVER END OF
ADAPTER FLANGE
HOOK BAG HANDLE
OVER MIDDLE HANDLE
INSERT RECYCLING PLUG
COMPLETELY AND SECURELY
INTO ADAPTER. INSTALL
GRASS BAG.
ADAPTER
PLUG
INSTALL
DISCHARGE
DEFLECTOR
INSTALL
NUTS
SLIDE
DEFLECTOR
SLOT
UNDER NUT