11
STEP 3: Configure Scanner Settings
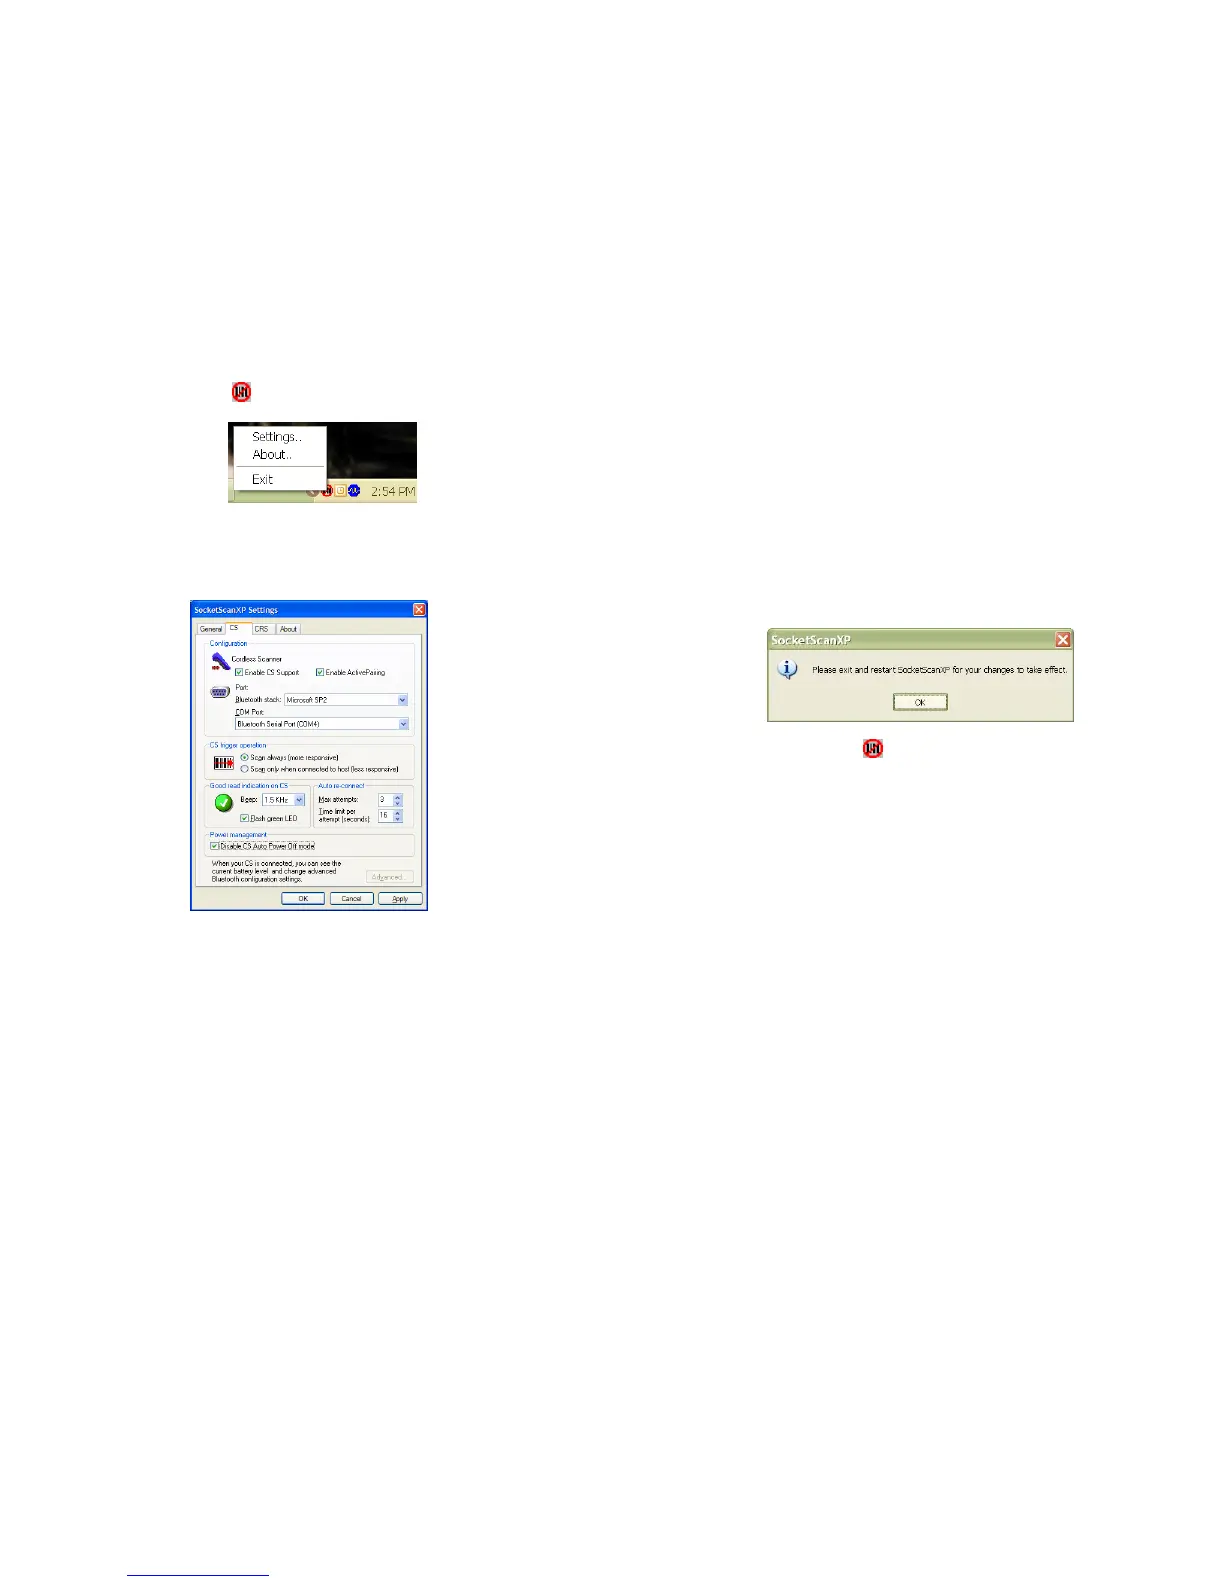
1. Click the SocketScan icon at the bottom of the screen. In the pop-up menu,
click Settings.
If the icon does not appear, open SocketScan by clicking on the SocketScan XP
icon on the desktop.
2. Tap on the CS tab. Enter the following settings:
• Enable CS support: Check this box. IMPORTANT!!!
• Enable ActivePairing: Do not check this box. This feature is NOT compatible
with the CHS.
• Bluetooth stack: Select Connect!Agent if you want to use it. Otherwise, select
your computer’s Bluetooth stack. The Connect!Agent option will only appear
if you installed the Connect!Agent software.
• COM Port: Select the COM port number assigned to the CHS. This field will
only appear for some Bluetooth stacks.
• CS trigger operation: Select whether you want the CHS to scan only when a
Bluetooth connection to the device is detected. If you select Scan only when
connected to host, scanning will be a few milliseconds slower.
12
• Good read indication on CS: Select how you would like the CHS to indicate
that it has successfully read data.
• Auto re-connect: Select the maximum number of attempts and time limit per
attempt for the CHS to try to reconnect to your computer in case they are
moved out of range from each other.
• Battery Level: No progress bar should appear since you are not connected to
the CHS.
• Power management: The CHS automatically shuts off if there is no Bluetooth
connection for 20 minutes. Check to disable.
3. After entering settings, click OK to save the changes.
4. You will be prompted to exit and restart SocketScan. Click OK.
5. Click on the SocketScan icon
at the bottom of your screen and in the pop-up
menu, click Exit.
 Loading...