Step 2: Hang the inverter on the bracket.
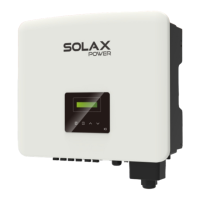
c) Insert expansion bolts into the holes, use rubber hammer to knock the
expansion bolts into the wall.
d) Insert the self-tapping screws into the gaskets and use the outer hexagon
wrench to tighten them.
c)
Expansion bolts
Rubber hammer
d)
Self-tapping
screw
Outer hexagonal wrench
Gasket
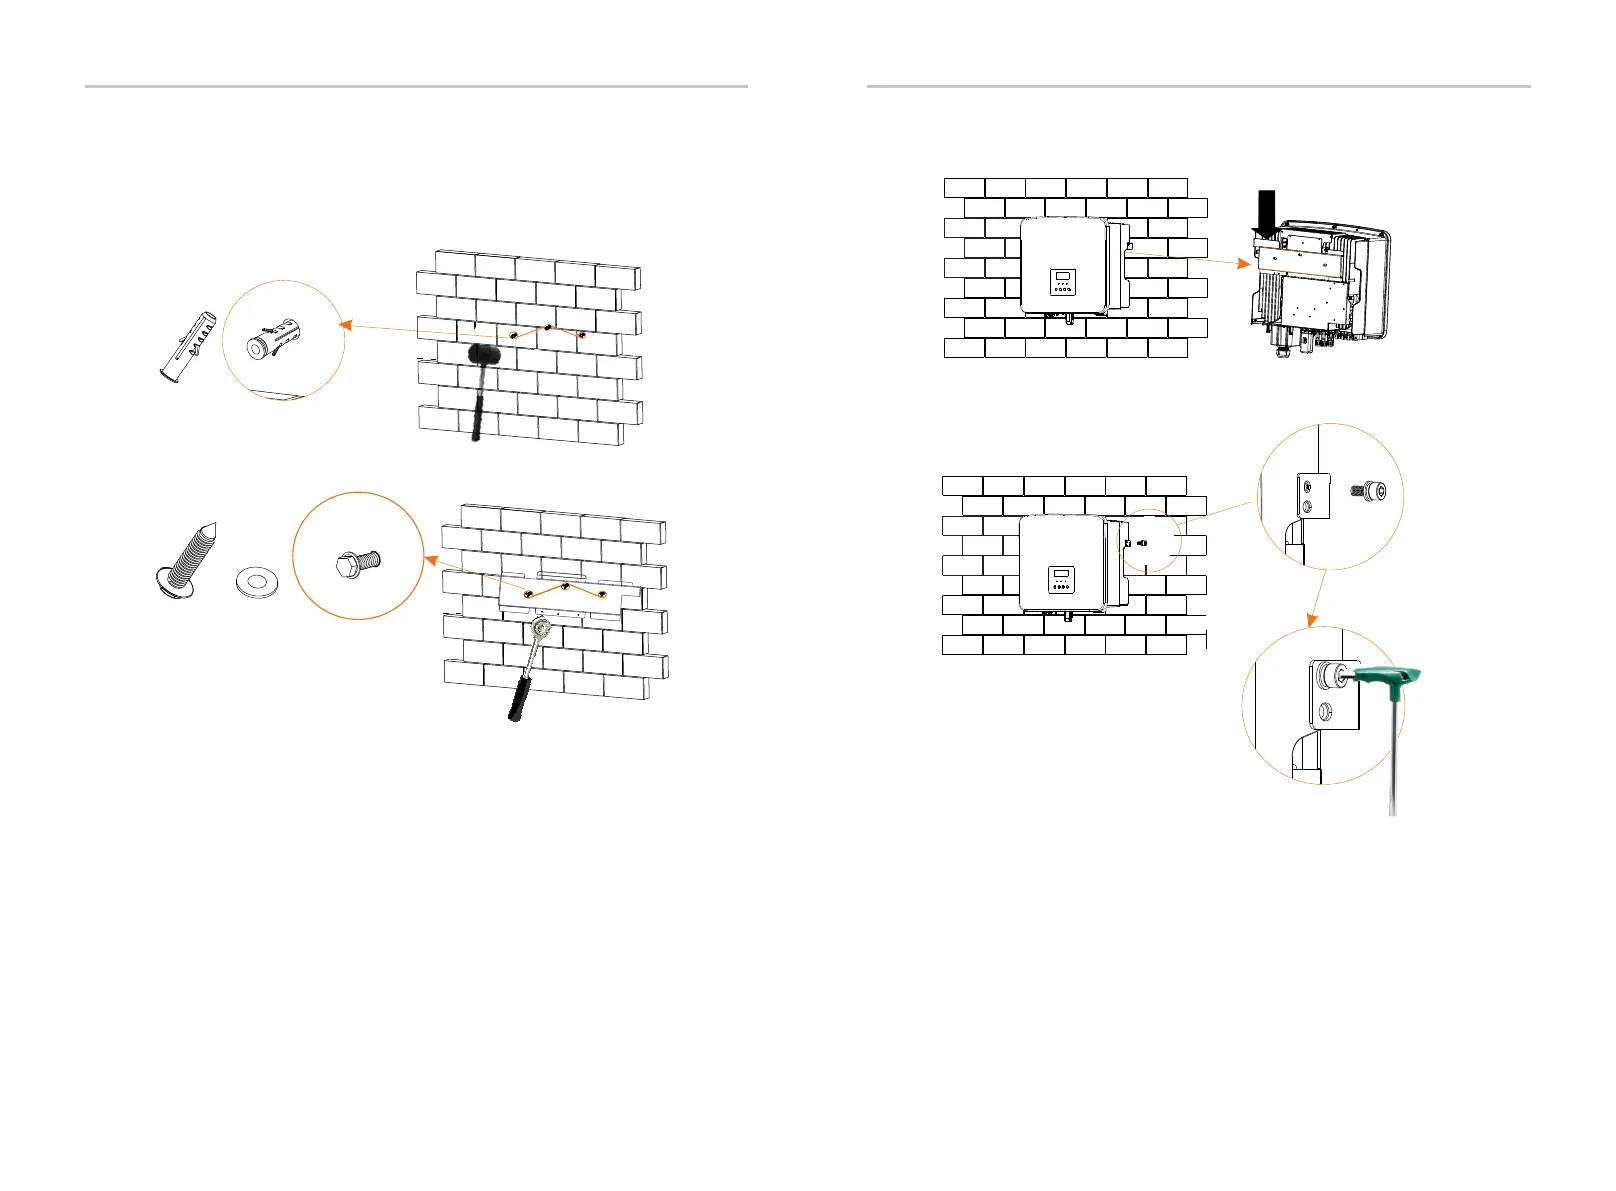
Step 3: Tighten the inverter and bracket.
Ø
f ) Use the inner hexagonal wrench to tighten the inner hexagonal screw on
the right side of the inverter.
e)
f )
Inner hexagonal wrench
(Torque :1.2±0.1 N·m)
Installation Installation
22
23
e) Hang the buckle of the inverter to the corresponding position of the
bracket;
Ø
 Loading...


