LCB FITNESS BIKE
6
1
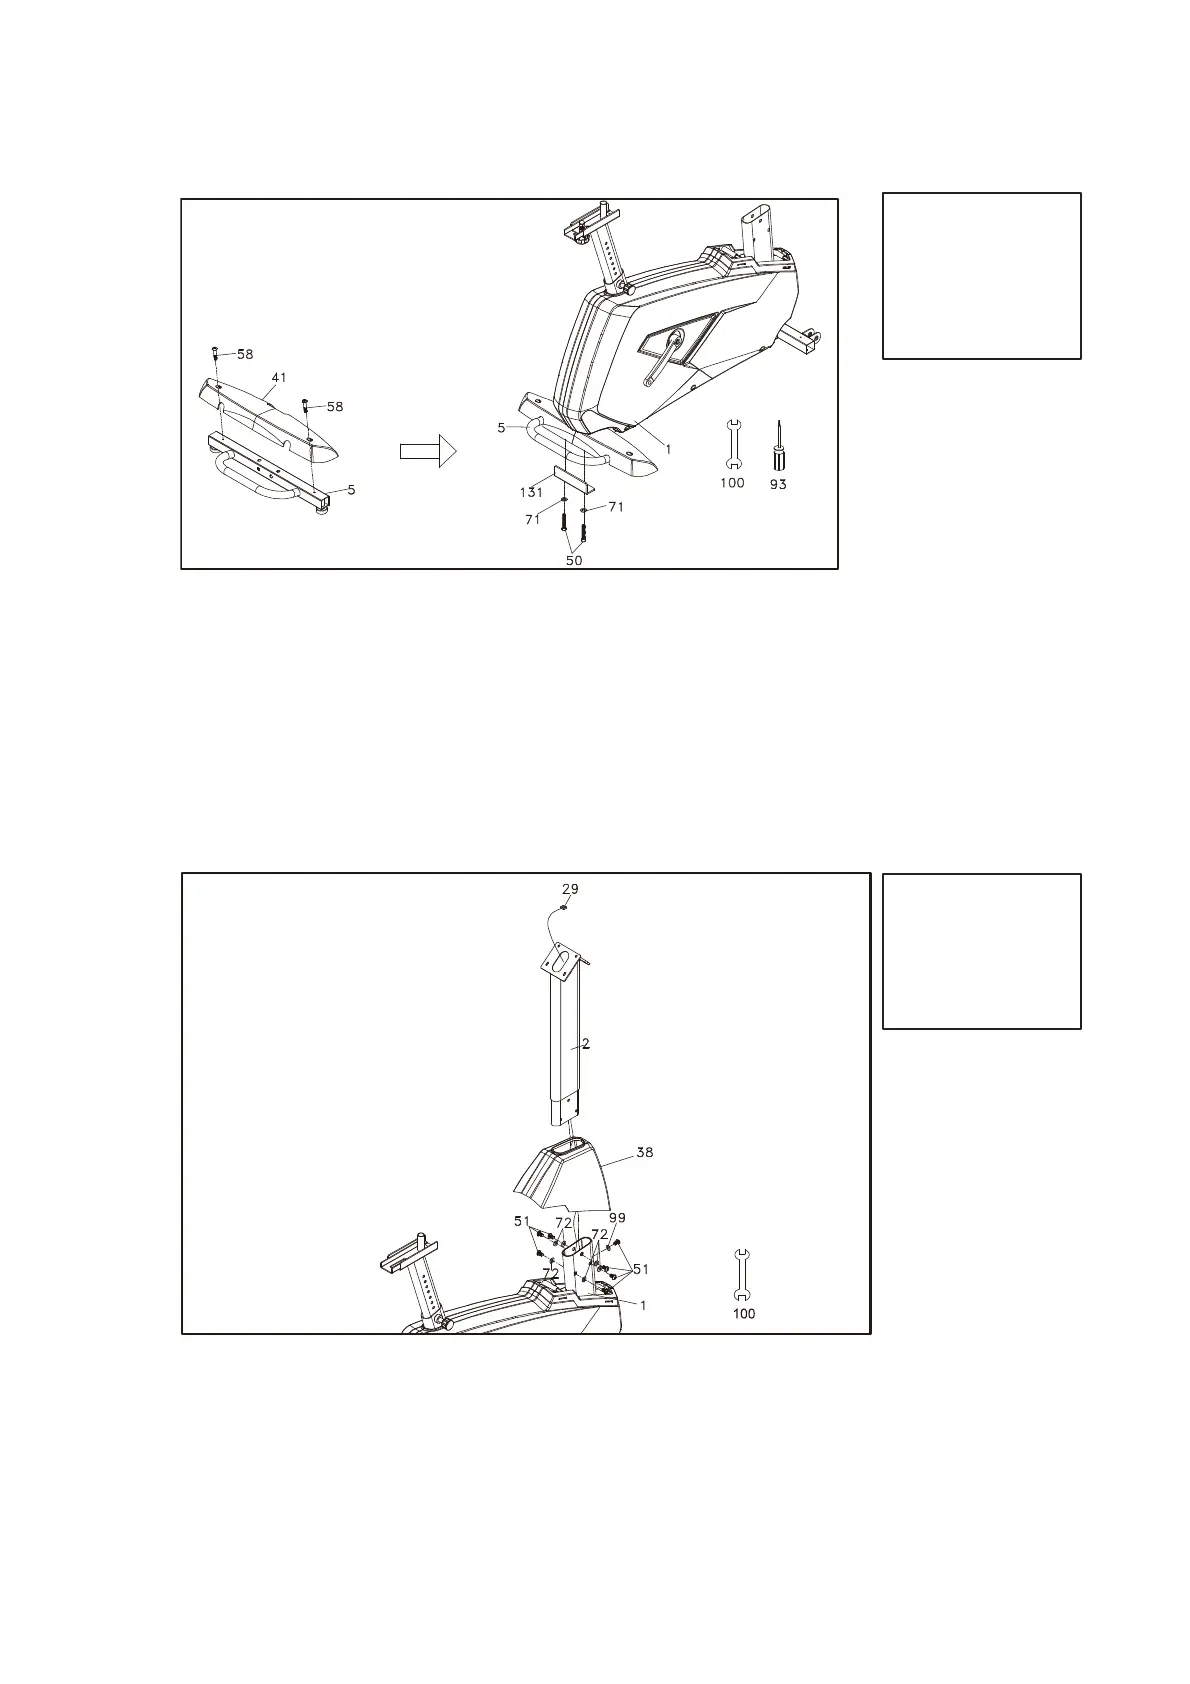
REAR
STABILIZER
HARDWARE STEP 1
#50. 3/8” x 2-1/4”
Hex Head Bolt (2 pcs)
#58. M5 x 12mm
Phillips Head Screw
(2 pcs)
#71. 3/8” x 25 x 2T
Flat Washer (2 pcs)
1. Secure the Rear Stabilizer Cover (41) onto the Rear Stabilizer (5) with
the two of Phillips Head Screws (58) by using the Phillips Head Screw
Driver (93).
2. Locate Rear Stabilizer (5) between Rear Stabilizer Attaching Plate
(131) and Mainframe (1) and tighten two Hex Head Bolts (50)
together with the two Flat Washers (71) from bottom upward by
using 12/14m/m Wrench (100).
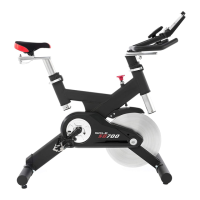
2
CONSOLE
MAST
HARDWARE STEP 2
#51. 5/16” x 5/8”
Hex Head Bolt (7 pcs)
#72. 5/16” x 18 x 1.5T
Flat Washer (6 pcs)
#99. 5/16” x 19 x 1.5T
Curved Washer (1 pcs)
1. Let the Computer Cable (29) through the Console Mast Cover (38) and
the Console Mast (2).
2. Secure the Console Mast (2) onto the Main Frame (1) with the seven of
Hex Head Bolts (51), six of Flat Washers (72) and one of Curved Washer
(99) by using the 12/14mm Wrench (100).