GENESIS
TM
DAS Operation Manual - Version 0.0 – Jan. 2019
©2019 SOLiD, Inc. All Rights Reserved. Confidential & Proprietary. Page 22
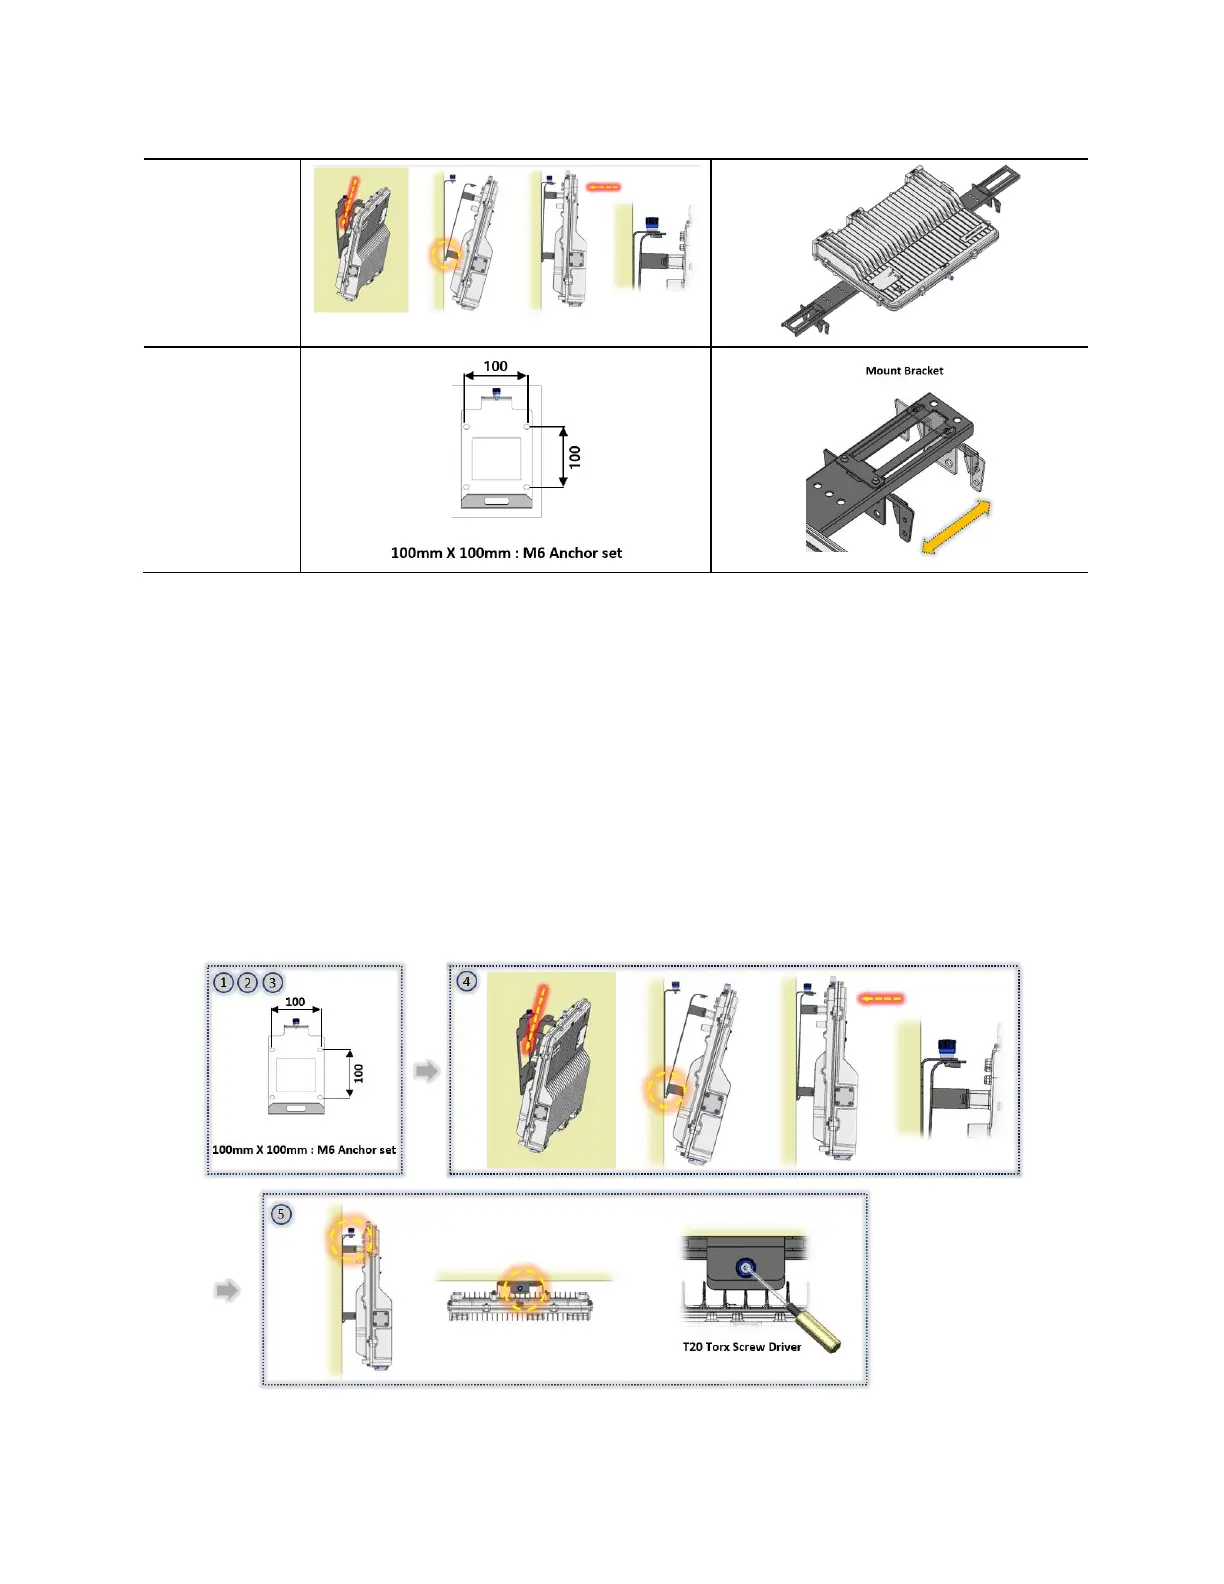
The following procedures are to install each mounting bracket.
A. QUICK-LOCK MOUNTING BRACKET
1. Mark the position of the drilling holes on the wall or ceiling to match the holes of the wall bracket.
2. Drill 4(four) holes at the marked position.
3. Secure the wall bracket to the wall or ceiling using the 4(four) M6 anchor sets.
4. Slide the LRN into the wall bracket and lift it up to be caught on the bracket.
5. Screw the captive screw on the wall bracket using T20-Torx-screwdriver to secure the LRN
tightly.
(*The mounting bracket set has the special structure to prevent the LRN from falling. Please
consider it when you need to remove the LRN from the wall bracket.)