14
www.solo-tester.com
Removing & Replacing
Consumables
5
15
www.solo-tester.com
2
2
1
1
All critical parts of Solo 365 can be replaced in the eld
without having to return the unit for service. Ensure
that the unit is switched off during the replacement of
consumables. Do not touch electrical contacts.
5.1 Removing the Smoke Cartridge
1) Ensure the unit is switched off and open the back
cover
2) Remove the smoke cartridge from the generator
by placing your thumb in the recess and sliding
the cartridge along the guide rails (Fig. 6).
(Do not remove the generator).
5.2 Replacing the Smoke Cartridge
1) Remove the cartridge form the bag
2) Slide cartridge completely into generator housing
following the guide rails (Fiig. 7)
3) Once the cartridge is inserted into the generator
do not remove it until indicated that a
replacement is necessary.
NOTE: Do not re-use empty cartridges.Empty
cartridges may be returned to the manufacturer via the
reseller for environmentally friendly disposal to comply
with WEEE (Waste Electrical & Electronic Equipment)
Regulations.
Figure 6
Figure 7
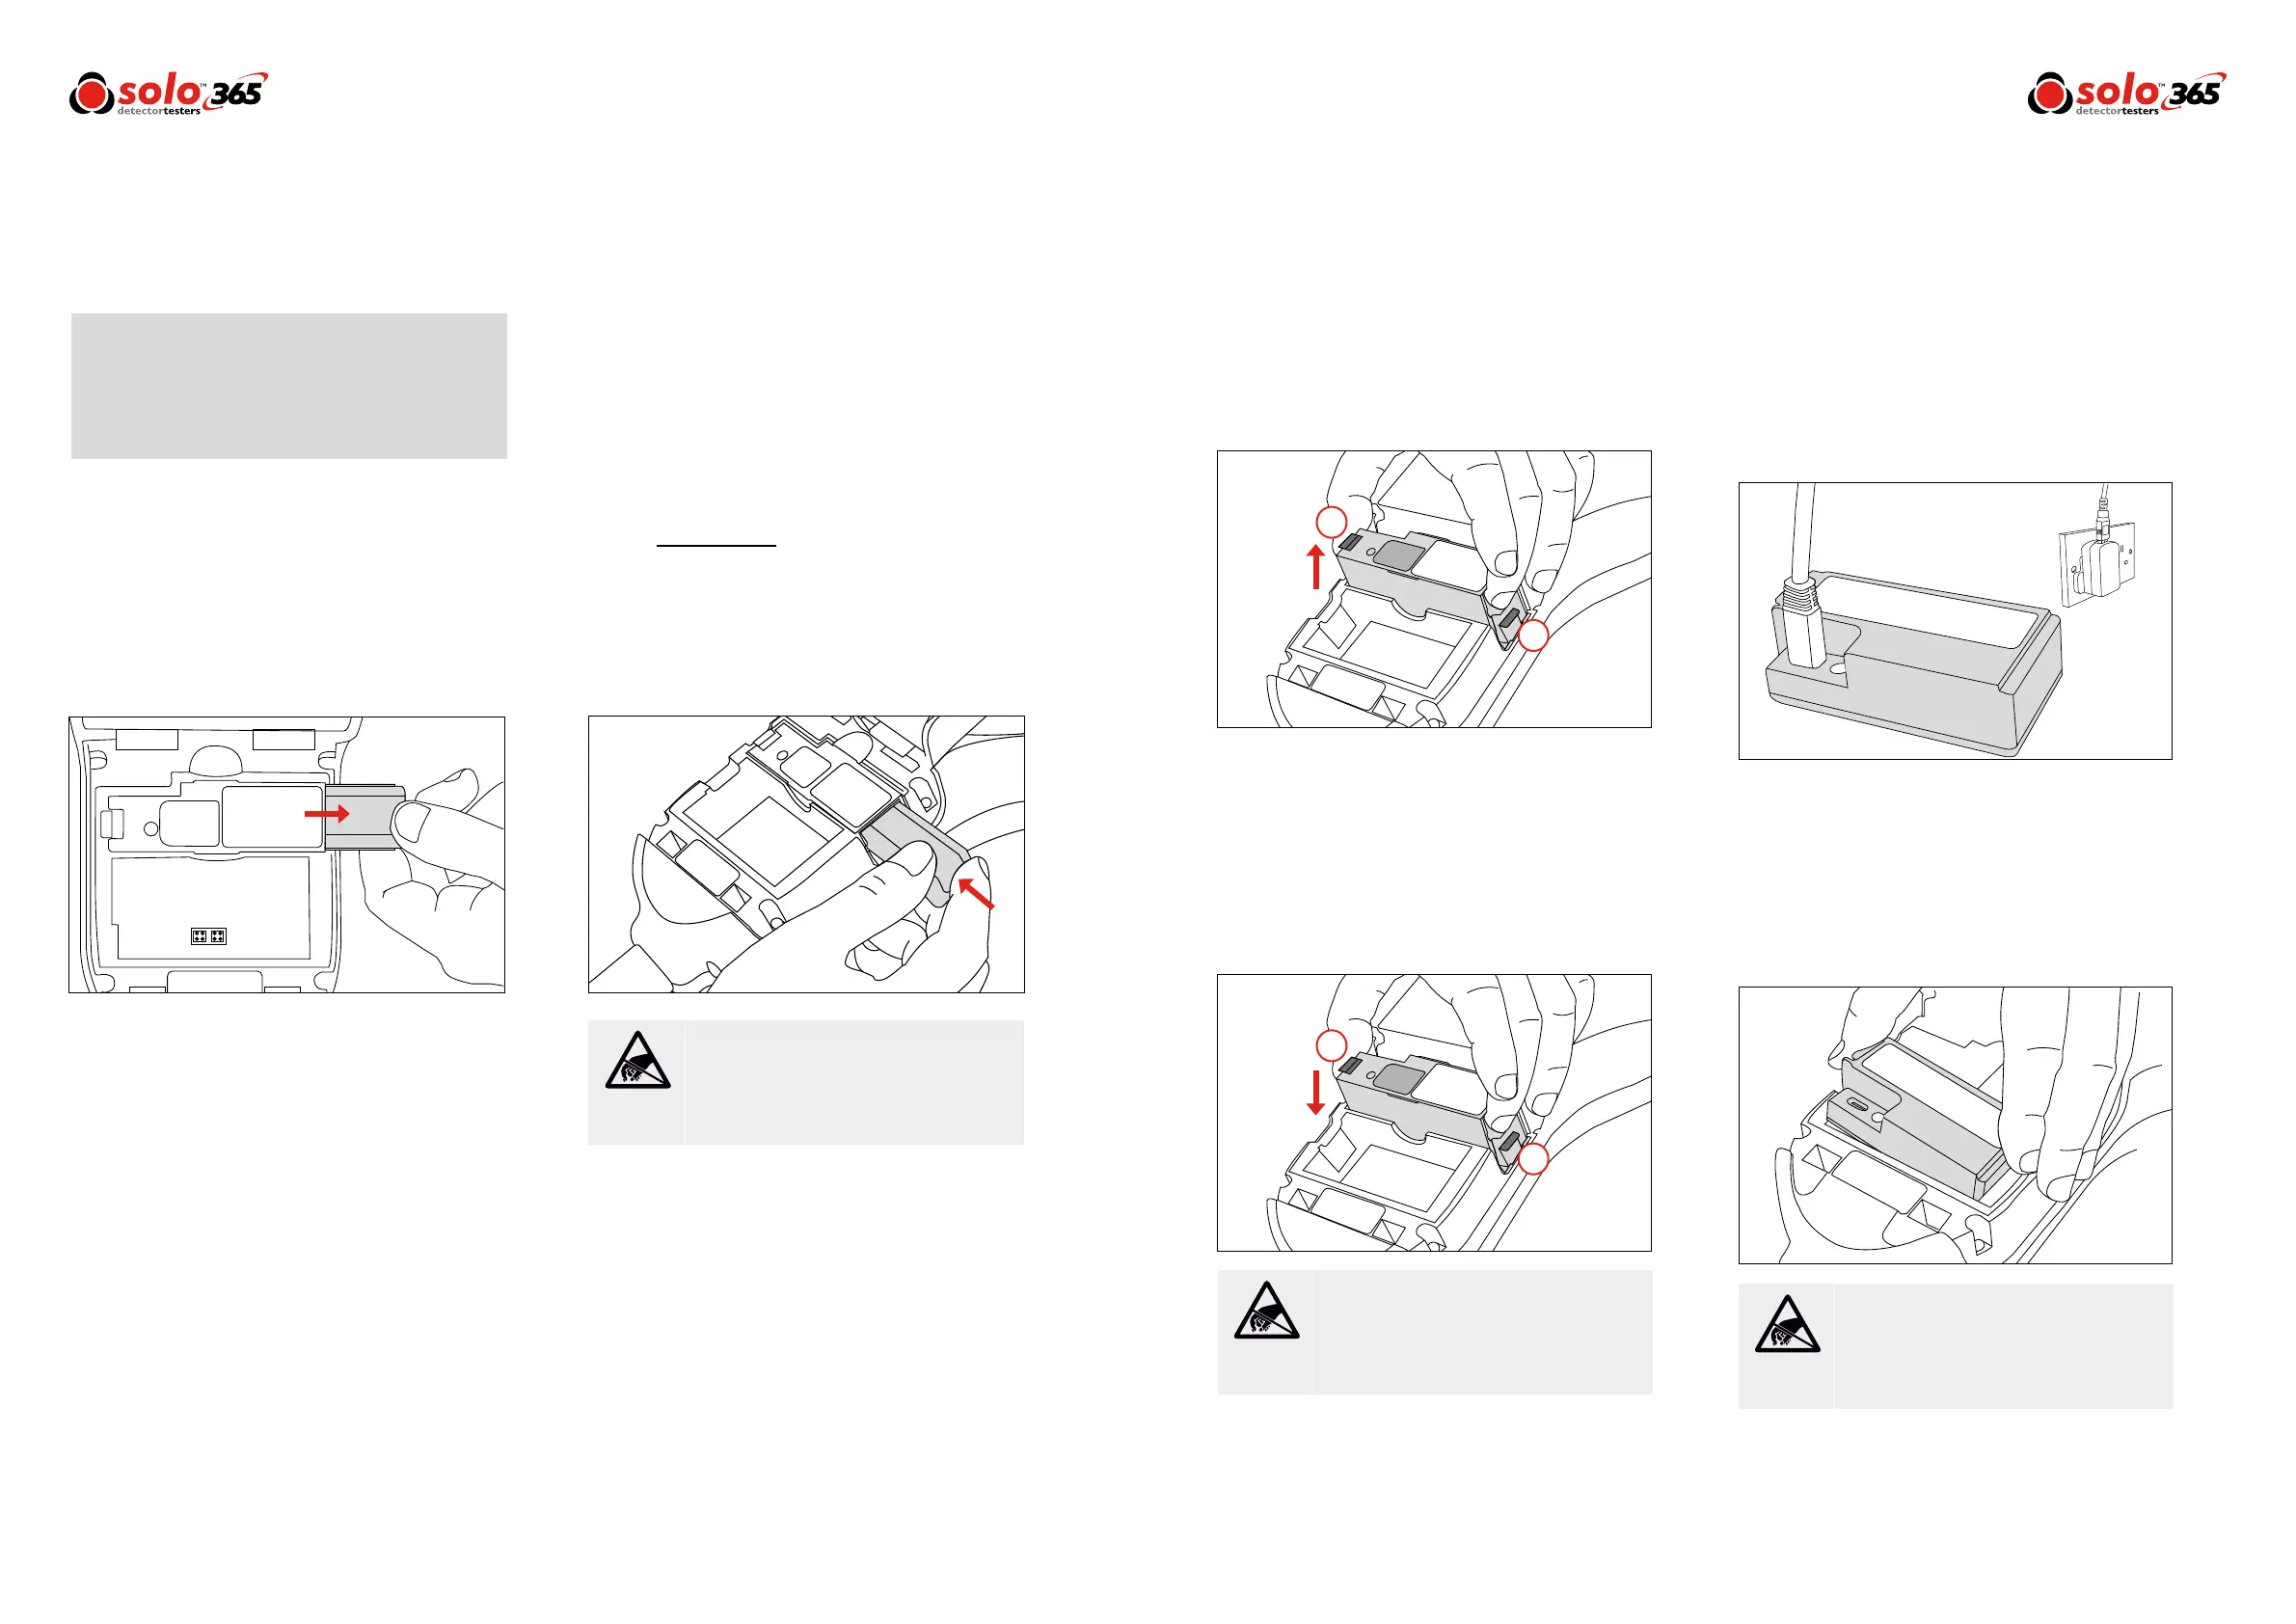
Figure 8
Figure 11
Do Not Touch
Do Not Touch
Do Not Touch
Do not touch the contacts on the cartridge.
Static electricity may cause damage and
contamination of the contacts must be
avoided.
Do not touch the contacts on the generator.
Static electricity may cause damage and
contamination of the contacts must be
avoided.
Do not touch the contacts on the battery.
Static electricity may cause damage and
contamination of the contacts must be
avoided.
5.3 Removing the Smoke Generator
1) Ensure the unit is switched off and the Smoke
Cartridge is removed (Section 5.1)
2) Disengage clip ‘1’ and lift. Repeat for clip ‘2’ to
remove the used generator (Fig. 8)
NOTE: When replacing the generator, any dust or debris
within the housing can be removed using an air duster. Any
condensation can be removed by wiping with a lint-free
cloth.
5.4 Replacing the Smoke Generator
1) Insert the generator rmly into the recess,
engaging clips ‘1’ and ‘2’ (Fig. 9)
NOTE: Once the generator is inserted do not remove it
until it is indicated that a replacement is necessary.
5.5 Removing the Battery for Charging
1) Ensure the unit is switched off and open the back
cover.
2) Unclip and remove the battery
3) Charge the battery by connecting the USB lead to
the battery and the powered USB socket using
the supplied mains adaptor or suitable source
(minimum 1A) (Fig. 10)
NOTE: Do not charge the battery while it is tted in the
unit.
5.6 Replacing the Battery
1) Once the battery is charged clip into the battery
compartment and close the back cover (Fig. 11)
NOTE: Do not force the battery into place.
Figure 10
Figure 9