16
www.solo-tester.com
Consumables
& Accessories
6
SOLO370-
1 PACK-001
SOLO370-
4 PACK-001
Solo 365 Lithium Ion Battery
Pack x1
Solo 365 Lithium Ion Battery
Pack x4
Solo 365 Smoke Generator
Solo 365 ASD Adaptor
Solo 365 Smoke Cartridges x12
Solo 365 Service Pack containing:
Spare 1058 x 1, Solo 370 x 1 &
Solo 371 x 1
SOLO371-001
SOLO372-001
ES3-12 PACK-001
SERVICE360-001
Consumables
Accessories
17
www.solo-tester.com
Clear Cup & Membrane
for Solo 365
Membrane for Solo 365
Solo Charger & USB Lead
SPARE1059-001
SPARE1060-001
Spares
Spares7
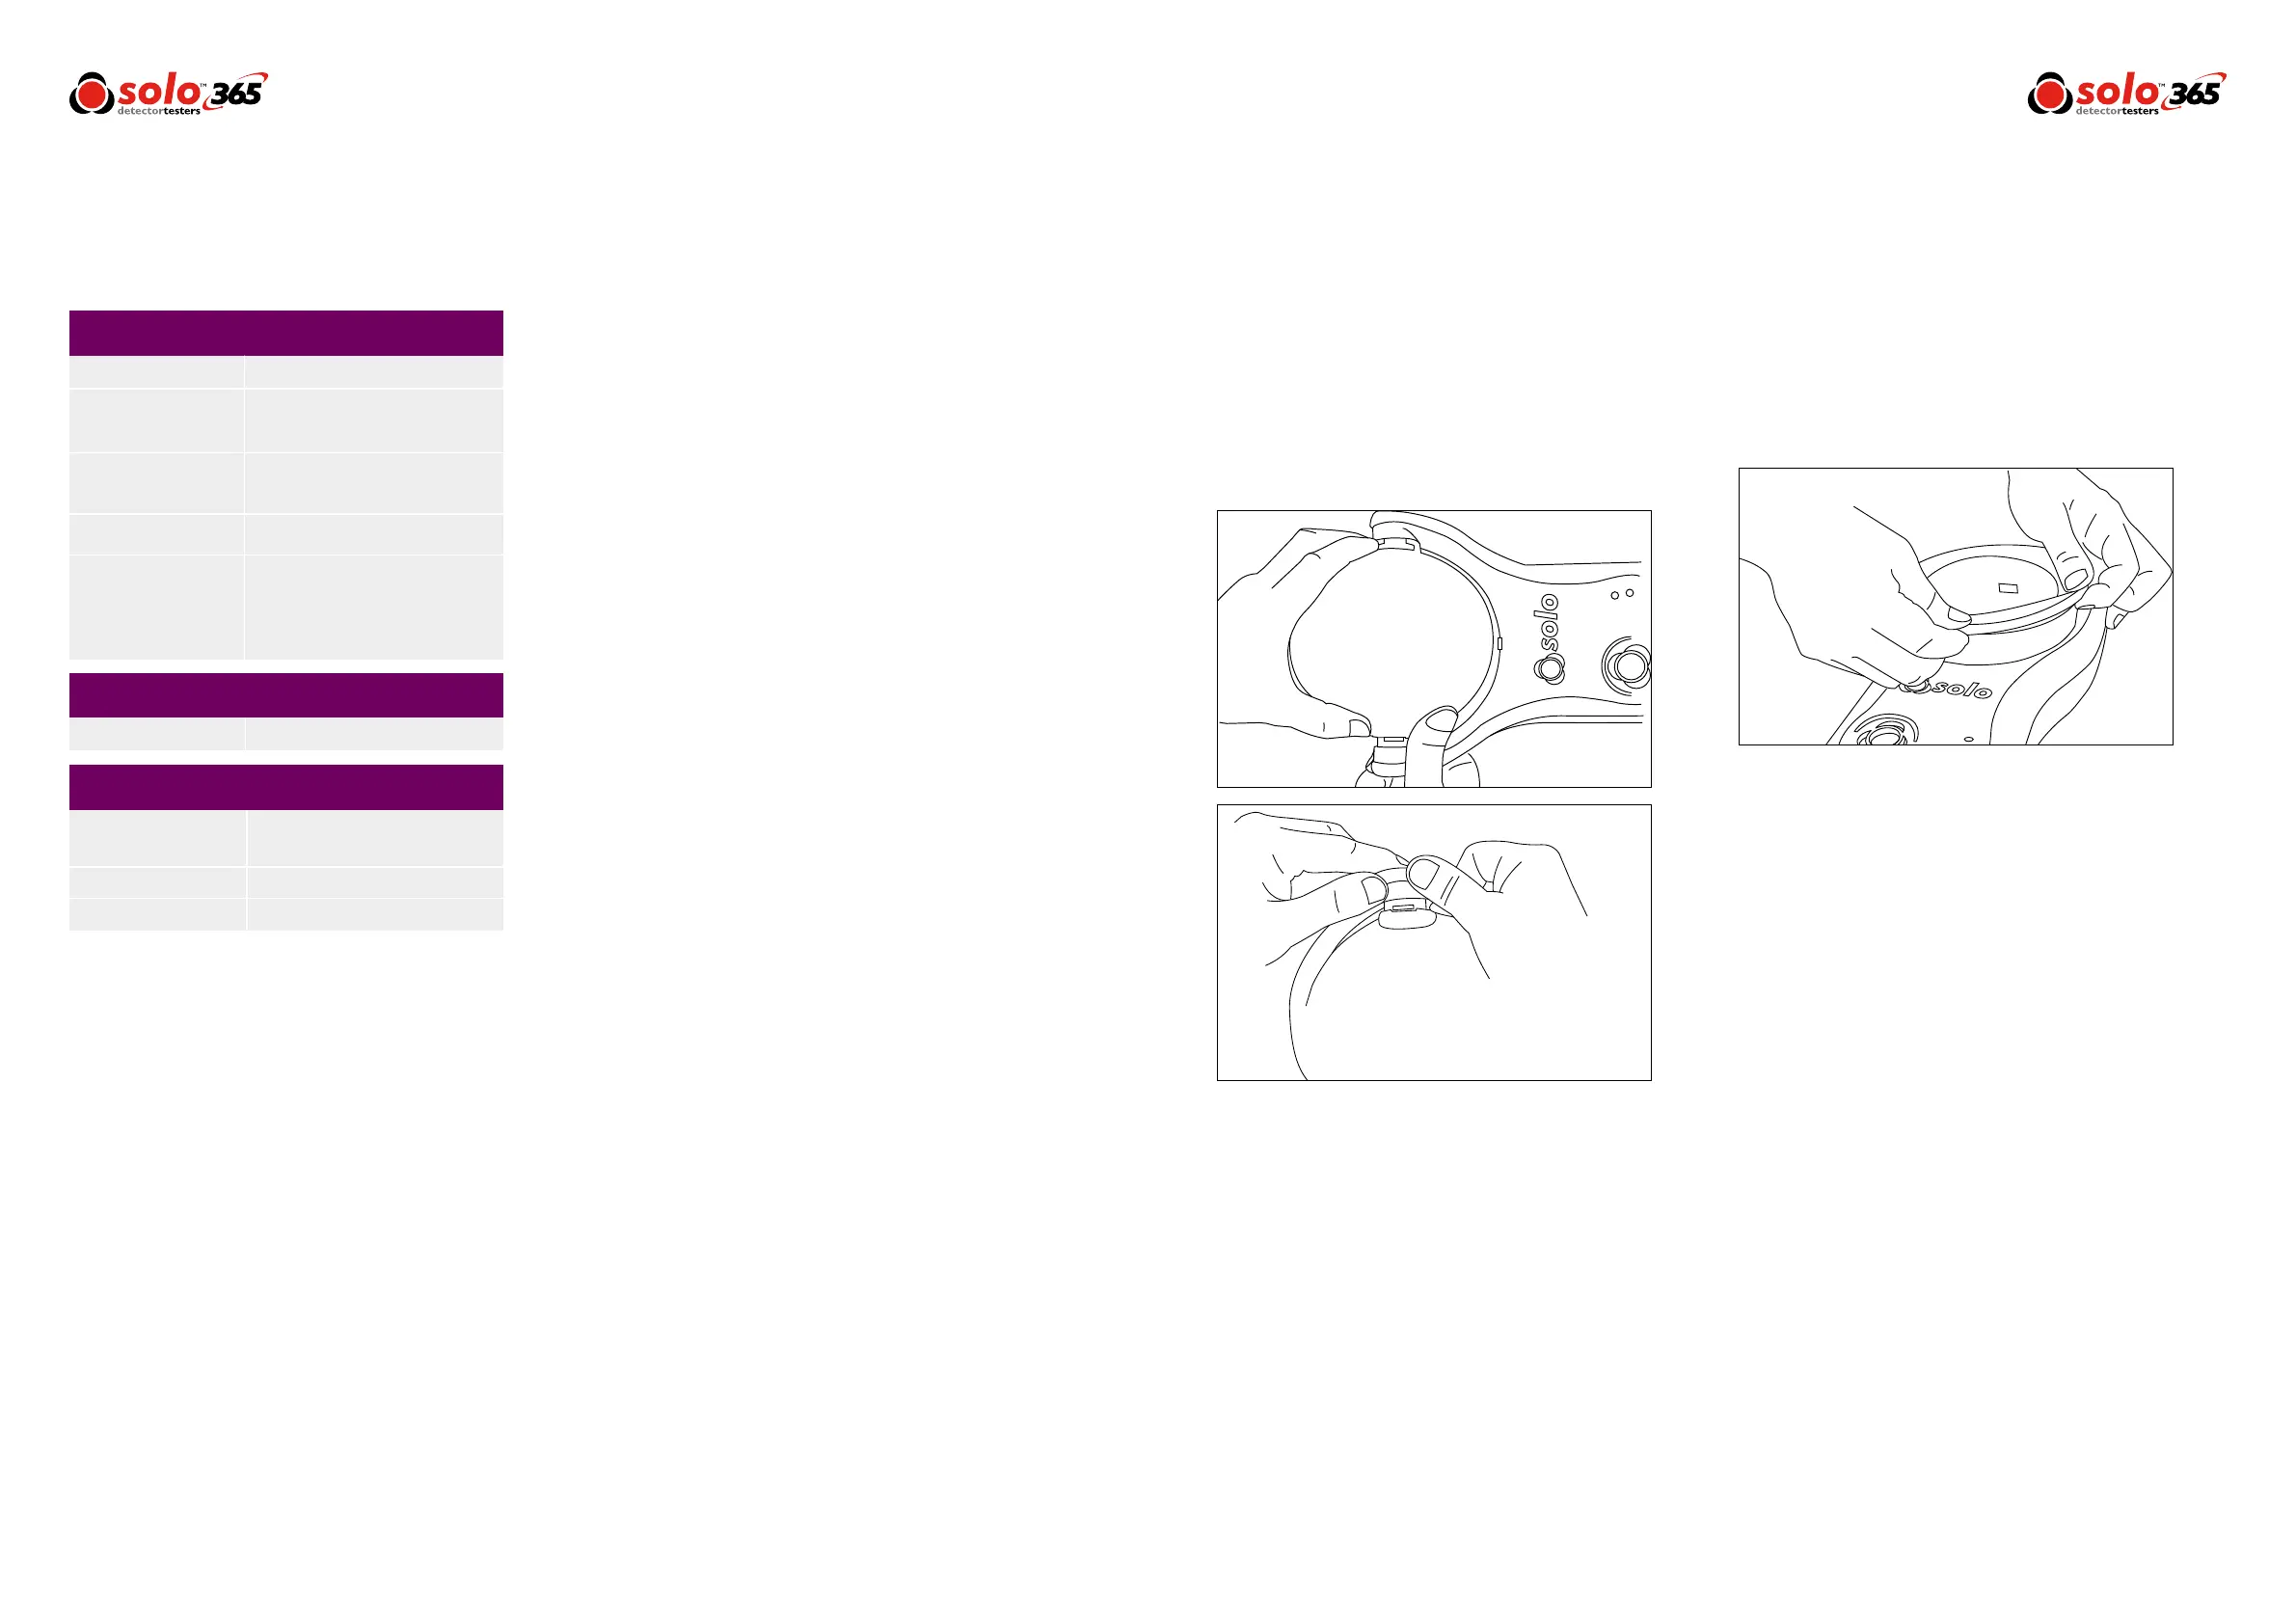
7.1 Removing the Clear Cup
1) Align the notch on the left hand side arm and
disengage by squeezing the cup and gently
pulling the arm outwards. (Fig. 12)
2) Rotate the cup to free it from the other arm
7.3 Removing & Replacing the Membrane
1) Ease the membrane off the clear cup gently
2) Take the replacement membrane and stretch it
over the clear cup (Fig. 13)
7.2 Replacing the Clear Cup
1) Engage the cup with the notch on the left hand
arm and rotate the cup to engage with the notch
on the right hand side
NOTE: Ensure the cup vent is the same side as the back
of the unit
SPARE1058-001
Figure 12
Figure 13