Preparing the equipment for use - Assembly of the guide bar and chain
ENGLISH 20
E
N
G
4. Preparing the equipment for use
4.1 Assembly of the guide bar and chain
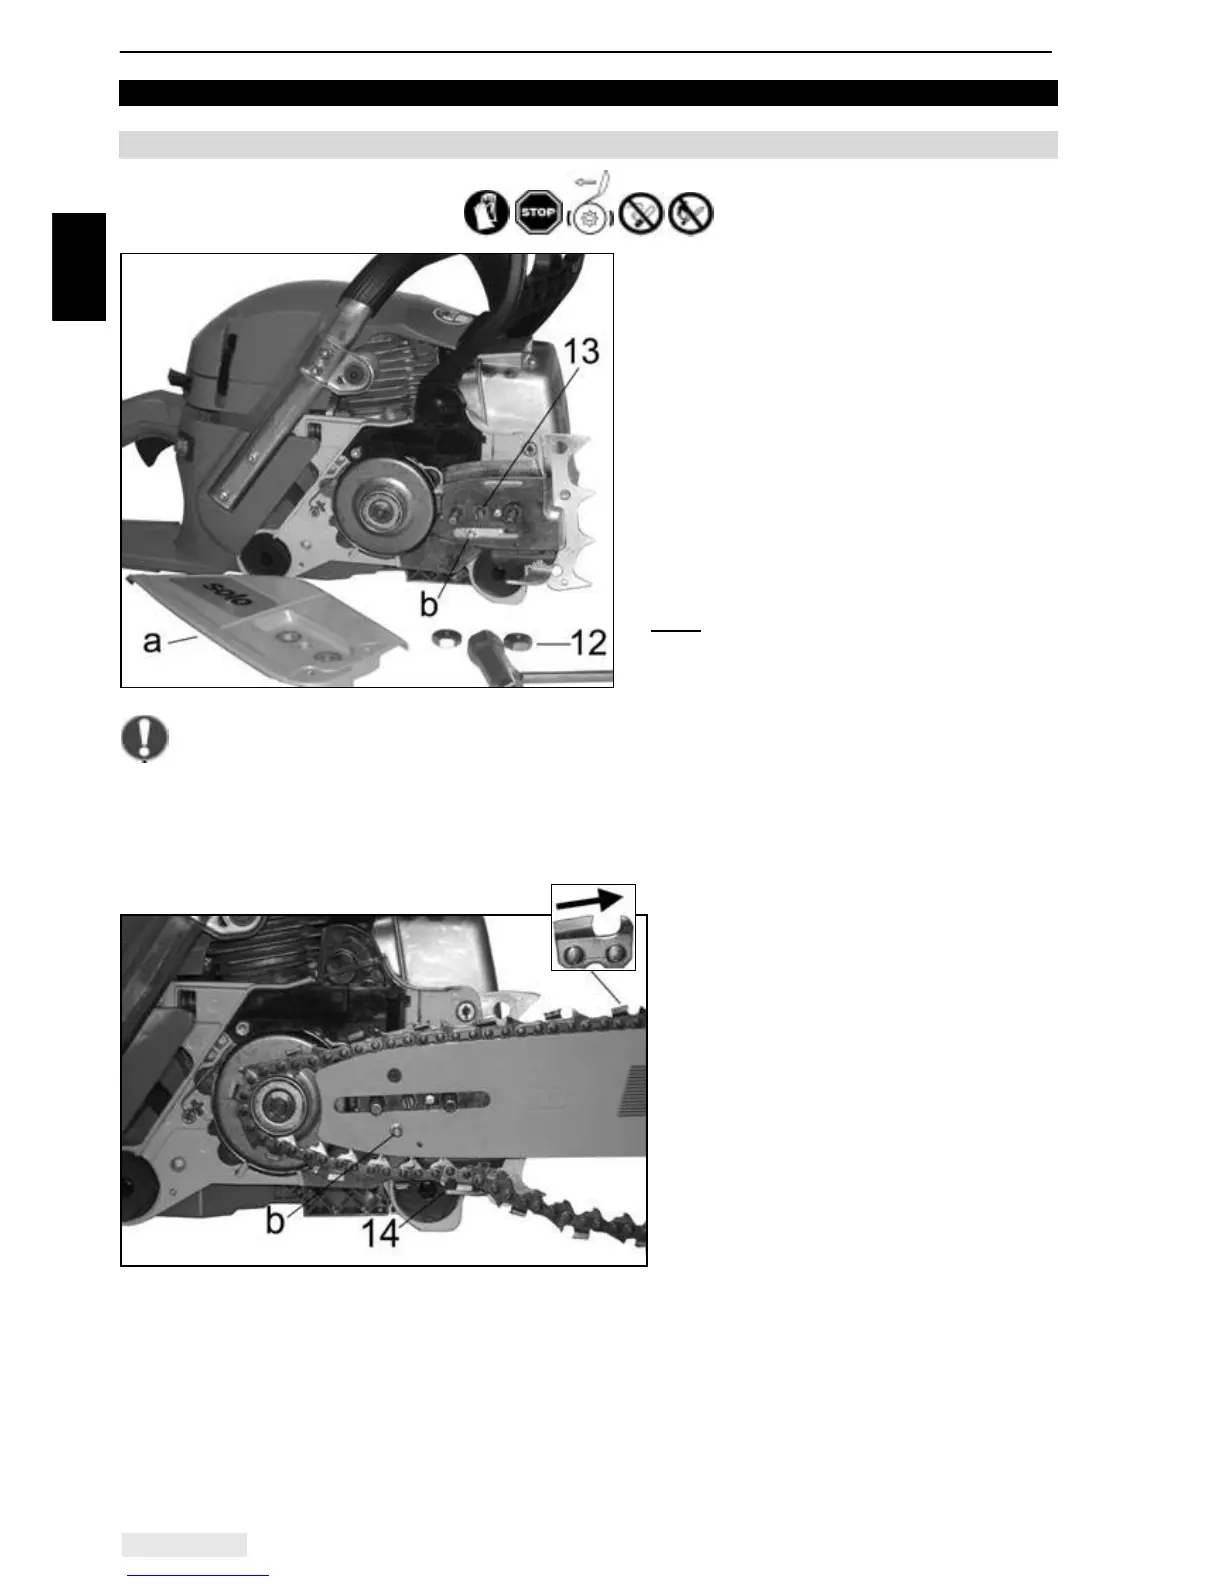
• Undo the retaining nuts on the rail cover
(12).
• Take off the rail cover.
• When setting up the tool for the first time,
remove the cardboard disc inserted at the
factory as transport protection underneath
the rail cover before installing the guide bar.
• On used saws, clean the rail contact
surface and the oil outlet.
• Adjust the chain tensioning cam (b) a little
to the left using the chain tensioning screw
(13), until it is approx. 1 cm in front of the
end stop.
Note:
Each time the guide bar is removed
and installed, adjust the chain tension cam
(b) up to the l.h. end stop.
Always install matching components (sprocket, guide rail, saw chain) (see Chapter 9,
"Permissible cutting gear and further accessories", page 40).
Note for new saw chains:
Before installing a new saw chain we recommend soaking it in a container (bowl) with chain oil with
anti-fling properties for a certain amount of time (preferably overnight).
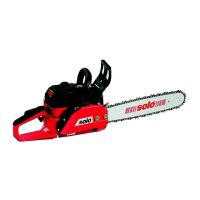
• Position the guide bar; in the process,
the chain tensioning cam (b) must fully
engage in the designated hole in the
guide bar.
• Fit the chain over the sprocket and into
the guide groove of the guide bar.
• The cutting elements of the saw teeth
must be on the upper side of the rail
facing towards the tip of the rail.
• Make sure that the drive links engage
correctly in the cutouts of the sprocket
and in the guide sprocket at the rail tip.
• Fit the rail cover, but initially only tighten
the retaining nuts finger tight.
• After correctly adjusting the chain tension (refer to the next section), tighten the retaining nuts as
described below.