EasyManua.ls Logo

SOMFY Freevia 280 User Manual

SOMFY Freevia 280
37 pages
To Next Page IconTo Next Page
Page #1 background imageLoading...
Page #1 background image
Freevia 280
Freevia 300
Operating and installation guide
Instrukcja montażu i obsługi
5057966C

Other manuals for SOMFY Freevia 280

Questions and Answers:

SOMFY Freevia 280 Specifications

General IconGeneral
Maximum door surface10 m²
Maximum door height2.5 m
Operating voltage230 V
Motor voltage24 V DC
Motor TypeDC motor
Power SupplyMains power
InstallationDIY installation possible
Warranty2 years
Safety FeaturesObstacle detection
Remote ControlYes

Summary

WELCOME

Who are Somfy?

Information about the Somfy company and its products.

Assistance

How to get help and support for Somfy products.

SAFETY INSTRUCTIONS

PRODUCT DESCRIPTION

Composition of the kit

Lists all components included in the Freevia kit, with quantities.

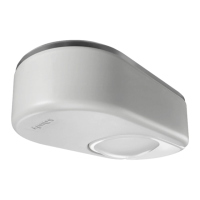
Ambient light detector

Maximum weight and dimensions of the gate

Size of motor (in mm)

General view of the installation

Technical data

PRELIMINARY OPERATIONS

Pre-installation checks

Essential checks to perform before installing the gate motor.

Tools required

List of tools needed for the installation process.

Electrical preequipment

Safety instructions

1. PREPARING THE BASE

Positioning the motor

Instructions on how to correctly position the motor horizontally and vertically.

Fitting the end stops

Guidance on securely fixing end stops to delimit gate travel.

Base

Requirements for anchoring the motor base to the ground.

2. MOUNTING

Fitting the lag screws

Steps for installing the lag screws and plugs for motor mounting.

Mounting the motor

Procedures for attaching the motor to the mounting base.

Fitting the rack

Mechanical adjustment

3. ELECTRICAL CONNECTIONS

Motor connection

Details on connecting the motor to the electronic unit.

Connection to the electrical power supply

Connection to a solar power supply

Safety device connection

4. QUICK COMMISSIONING

Presenting the remote control

How to register remote controls with the motor unit.

Affixing the label to the electronic unit

Guidance on attaching the electronic unit label.

Switching the installation on

Steps to power on the gate motor installation.

Programming the gate travel

Setting the motor's opening and closing travel limits.

5. FITTING THE COVER

OPERATION

Operation in sequential mode

How the gate operates with repeated button presses: Open, Stop, Close.

Pedestrian opening

Performing a partial gate opening using a remote control button.

Operation in automatic mode

Obstacle detection operation

Area lighting operation

Operation of the 3 button remote controls or control points

Unlocking/locking the motor

ADVANCED PARAMETER SETTING

Selection of the buttons of your 2 or 4 button remote controls

Choosing which remote buttons control gate functions.

Memorising a 2 or 4 button remote control

Programming remote controls to operate the gate.

Memorising a 3 button remote control

Adding 3-button remote controls to the system.

Activating pedestrian opening

Activating the AUTO CLOSING mode

ACCESSORIES

Cable cross section by type of accessory

Recommended cable sizes for various accessories.

Cells

Cell location

Guidelines for optimal placement of gate safety cells.

Cell installation and wiring

Step-by-step guide for installing and wiring the safety cells.

Cell recognition by the motor electronics in sequential mode

Deleting cells

Blocking cells

Safety instructions

Orange light

Installing the orange light

Steps for mounting the orange warning light.

Wiring the orange light

Area lighting

Backup battery

Battery wiring and fitting

Key lock

Interphone

Digicode

Offset aerial

2 button remote control

4 button remote control

SOLAR POWER

Connection to the solar power supply

How to connect the solar panel to the motor unit.

Advice for use

Recommendations for optimizing energy consumption with solar power.

TROUBLESHOOTING GUIDE

The motor does not respond to commands from the remote control

Solutions for when the remote control fails to operate the motor.

The electronic unit's STATUS indicator is off

Troubleshooting steps when the status indicator light is not on.

The STATUS indicator of the electronic unit is flashing

Diagnosing issues based on different flashing patterns of the status indicator.

5 pulses

6 pulses

The automatic closing mode does not activate

Assistance

Replacing the remote control battery

Aerial wiring and position

Clear the settings

Clear the memorised settings and remote controls

Related product manuals