65
LT50/60 CMO and LT50 RTS CMO
1) Provide power to the motor.
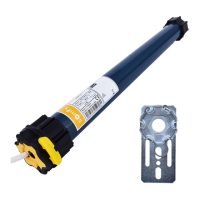
Remove cap as shown in Fig. (2) and depress both limit switch
buttons until they lock in the down position.
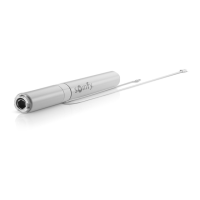
To assign the transmitter to communicate with the motor, push the
UP
and
DOWN
buttons on the transmitter simultaneously until the
motor jogs briefly up and down then release. See Fig. (3).
2) Check the direction of operation.
The
DOWN
button should correspond with the down direction of the end product (for awnings
DOWN
extends the
awning).
If the direction is wrong, press the
STOP
button on the transmitter as shown in Fig. (4) until the motor jogs. Check
the direction again to make sure it is correct.
3) Setting the UP and DOWN limits
Press the
UP
button of the transmitter until the end product
reaches the required UP position, then stop it.
Unlock the UP limit switch on the motor head by pressing
and releasing it. The UP limit is now set.
Repeat the above operation to set the DOWN limit.
4) Recording the settings on your transmitter
Press the programming button on the back of the transmitter
and release when the product jogs briefly UP and DOWN.
The transmitter is now memorized into the motor.
Note: On 4 channel transmitters, verify the desired channel
selection before pressing the programming button.
65
LT50/60 CMO and LT50 RTS CMO
1) Provide power to the motor.
Remove cap as shown in Fig. (2) and depress both limit switch
buttons until they lock in the down position.
To assign the transmitter to communicate with the motor, push the
UP
and
DOWN
buttons on the transmitter simultaneously until the
motor jogs briefly up and down then release. See Fig. (3).
2) Check the direction of operation.
The
DOWN
button should correspond with the down direction of the end product (for awnings
DOWN
extends the
awning).
If the direction is wrong, press the
STOP
button on the transmitter as shown in Fig. (4) until the motor jogs. Check
the direction again to make sure it is correct.
3) Setting the UP and DOWN limits
Press the
UP
button of the transmitter until the end product
reaches the required UP position, then stop it.
Unlock the UP limit switch on the motor head by pressing
and releasing it. The UP limit is now set.
Repeat the above operation to set the DOWN limit.
4) Recording the settings on your transmitter
Press the programming button on the back of the transmitter
and release when the product jogs briefly UP and DOWN.
The transmitter is now memorized into the motor.
Note: On 4 channel transmitters, verify the desired channel
selection before pressing the programming button.
UP
STOP
DOWN
White Button
Yellow Button
Programming and Limit Setting Instructions
120 VAC
60 Hz
NEUTRAL
GROUND
GREEN
W
HITE
HOT
BLACK
5) Setting the intermediate position
Upper Intermediate Position:
Bring the product to its upper limit. Press the
STOP
and
DOWN
buttons
simultaneously then release. When the product reaches the desired intermediate position, press the
STOP
button.
Make adjustments if needed. Press the
STOP
button again until the motor jogs then release.
Lower Intermediate Position:
Bring the product to its lower limit. Press the
STOP
and
UP
buttons simultaneously
then release. When the product reaches the desired intermediate position, press the
STOP
button. Make
adjustments if needed. Press the
STOP
button again until the motor jogs then release.
6) Adding and deleting a transmitter or transmitter channel
To
Add
a transmitter/channel, press the programming button of an already recorded one until the motor jogs.
Select the transmitter/channel to add and press the programming button until the motor jogs.
To
Delete
a transmitter/channel, press the programming button of an already recorded one until the motor jogs.
Select the transmitter/channel to delete and press the programming button until it jogs.
Note: These instructions are for reference only. For more detailed instructions please refer to the installation
instructions packaged with the motor or at www.somfysystems.com under “Technical Documentation”.
For initial programming, provide power only to the motor being programmed.
For awning installations, an awning hood is strongly recommended and a drip loop should be formed to
prevent water from entering the head of the motor as shown in Fig. (1).
Follow the steps below to program the motor and set the limits.
DRIP
LOOP
Fig. (4)Fig. (3)Fig. (2)
Fig. (1)