106
CONTENTS
WELCOME 2
1. SAFETY 3
2. NINA TIMER IO REMOTE CONTROL 5
3. USING NINA TIMER IO 16
Control an item of equipment 16
My function 18
Natural Control function 22
Launch a scenario 27
Sunlight Function 28
Alarm function 32
Timer function 34
Create typical days 39
Program the week 57
View programmed actions 60
4. CUSTOMIZING NINA TIMER IO 68
Customize items of equipment 68
Customize groups 72
Customize scenarios 78
Define timer settings 83
Customize remote control 88
5. ADVANCED SETTINGS 94
6. TROUBLESHOOTING 107
7. ABOUT NINA TIMER IO 108
Copyright © 2017 - 2021 SOMFY ACTIVITÉS SA, Société Anonyme. All rights reserved.
Upgrading an installation already equipped with Nina Timer io
Reset to factory settings
Erases all settings made during the first installation: paired devices, groups, scenarios, alarm code, typical days,
weekly programming, etc.
Reset button and restore factory settings with the Sleep button
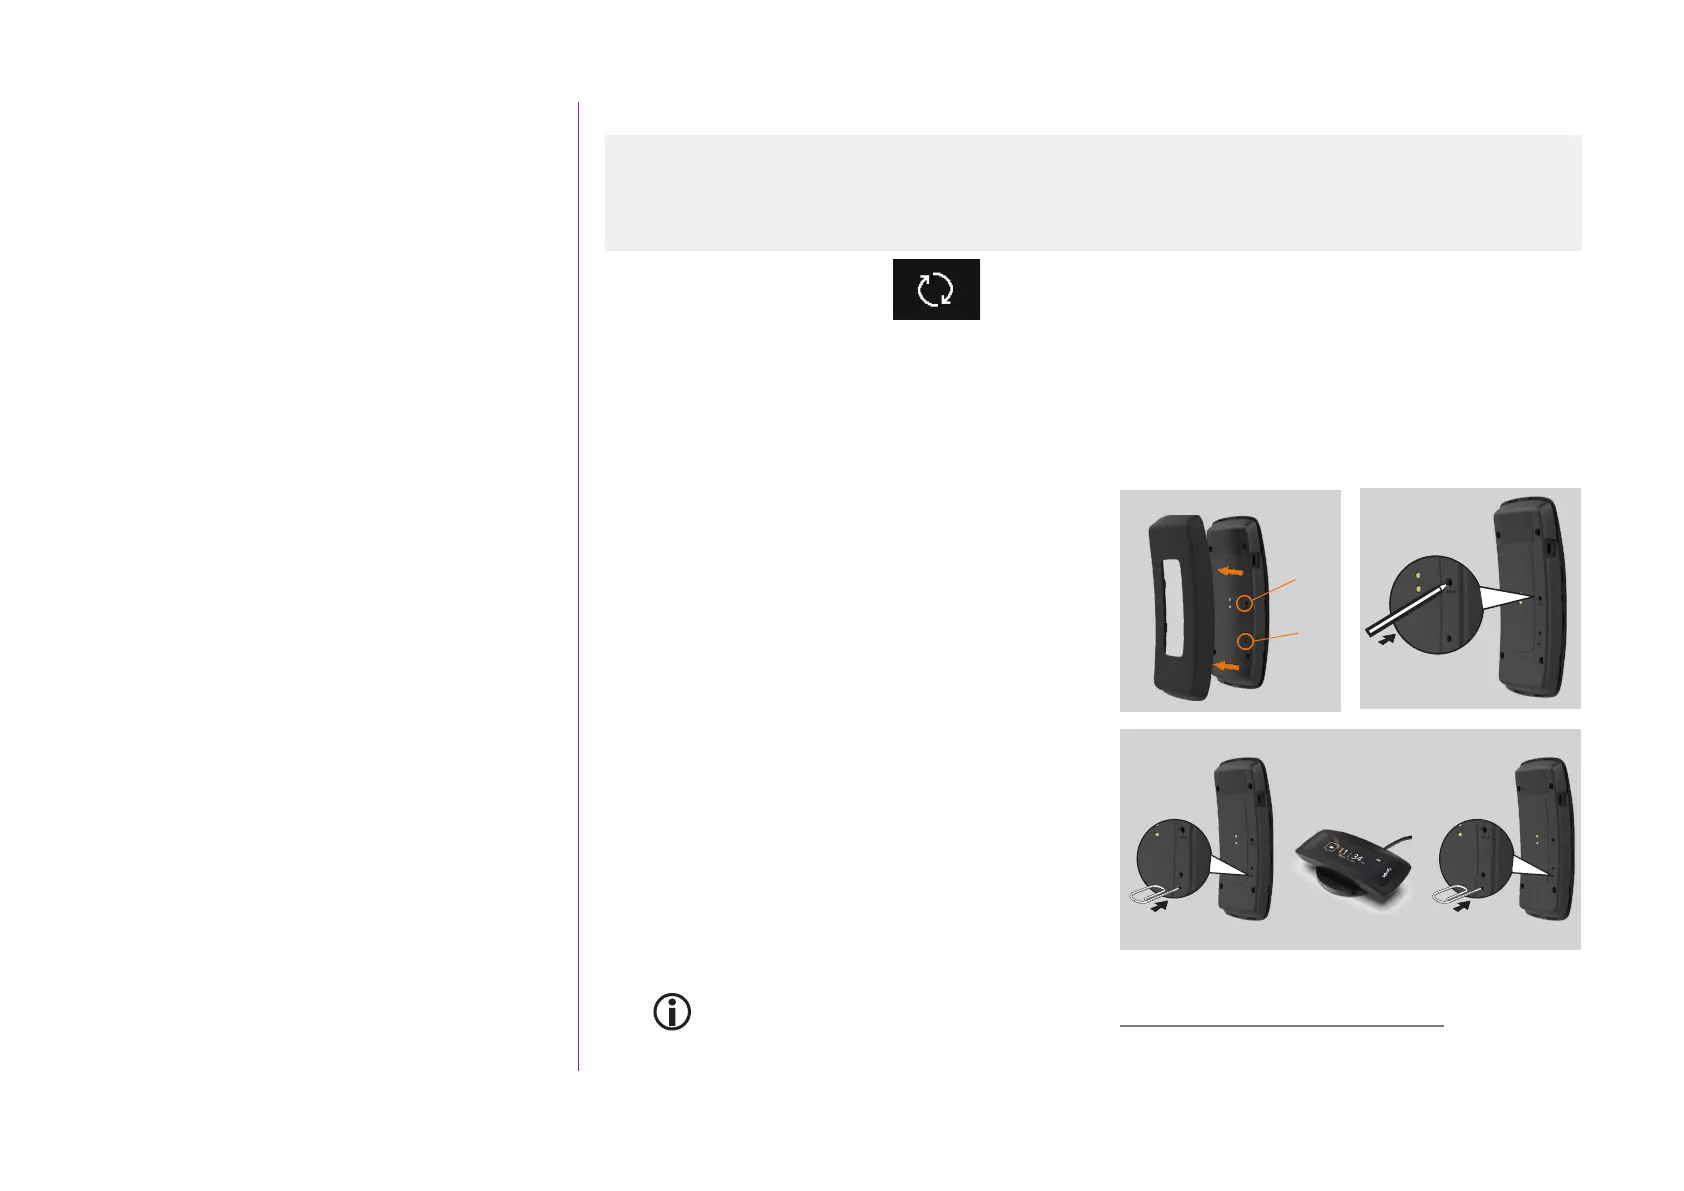
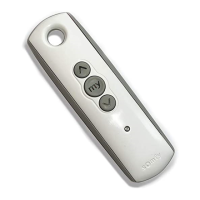
If necessary, there are two buttons on the right on the back of the remote control:
1. Remove the back case from the remote control to
access the buttons: the Reset button (A) is in the
middle, and the Sleep button (B) is at the bottom.
2. To restart the remote control if it is locked or the
screen is frozen: using a pen, briefly press the Reset
button (A). None of the settings are lost.
3. To restore factory settings:
> USING a pointed item (e.g. a paper clip), press the
Sleep button (B) for at least 2 s: the green LED will
flash four times and the remote control will go into
forced standby mode.
> Place the remote control on its base to exit forced
standby mode and while it is restarting (green
LED lit up), press the Sleep button (B) again for at
least 2 s: all of the settings made are deleted.
To restart the installation from the beginning, see First installation of Nina Timer io, page 95.
2
1
A
B
3
B B
A
2
Pair equipment 103
Manage the io system 104
Manage equipment 105
Reset to factory settings 106