95
CONTENTS
WELCOME 2
1. SAFETY 3
2. NINA TIMER IO REMOTE CONTROL 5
3. USING NINA TIMER IO 16
Control an item of equipment 16
My function 18
Natural Control function 22
Launch a scenario 27
Sunlight Function 28
Alarm function 32
Timer function 34
Create typical days 39
Program the week 57
View programmed actions 60
4. CUSTOMIZING NINA TIMER IO 68
Customize items of equipment 68
Customize groups 72
Customize scenarios 78
Define timer settings 83
Customize remote control 88
5. ADVANCED SETTINGS 94
6. TROUBLESHOOTING 107
7. ABOUT NINA TIMER IO 108
Copyright © 2017 - 2021 SOMFY ACTIVITÉS SA, Société Anonyme. All rights reserved.
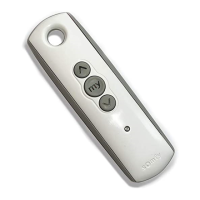
First installation of Nina Timer io
The installation of Nina Timer io remote control is guided by the product itself. From the start, Nina io displays
step by step the dierent key stages to follow to perform the first installation:
Start Nina Timer io
1. Clip the removable case onto the back of the
remote control.
2. Place Nina Timer io on its base.
3. Wait for a few seconds until the end of the
welcome animation and choose a language by
clicking on the corresponding tick box.
4. Click on Start to start pairing the devices.
> Nina Timer io is ready for pairing.
Deutsch
Français
Dutch
Italiano
Español
English
1/2
OK
1
2
3
4
Start Nina Timer io 95
Pair equipment 96
Place equipment in groups/rooms 98
Pair sensors 99
Complete installation 100