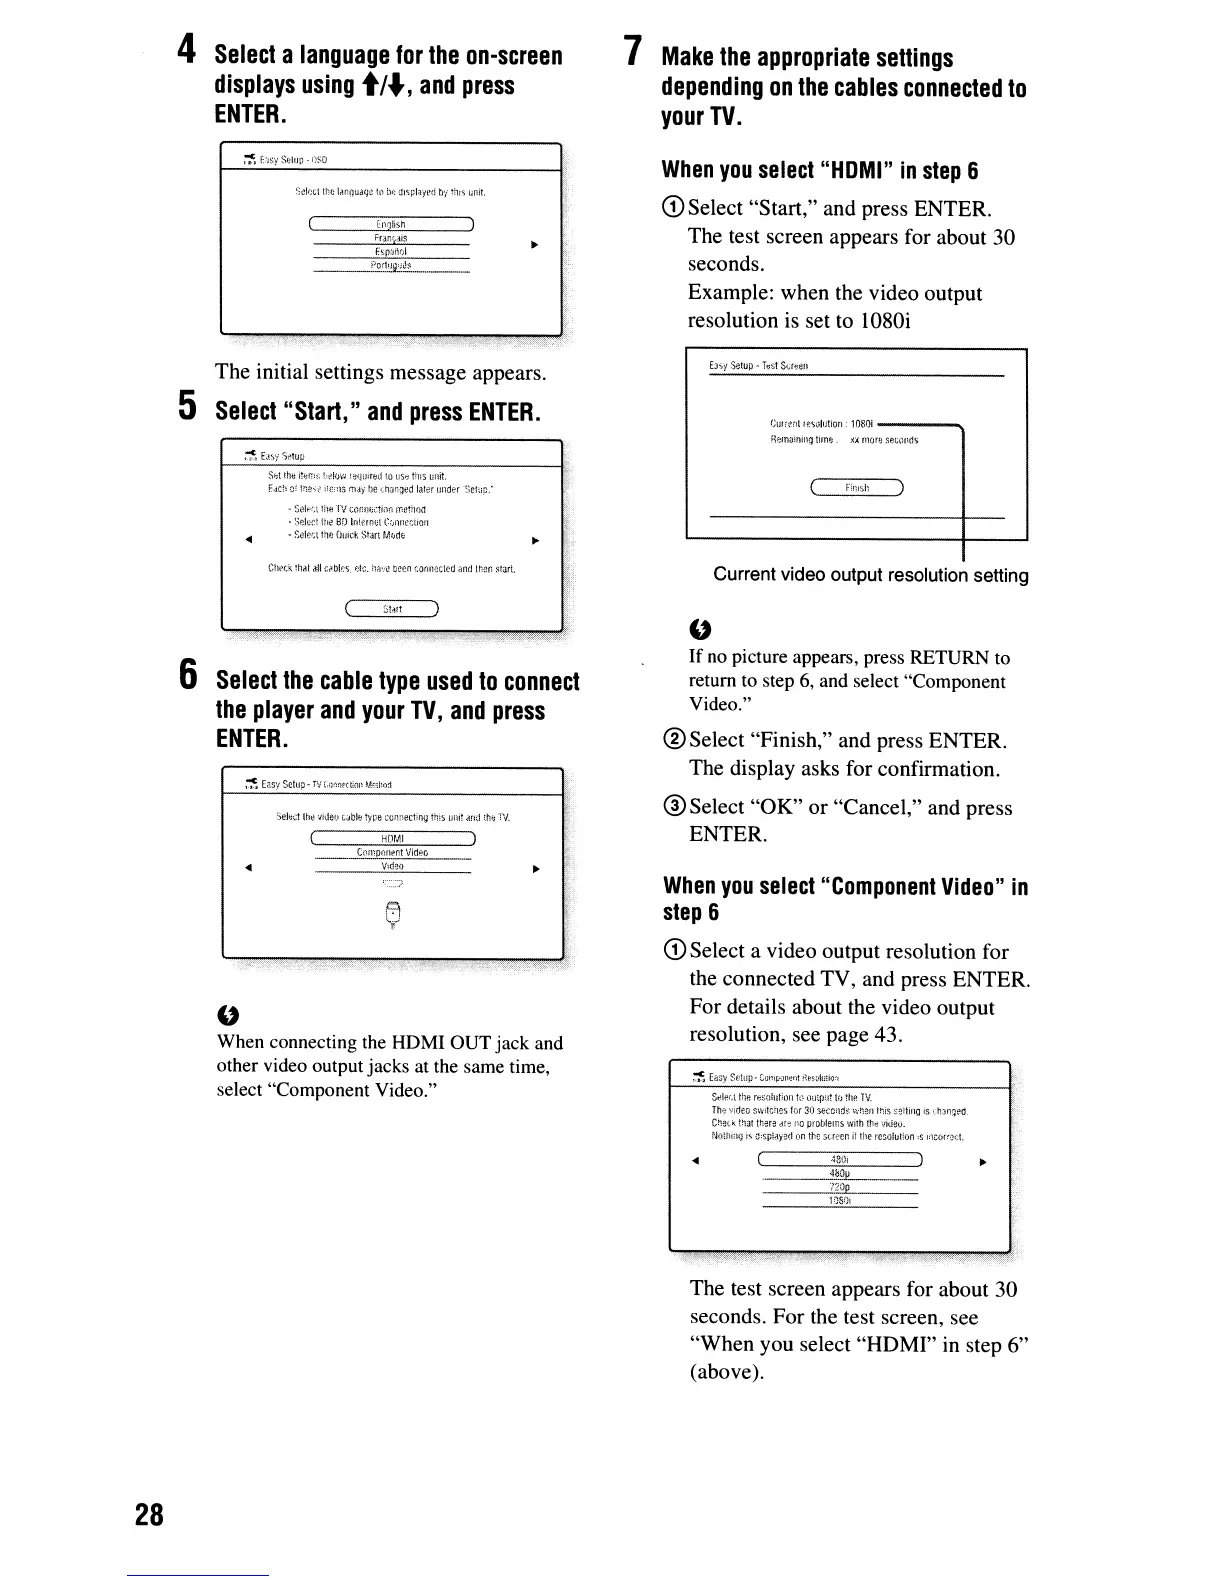
4
Select
a
language
for
the
on-screen
displays
using
t/.,
and
press
ENTER.
7
Make
the
appropriate
settings
depending
on
the
cables
connected
to
your
TV.
I'
Frar;r,.<t1s
"
"""
The initial settings message appears.
5
Select
"Start,"
and
press
ENTER.
.~EJ.W~iitup
Sf,\
rhli
iti;f';!:;
!);!II>\,<
!!:qlJifl:d
to
l;S~
!!1lS
unit.
r.<ich
Of
the,;!
items
m-ii
he
~:haq~d
later
lJlld~r
'Setup:
"
When
you
select
"HDMI"
in
step
6
CD
Select "Start," and press ENTER.
The test screen appears for about 30
seconds.
Example: when the video output
resolution is set to 1080i
CUlrt.nt
leSGl!Hion:
1080i
---
.....
n?maining
time.
fJ. lIlore
sec{)fiCls
(
F"",;h
..
¥
St!If'~.~
r!1f!
TV
cnmllj(:ti(l(1
rr:t~!!ll')i1
.
SelliC!
gil,!
8D
lnlt:lncl C:jOllfction
-
Scle!;t
the
IJUick
Stan
MIJdt
Chetit
:hill
dll
c~bles.
p.t~.
hfl\:e
neen
connected
lind
IMr:
srart.
Current video output resolution setting
28
'."
6
Select
the
cable
type
used
to
connect
the
player
and
your
TV,
and
press
ENTER.
HOMI
Cnmponer:t
Vid~(i
..
A
v
.
"
When connecting the HDM! OUT jack and
other video output jacks at the same time,
select "Component Video."
"
If
no picture appears, press RETURN to
return to step 6, and select "Component
Video."
®Select "Finish," and press ENTER.
The display asks for confirmation.
®Select "OK"
or
"Cancel," and press
ENTER.
When
you
select
"Component
Video"
in
step
6
CD
Select a video output resolution for
the connected TV, and press ENTER.
For details about the video output
resolution, see page 43.
So:"let.t
n.e
resnlllHolI
h1
outpU!
to
the
lV.
The
...
ideo
Sw;lc!les
IQr
30
seconds
\'(i'len
Ir:is
~t;l:tin9
is
i.t;)n~t'd
Chel~
thallh!H3
,Ht:
no
problems
with
lh~
·JiJeu.
Nothi,lg
i-s
n:spl.a'j(!(\
on
lne
sa,?cr.
il
the
rC50llJlion
's
I'lcorr(!cl.
..
(
':80,
)
~
"----~--
lZOp
lDS!),
The test screen appears for about 30
seconds. For the test screen, see
"When you select "HDMI" in step 6"
(above).