Do you have a question about the Sony CCD-TRV26E and is the answer not in the manual?
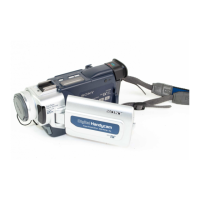
Details on video recording system, audio, signal, and cassette compatibility.
Technical details including image device, viewfinder, lens, and focal distance.
Methods to prevent power shut-off during service operations.
Procedure for forcibly ejecting a cassette when the unit is not ejecting.
Overview of the self-diagnosis function for identifying and resolving issues.
Explains the 4-digit display indicating repaired by, block, and detailed code.
Describes how to access and view up to six past self-diagnosis codes.
Lists self-diagnosis codes, symptoms, and corresponding corrections.
Guidance on how to effectively use the service manual.
Instructions for verifying all included accessories.
Steps for correctly installing and charging the camcorder's battery pack.
Step-by-step guide for removing the front panel and video light components.
Instructions for removing specific boards for color viewfinder models.
Procedures for removing parts for B/W viewfinder models.
Steps for removing the right side cabinet assembly.
Instructions for detaching the cassette lid assembly.
Guide for removing the battery panel assembly.
Steps for removing the left side cabinet assembly.
Instructions for detaching the control switch block (FK-8500).
Procedures for removing the zoom lens assembly and associated board.
Guide for removing multiple key circuit boards.
Instructions for detaching the viewfinder assembly.
Steps for removing the TR cover, CF-60 board, and display panel.
Procedures for removing IR cover, CF-61 board, and LCD panel.
Describes the necessary setup for performing adjustments.
Identifies the placement of various circuit boards within the unit.
Shows the layout and connection points of flexible boards and flat cables.
A comprehensive overview of the camcorder's functional blocks and interconnections.
Detailed block diagram for the camera and video signal processing.
Block diagram illustrating the VTR and camera control functions.
Diagram showing the servo system's components and signal flow.
Block diagram detailing the various operational modes and their control.
Diagram illustrating the audio signal processing path.
Block diagram specific to the Black and White Electronic Viewfinder.
Diagram showing the power supply distribution and control within the unit.
Provides the primary schematic diagram for the camcorder's frame.
Details specific board layouts and their corresponding schematics.
Procedures for adjusting camera-related functions and parameters.
Procedures for adjusting mechanical aspects like tape path and operation without a cassette.
Procedures for adjusting video signal parameters like oscillation, levels, and current.
Procedures for initializing page data and adjusting battery end voltage.
Procedures for adjusting servo system parameters like CAP FG offset and RF switching position.
Procedures for adjusting IR video carrier frequency and deviation.
Covers adjustments for 1.5 MHz deviation and BPF characteristics.
Illustrates the physical locations of components used for adjustments.
Provides detailed exploded views of camcorder assemblies for parts identification.
Comprehensive list of electrical components with part numbers and descriptions.
| Optical Zoom | 20x |
|---|---|
| Image Sensor | CCD |
| Microphone | Built-in |
| Focus Adjustment | Auto/Manual |
| Microphone Type | Mono |
| Screen Size | 2.5 inches |
| Camcorder Media Type | Video8 |
| Image Sensor Size | 1/4 inch |
| Effective Pixels | 270, 000 pixels |
| Recording Time | 120 min (P6-120 tape) |
| Input/Output | AV out |