Managing pictures on a Windows computer
24
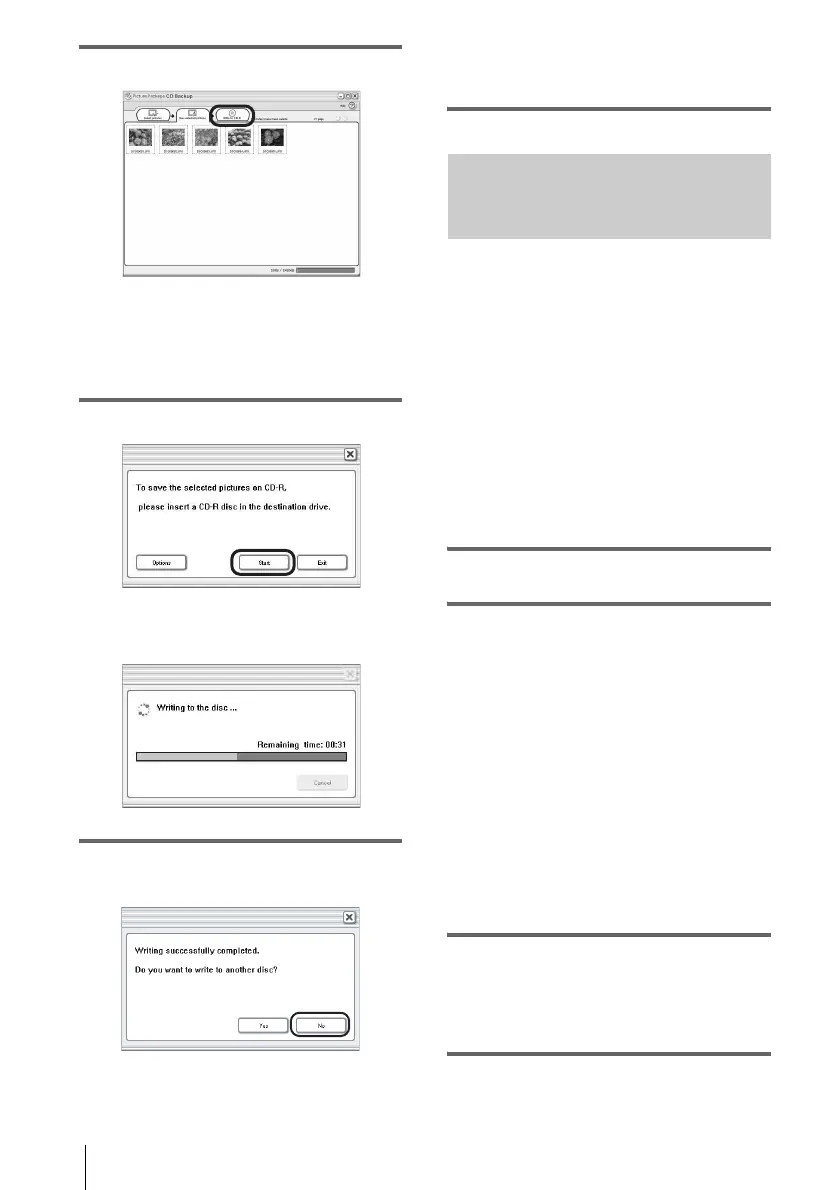
6 Click [Write to CD-R].
.
Place a new CD-R in the disc drive.
b Note
• CD-RWs cannot be used.
7 Click [Start].
Saving to a CD-R starts. The remaining
time appears on the computer screen.
.
8 Click [No] when you want to finish.
The disc tray comes out automatically.
.
To create another copy with the same
content, click [Yes], then place a new CD-
R in the disc drive.
Creating a Video CD (Direct
Access to Video CD Burn)
– Picture Package VCD Maker
You can copy recorded movies on a tape to a
Video CD using a computer equipped with a
disc drive compatible with CD-Rs.
The following procedure describes how to
create a Video CD from a picture recorded on a
tape (maximum length of about one hour).
b Notes
• Some models are not compatible for this operation.
Regarding supported models, check to see if there is
a listing for the Burn VCD feature in the index of the
separate Camera Operations Guide.
• You can only use a USB cable for this operation.
You cannot use an i.LINK cable.
1 Turn on the computer.
2 Prepare the power source for your
camcorder, then slide the POWER
switch repeatedly to select the PLAY/
EDIT mode.
Use the supplied AC Adaptor as the power
source since it takes a few hours to create a
Video CD.
The name of the power switch on the
camcorder varies depending on the model.
z Tip
• Slide the POWER switch to select the
CAMERA-TAPE mode, and you can view
pictures recorded on your camcorder to the
computer directly - USB Streaming.
3 Set [USB STREAM] in the menu
settings of your camcorder to on.
The procedure of the menu settings varies
depending on the model.
4 Insert a recorded cassette into your
camcorder.