4
CX-LMN5
SECTION 2
GENERAL
This section is extracted
from instruction manual.
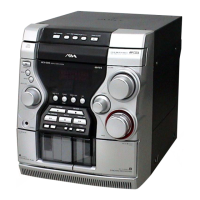
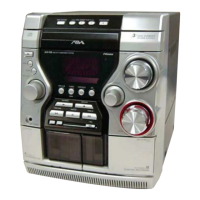
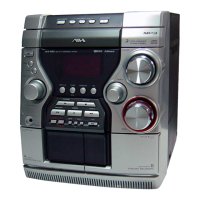
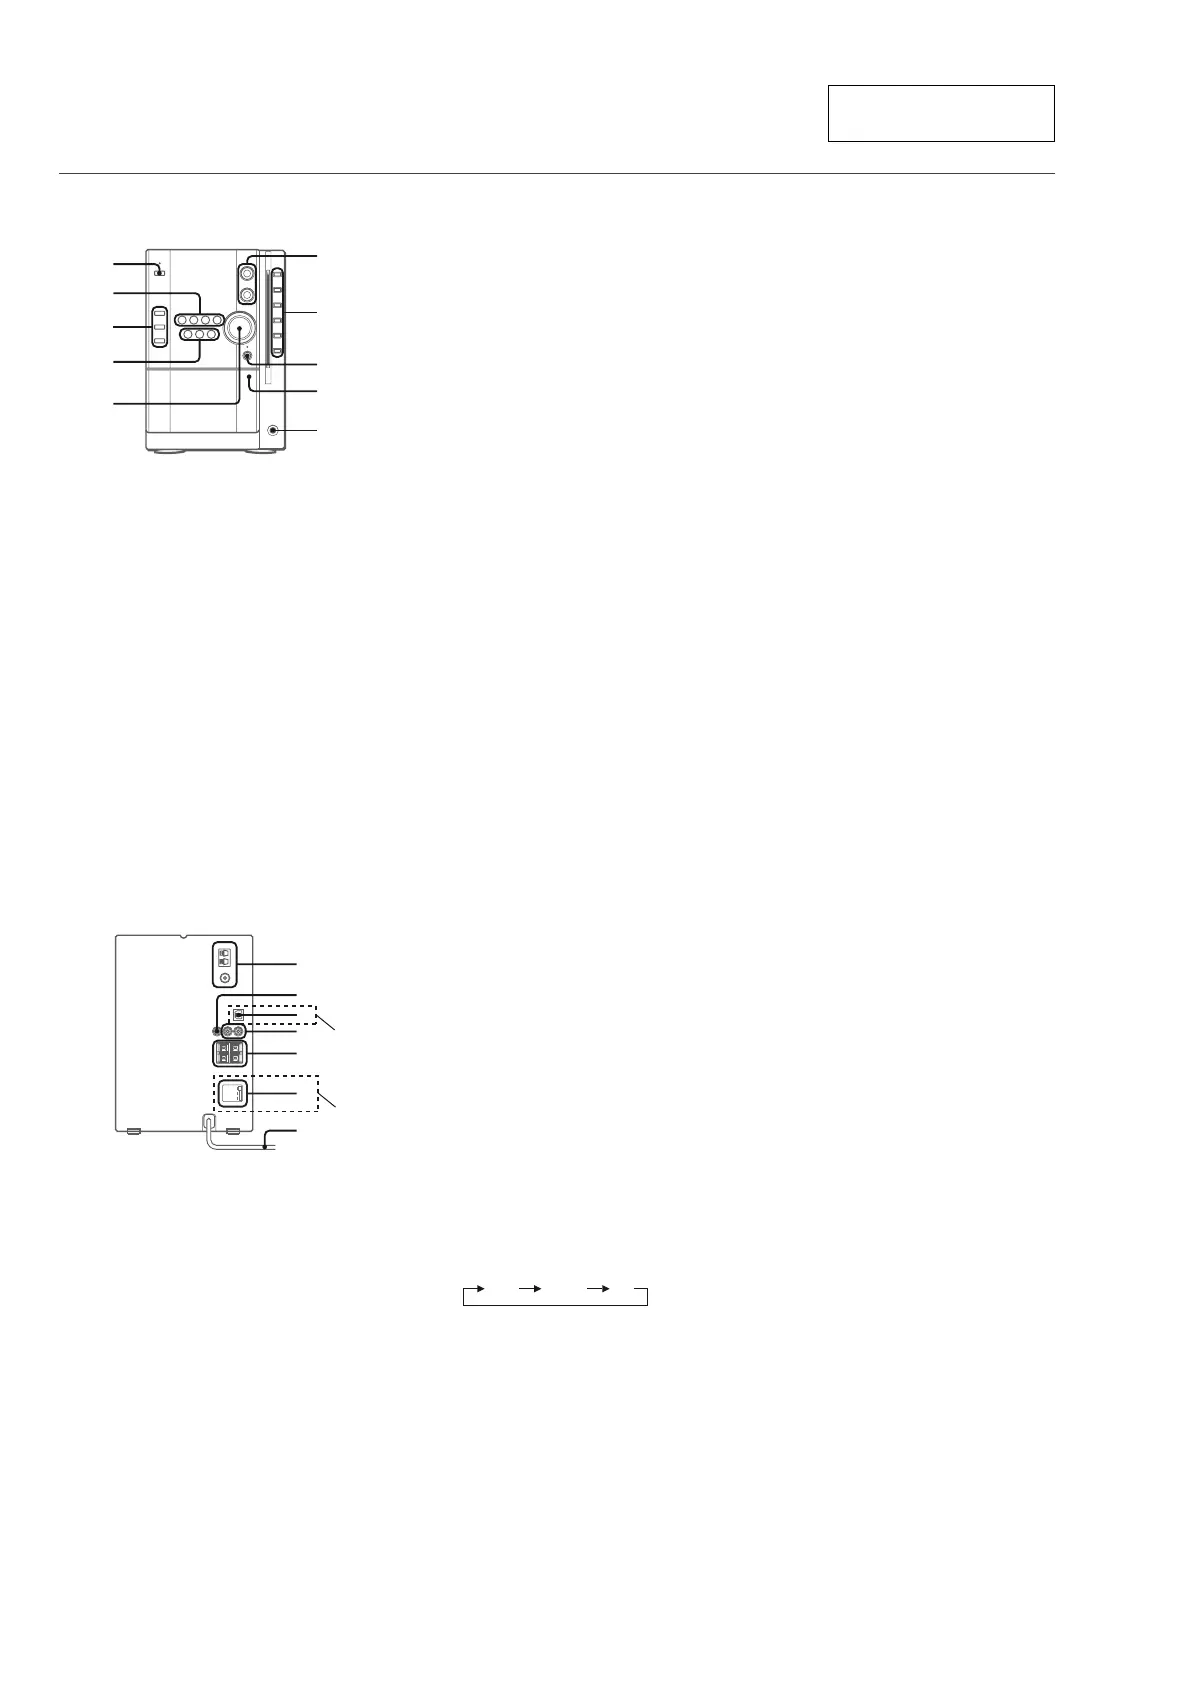
PARTS AND CONTROLS
Main unit: front
Refer to the pages indicated in parentheses for details.
1
4
5
2
3
6
7
8
9
0
1 POWER 6STANDBY/ON (8)
Switches the unit on and off (standby).
2 ECD (8, 10-12)
Starts and pauses CD play.
TUNER/BAND (8, 14)
Selects tuner function and the tuner band.
dTAPE (REC MUTING) (8, 17, 19)
Starts playback and changes the playback side.
Also used to enter 4-second blank spaces during
recording.
AUX (8)
Selects the function of external equipment connected to
AUX IN jacks.
3 ECO/RDS (8, 14-16)
Sets the ECO mode on or off.
Tuner: Activates RDS features.
SYNCHRO REC (18)
Starts recording and CD play simultaneously.
REC START/REC PAUSE (18-20)
Starts and pauses recording.
4 s (10-12, 17, 18, 20)
CD and Tape: stops playback.
Tuner: clears a preset station.
TUNING f/r-, +t/g (8,10-12,
14, 17, 21, 22)
CD: skips to a previous or a succeeding track when
pressed, searches a track in fast forward or reverse
playback when held down.
Tape: rewinds or fast forwards the tape.
Tuner: manually tunes up or down within the band.
5 VOLUME (9)
Adjusts the volume.
6 TREBLE (9)
Adjusts the treble level.
BASS (9)
Adjusts the bass level.
7 zCD EJECT (10, 12)
Ejects the disc(s).
CD slot buttons (1-5) (8, 10-12)
Selects a disc slot.
Starts CD play for one desired disc.
8 i-Bass/DEMO (4, 9)
Produces rich and clear low frequency sound.
Switches DEMO on and off while the unit is turned off.
9 PUSH EJECTz (17-19)
Opens or closes the cassette holder.
0 PHONES jack
Plug in optional headphones set with a stereo mini plug
(ø3.5 mm). Speaker output is cancelled.
Main unit: rear
Refer to the pages indicated in parentheses for details.
1
3
2
4
5
6
1 AM LOOP jack and FM 75 terminal (4)
Plug in the supplied AM and FM antennas.
2 SUB WOOFER3 jack
Connect optional powered sub woofer with a built-in
amplifier to the jack.
3 DIGITAL OUT (OPTICAL) jack (AEP, UK)
CD digital sound signals can be output through this jack.
Use an optical cable to connect digital audio equipment.
Fit an optical cable plug in the DIGITAL OUT (OPTICAL)
jack and push it to connect.
4 AUX IN jacks
Accept analogue sound signals from external equipment.
Connect external equipment using an optional connecting
cable with RCA phono plugs (red plug to R jack, white
plug to L jack). Refer also to the operating instructions
for your equipment.
To switch function to external input, press AUX.
To change a source name in the display of the
AUX function.
Hold down AUX and press POWER while the power is
on.
AUX VIDEO TV
5 SPEAKERS3 terminals (4)
Connect the speaker cords of the supplied speakers.
6 AC power cord (4)
(AEP,UK)
120V
220V
230-240V
7
(E)
7 VOLTAGE SELECTOR (E)
120 V/220 V/230-240 V AC,50/60Hz
www.freeservicemanuals.info
Published in Heiloo, Holland.
 Loading...