6-38
DCR-SR32E/SR33E/SR42/SR42A/SR42E/SR52E/SR62/SR62E/SR72E/SR82/SR82C/SR82E_ADJ
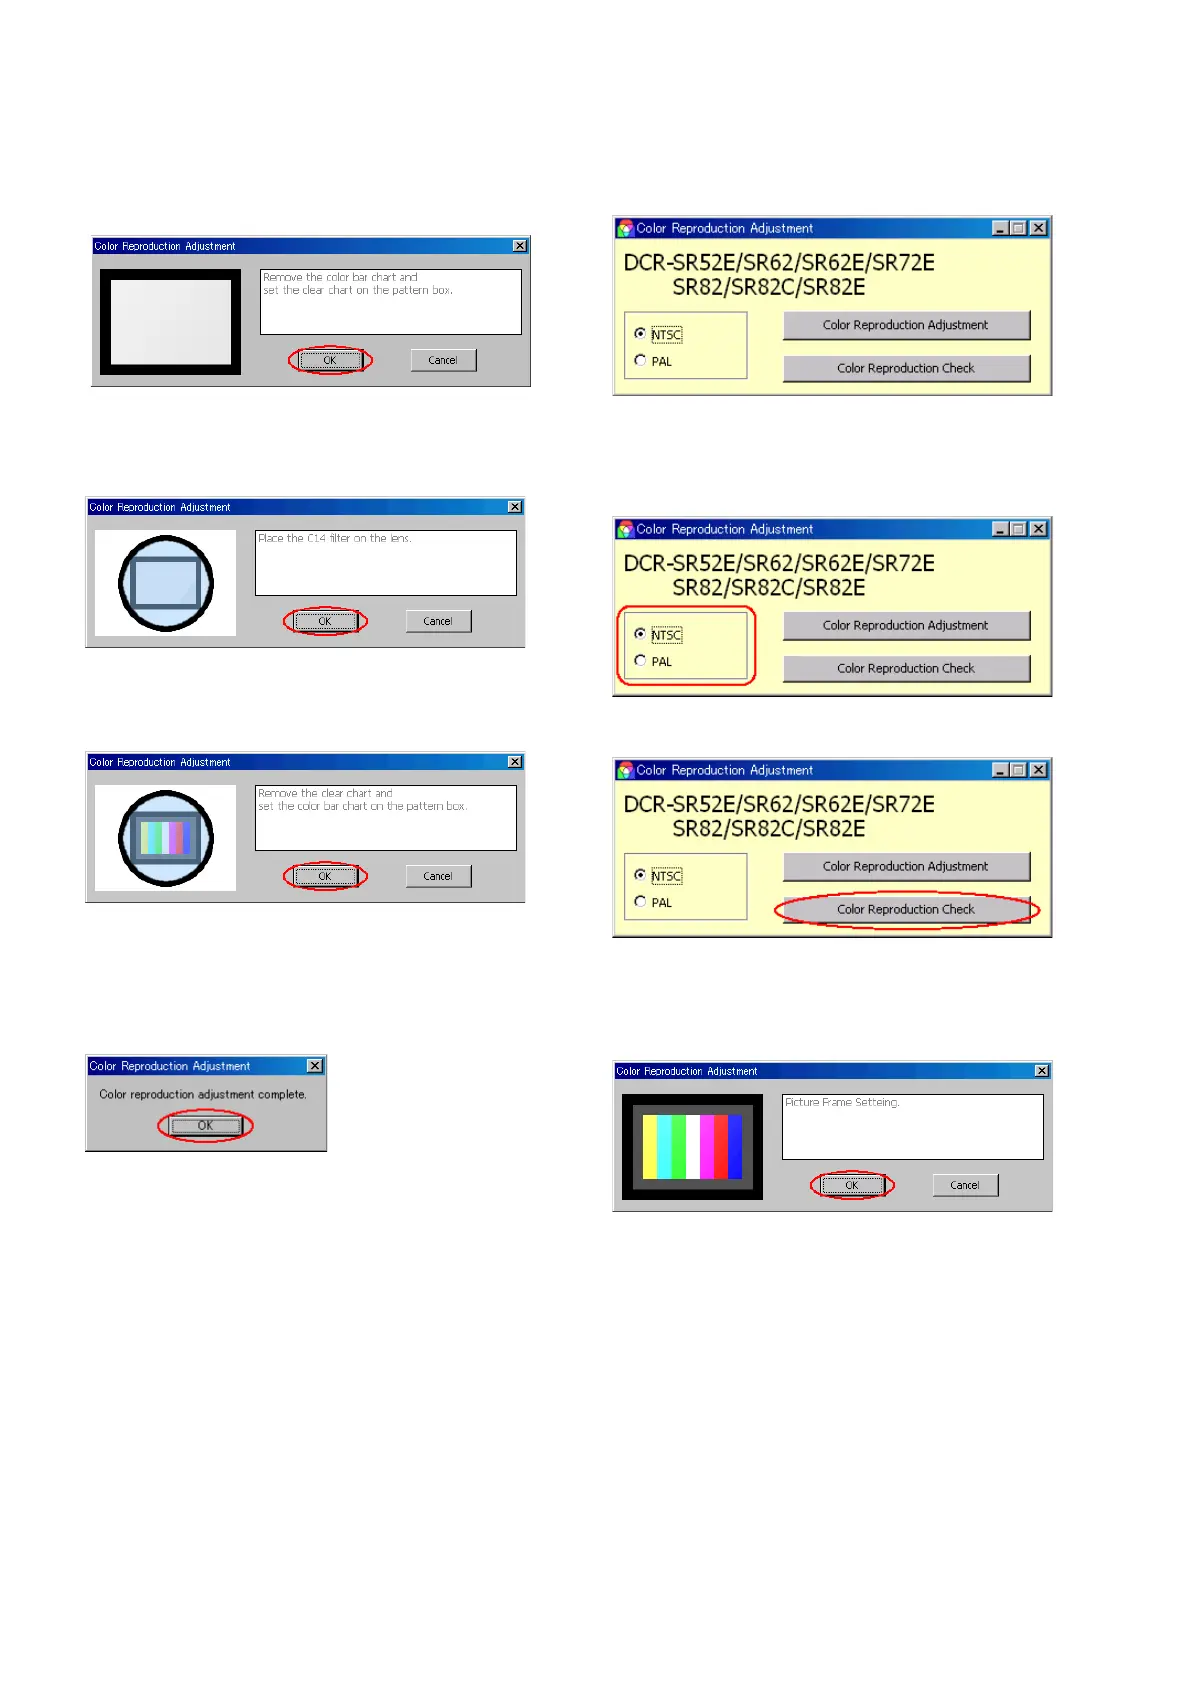
5) The data with the color bar chart are captured, and then the
following message will be displayed.
With the picture frame setting retained, replace the color bar
chart with the clear chart and press the [OK] button.
6) The data with the clear chart are captured, and then the fol-
lowing message will be displayed.
With the clear chart in shooting state, place the C14 filter on
the lens and click the [OK] button.
7) The data with the clear chart + C14 filter are captured, and
then the following message will be displayed.
Replace the clear chart with the color bar chart, and with the
C14 filter placed on the lens, click the [OK] button.
8) The data with the color bar chart + C14 filter are captured, the
adjustment value is calculated, and it is written to the
camcorder.
Upon successful completion, the following message will be
displayed.
Click the [OK] button, and thus the adjustment is complete.
[Checking method]
1) Click the [Start] button in CAMERA Adjustment 5, and the
following screen will appear.
2) Select the model (NTSC or PAL) with the Model Select radio
button.
Note: NTSC model: DCR-SR62/SR82/SR82C
PAL model: DCR-SR52E/SR62E/SR72E/SR82E
3) Click the [Color Reproduction Check] button.
4) The following message will be displayed, and then shoot the
color bar chart and set the picture frame, and then click the
[OK] button.
(Refer to “Picture Frame Setting”)
Ver. 1.7 2008.04