EasyManua.ls Logo

Sony DCR-TRV125E User Manual

Sony DCR-TRV125E
195 pages
To Next Page IconTo Next Page
Page #1 background imageLoading...
Page #1 background image
SERVICE MANUAL
DIGITAL VIDEO CASSETTE RECORDER
SPECIFICATIONS
RMT-814
DCR-TRV120/TRV120E/TRV120P/TRV125E/
TR8000E/TR8100E
US Model
Canadian Model
DCR-TRV120
AEP Model
DCR-TRV120E/TRV125E/TR8000E/TR8100E
UK Model
East European Model
North European Model
Russian Model
DCR-TRV120E/TR8000E
E Model
DCR-TRV120/TRV120E/TRV120P
Hong Kong Model
DCR-TRV120/TRV120E
Korea Model
DCR-TRV120P
Argentina Model
DCR-TRV120P
Brazilian Model
DCR-TRV120
Australian Model
Chinese Model
DCR-TRV120E
Tourist Model
DCR-TRV120/TRV120E
B700 MECHANISM
– Continued on next page –
NTSC MODEL : DCR-TRV120/TRV120P
PAL MODEL : DCR-TRV120E/TRV125E/TR8000E/TR8100E
For MECHANISM ADJUSTMENT, refer to
the “8mm Video MECHANICAL
ADJUSTMENT MANUAL
(9-973-801-11).
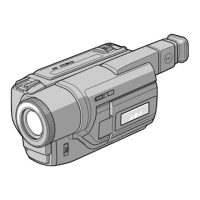
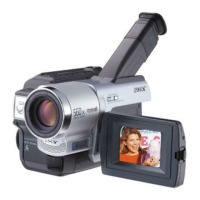
Photo: DCR-TRV120
Ver 1.0 2000. 02

Table of Contents

Questions and Answers:

Sony DCR-TRV125E Specifications

General IconGeneral
Optical Zoom20x
Digital Zoom800x
LCD Screen Size2.5 inches
ViewfinderColor
MicrophoneStereo
Recording MediaMiniDV
Image Sensor1/4-inch CCD

Summary

Digital Video Camera Recorder

Operating Instructions

Provides guidance on how to use the camcorder.

Welcome!

WARNING

Safety precautions to prevent hazards like electric shock or fire.

Customizing Your Camcorder

Changing the menu settings

Details how to navigate and modify camcorder settings through menus.

"Memory Stick" Operations

Covers operations related to the Memory Stick for still image storage.

Additional Information

Provides supplementary details about the camcorder's features and systems.

Quick Reference

Offers a quick guide to camcorder parts and functions.

Checking supplied accessories

Getting Started

Preparing the Power Supply

Covers the initial steps for setting up the camcorder's power source.

Quick Start Guide

Connecting the Mains Lead

Details how to connect the camcorder to the mains power supply.

Inserting a Cassette

Instructions on how to properly insert a cassette into the camcorder.

Quick Start Guide

Recording a Picture

Step-by-step guide on how to start recording video footage.

Monitoring the Playback Picture on the LCD Screen

How to view recorded content on the camcorder's LCD screen.

Quick Start Guide

Connecting the Mains Lead

Details how to connect the camcorder to the mains power supply.

Inserting a Cassette

Instructions on how to properly insert a cassette into the camcorder.

Quick Start Guide

Recording a Picture

Step-by-step guide on how to start recording video footage.

Monitoring the Playback Picture on the LCD Screen

How to view recorded content on the camcorder's LCD screen.

Getting Started

Using this Manual

Explains how to navigate and understand the manual's structure and conventions.

Before Using Your Camcorder

Provides essential information and recommendations before operating the camcorder.

Getting Started

Using this Manual

Explains how to navigate and understand the manual's structure and conventions.

Precautions on Camcorder Care

Important guidelines for maintaining and protecting the camcorder from damage.

Step 1 Preparing the Power Supply

Installing the Battery Pack

Instructions on how to install the battery pack into the camcorder.

Step 1 Preparing the Power Supply

Charging the Battery Pack

Details the procedure for charging the camcorder's battery pack.

Step 1 Preparing the Power Supply

After Charging the Battery Pack

Information and notes after the battery pack has been charged.

Step 1 Preparing the Power Supply

Recording Time/Time Recording

Provides estimated recording times for different battery packs and modes.

Step 1 Preparing the Power Supply

Playing Time/Playback Time

Provides estimated playback times for different battery packs and modes.

Step 1 Preparing the Power Supply

The Remaining Battery Time Indicator

Explains how the battery indicator works and its limitations.

What is "InfoLITHIUM"?

Provides information about the InfoLITHIUM battery technology.

Step 1 Preparing the Power Supply

Connecting to the Mains

Instructions on how to connect the camcorder to AC power.

Step 2 Inserting a Cassette

To Eject a Cassette

Instructions on how to remove a cassette from the camcorder.

Step 2 Inserting a Cassette

To Prevent Accidental Erasure

How to protect the cassette from accidental erasure using the write-protect tab.

Recording – Basics

Recording a Picture

Step-by-step instructions on how to start recording video footage.

Recording – Basics

Notes on Recording Mode

Information about SP and LP recording modes and recommendations.

Note on LOCK (DCR-TRV320E only)

Specific note about the LOCK function for the DCR-TRV320E model.

To Enable Smooth Transition

Tips for creating smooth transitions between recorded scenes.

Recording – Basics

Adjusting the LCD Screen

How to adjust the brightness and position of the LCD screen.

Recording a Picture

After Recording

Steps to take after completing a recording session.

Using the Zoom Feature

Explains how to use the camcorder's zoom functionality.

Recording a Picture

Notes on Digital Zoom

Important notes regarding the use of digital zoom.

To Record Pictures with the Viewfinder

How to adjust the viewfinder for optimal viewing.

Recording a Picture

Indicators Displayed in the Recording Mode

Explains the various indicators shown on the LCD screen during recording.

Recording a Picture

Shooting Backlit Subjects – BACK LIGHT

How to use the backlight function for subjects with backlighting.

Recording a Picture

Shooting in the Dark – NightShot/Super NightShot

Instructions for shooting in low-light conditions using NightShot and Super NightShot.

Using SUPER NIGHTSHOT

Details on how to use the Super NightShot mode for enhanced low-light recording.

Recording a Picture

Notes

General notes and warnings related to using the NightShot function.

Recording a Picture

Self-timer Recording – DCR-TRV320E only

How to use the self-timer for automatic recording.

Recording – Basics

Checking the Recording – END SEARCH / EDITSEARCH / Rec Review

How to check recorded footage using specific playback functions.

Recording – Basics

Rec Review

How to review the most recently stopped recording section.

Playback – Basics

Playing Back a Tape

Step-by-step guide on how to play back recorded tapes.

Playback – Basics

To Display the Screen Indicators

How to show or hide screen indicators during playback.

Playback – Basics

Using the Data Code Function

How to display and use recorded data such as date and time.

Playback – Basics

Various Playback Modes

Explains different modes for playing back recorded tapes.

Playback – Basics

Slow Playback for Tapes Recorded in the Digital8 System

How to perform slow playback for Digital8 tapes.

Viewing the Recording on TV

Viewing the Recording on TV

If Your TV or VCR Has an S Video Jack

How to connect using an S-video jack for higher quality playback.

Viewing the Recording on TV

Using the AV Cordless IR Receiver

How to use the AV cordless IR receiver for wireless TV viewing.

Viewing the Recording on TV

To Cancel the Super Laser Link Function

How to disable the super laser link function.

Advanced Recording Operations

Recording a Still Image on a Tape – Tape Photo Recording

How to record still images onto a tape as photos.

Advanced Recording Operations

Notes

General notes for tape photo recording and its limitations.

Advanced Recording Operations

Self-Timer Tape Photo Recording – DCR-TRV320E only

How to use the self-timer for recording still images onto tape.

Advanced Recording Operations

Printing the Still Image

Instructions on how to print still images using a video printer.

Advanced Recording Operations

Using the Wide Mode

How to record in 16:9 widescreen format for compatible TVs.

Advanced Recording Operations

Using the Wide Mode

How to record in 16:9 widescreen format for compatible TVs.

Advanced Recording Operations

Using the Fader Function

How to use fader effects to create professional-looking transitions.

Advanced Recording Operations

Using the Fader Function

How to use fader effects to create professional-looking transitions.

Using the Fader Function

Advanced Recording Operations

Using Special Effects – Picture Effect

How to apply various digital picture effects to enhance recordings.

Using Special Effects

– Picture Effect

How to apply various digital picture effects to enhance recordings.

Using Special Effects

– Digital Effect

How to add digital effects to recorded images.

Using Special Effects

– Digital Effect

How to add digital effects to recorded images.

Using Special Effects

– Digital Effect

How to add digital effects to recorded images.

Using the PROGRAM AE Function

Using the PROGRAM AE Function

Notes

Notes on limitations and compatibility of PROGRAM AE modes.

Adjusting the Exposure Manually

To Return to the Automatic Exposure Mode

How to revert to automatic exposure from manual settings.

Focusing Manually

To Return to the Autofocus Mode

How to switch back to autofocus mode.

Focusing Manually

Superimposing a Title

Superimposing a Title

To Superimpose the Title While You Are Recording

How to add a title directly during recording.

Making Your Own Titles

Making Your Own Titles

Advanced Recording Operations

Inserting a Scene

How to insert a new scene into an existing recording.

Advanced Playback Operations

Playing Back a Tape with Picture Effects

How to play back tapes with applied picture effects.

Advanced Playback Operations

Playing Back a Tape with Digital Effects

How to play back tapes with applied digital effects.

Advanced Playback Operations

Enlarging Recorded Images – PB ZOOM

How to enlarge recorded images using the PB ZOOM feature.

Advanced Playback Operations

Enlarging Still Images Recorded on Memory Sticks – Memory PB ZOOM

How to enlarge still images from a Memory Stick.

Advanced Playback Operations

Quickly Locating a Scene Using the Zero Set Memory Function

How to quickly find specific scenes using the zero set memory function.

Advanced Playback Operations

Searching a Recording by Date – Date Search

How to search for recordings based on the date they were made.

Advanced Playback Operations

Searching a Recording by Date – Date Search

How to search for recordings based on the date they were made.

Advanced Playback Operations

Searching for a Photo – Photo Search/Photo Scan

How to search and scan for still images recorded on tape.

Advanced Playback Operations

Searching for a Photo – Photo Search/Photo Scan

How to search and scan for still images recorded on tape.

Editing

Dubbing a Tape

How to copy recordings from one tape to another using an AV cable.

Editing

Dubbing a Tape

Information on editing tapes using VCRs and different video systems.

Editing

Dubbing a Tape

How to dub tapes using an i.LINK (DV) cable for digital transfer.

Editing

Dubbing a Tape

Notes on dubbing tapes and limitations of digital editing.

Editing

Using with Analog Video Unit and PC – Signal Convert Function

How to capture analog video signals and convert them to digital using a PC.

Editing

Using with Analog Video Unit and PC – Signal Convert Function

Notes and precautions for capturing and converting analog video signals.

Editing

Recording Video or TV Programmes

How to record TV programs or video from other VCRs.

Editing

Recording Video or TV Programmes

Details on connecting to TVs or VCRs for recording video or TV programs.

Editing

Recording Video or TV Programmes

How to record TV programs or video from other VCRs using an i.LINK cable.

Editing

Recording Video or TV Programmes

Notes on digital editing and recording paused video.

Editing

Inserting a Scene from a VCR – Insert Editing

How to insert a new scene into an existing recording.

Editing

Inserting a Scene from a VCR – Insert Editing

Detailed steps for insert editing a scene from a VCR.

Editing

Inserting a Scene from a VCR – Insert Editing

Notes and alternative methods for insert editing.

Customizing Your Camcorder

Changing the Menu Settings

Explains how to personalize camcorder settings and functions.

Customizing Your Camcorder

Changing the Menu Settings

Details how to navigate and modify camcorder settings through menus.

Selecting the Mode Setting of Each Item

Explains how to set specific modes for various camcorder functions.

Customizing Your Camcorder

Changing the Menu Settings

Details various menu settings for playback and audio modes.

Customizing Your Camcorder

Changing the Menu Settings

Details menu settings for LCD, quality, print marks, and formatting.

Customizing Your Camcorder

Changing the Menu Settings

Details menu settings for recording modes, audio modes, and tape playback.

Customizing Your Camcorder

Changing the Menu Settings

Details menu settings for clock, TV input, and demo mode.

Customizing Your Camcorder

Changing the Menu Settings

Details menu settings for world time, beep, commander, display, and indicators.

Customizing Your Camcorder

Selecting the Mode Setting of Each Item

Explains how to set specific modes for various camcorder functions.

Customizing Your Camcorder

Changing the Menu Settings

Details menu settings for HiFi Sound, TBC, DNR, Audio Mix, NTSC PB, PB Mode, and A/V t DV OUT.

Customizing Your Camcorder

Changing the Menu Settings

Details menu settings for LCD, quality, print marks, and formatting.

Customizing Your Camcorder

Changing the Menu Settings

Details menu settings for recording mode, audio mode, remaining tape display, and data code.

Customizing Your Camcorder

Changing the Menu Settings

Details menu settings for clock, TV input, and demo mode.

Customizing Your Camcorder

Changing the Menu Settings

Details menu settings for world time, beep, commander, display, and indicators.

Customizing Your Camcorder

Resetting the Date and Time

How to set the camcorder's date and time.

Customizing Your Camcorder

Resetting the Date and Time

Information about date and time settings and their display.

"Memory Stick" Operations

Using "Memory Stick" – Introduction

An introduction to the Memory Stick functionality and its basic use.

"Memory Stick" Operations

Using "Memory Stick" – Introduction

Precautions and compatibility notes for using the Memory Stick.

"Memory Stick" Operations

Inserting "Memory Stick"

Instructions on how to insert a Memory Stick into the camcorder.

To Eject the "Memory Stick"

How to remove a Memory Stick from the camcorder.

"Memory Stick" Operations

Selecting Image Quality Mode

How to choose the image quality setting for still images.

"Memory Stick" Operations

Image Quality Settings

Details on image quality settings (FINE, STANDARD) and memory capacity.

Recording Still Images on "Memory Stick"

– Memory Photo Recording

Specific steps for recording still images in Memory Photo mode.

Recording Still Images on "Memory Stick"

– Memory Photo Recording

Notes and limitations when recording still images.

Recording Still Images on "Memory Stick"

– Memory Photo Recording

How to select continuous shooting modes for Memory Photo.

Recording Still Images on "Memory Stick"

– Memory Photo Recording

Details on continuous shooting settings and multi-screen mode.

Recording Still Images on "Memory Stick"

Self-Timer Memory Photo Recording

How to use the self-timer for recording still images onto Memory Stick.

"Memory Stick" Operations

Superimposing a Still Image in the "Memory Stick" on a Moving Image – MEMORY MIX

How to superimpose still images from Memory Stick onto moving video.

"Memory Stick" Operations

Superimposing a Still Image in the "Memory Stick" on a Moving Image – MEMORY MIX

Details on different MEMORY MIX modes and their effects.

"Memory Stick" Operations

Superimposing a Still Image in the "Memory Stick" on a Moving Image – MEMORY MIX

How to change the still image or mode setting for MEMORY MIX.

"Memory Stick" Operations

Superimposing a Still Image in the "Memory Stick" on a Moving Image – MEMORY MIX

Notes on mode settings and image capacity during MEMORY MIX.

"Memory Stick" Operations

Recording an Image from a Tape as a Still Image

How to record moving images from tape as still images onto Memory Stick.

"Memory Stick" Operations

Recording an Image from a Tape as a Still Image

Notes on recording images from tape as still images, including sound and titles.

"Memory Stick" Operations

Recording a Still Image from Other Equipment

How to record still images from external equipment like TV or VCR.

"Memory Stick" Operations

Using the i.LINK Cable (DV Connecting Cable)

How to use the i.LINK cable for transferring images from tape as still images.

"Memory Stick" Operations

Copying Still Images from a Tape – Photo Save

How to copy still images from tape to Memory Stick using Photo Save.

"Memory Stick" Operations

Copying Still Images from a Tape – Photo Save

Notes on stopping copying, full memory, and write-protect tabs.

"Memory Stick" Operations

Viewing a Still Image – Memory Photo Playback

How to play back still images recorded on Memory Stick.

"Memory Stick" Operations

Viewing a Still Image – Memory Photo Playback

How to play back recorded images on a TV screen and notes on image quality.

"Memory Stick" Operations

Viewing a Still Image – Memory Photo Playback

How to play back multiple recorded images at once using the index screen.

"Memory Stick" Operations

Viewing the Recorded Images Using a Personal Computer

How to view Memory Stick images on a PC using supplied software and cable.

"Memory Stick" Operations

Copying the Image Recorded on “Memory Stick” to Tapes

How to copy still images and titles from Memory Stick to tape.

"Memory Stick" Operations

Copying the Image Recorded on “Memory Stick” to Tapes

Notes and limitations on copying images from Memory Stick to tapes.

"Memory Stick" Operations

Enlarging Still Images Recorded on “Memory Stick”s – Memory PB ZOOM

How to enlarge still images from Memory Stick using PB ZOOM.

"Memory Stick" Operations

Playing Back Images in a Continuous Loop – SLIDE SHOW

How to play back images in a continuous slideshow loop.

"Memory Stick" Operations

Playing Back Images in a Continuous Loop – SLIDE SHOW

How to stop or pause the slideshow and view on TV.

Preventing Accidental Erasure

– Image Protection

Steps to protect selected images on the Memory Stick.

Preventing Accidental Erasure

– Image Protection

How to cancel image protection.

Deleting Images

Deleting Selected Images

Steps to delete specific images from the Memory Stick.

Deleting Images

Deleting All the Images

How to delete all unprotected images from the Memory Stick.

Deleting Images

To Cancel Deleting All the Images in the "Memory Stick"

How to cancel the deletion of all images.

Writing a Print Mark

– PRINT MARK

Steps to add print marks to still images.

Writing a Print Mark

– PRINT MARK

How to cancel writing print marks.

Additional Information

Digital8 System, Recording and Playback

Explains the Digital8 system's capabilities for recording and playback.

Digital8 System, Recording and Playback

Copyright Signal

Information regarding copyright signals and recording restrictions.

Digital8 System, Recording and Playback

When You Playback a Dual Sound Track Tape

How to playback tapes with dual sound tracks.

About i.LINK

What is “i.LINK”?

Explains what i.LINK is and its capabilities for digital data transfer.

About i.LINK

i.LINK Baud Rate

Details the different baud rates supported by the i.LINK interface.

i.LINK Functions on this Unit

Describes the i.LINK functions available on the camcorder.

Changing the Lithium Battery in Your Camcorder

Changing the Lithium Battery

Instructions on how to replace the camcorder's internal lithium battery.

Changing the Lithium Battery in Your Camcorder

Changing the Lithium Battery

Visual guide for replacing the lithium battery.

Troubleshooting

In the Recording Mode

Troubleshooting steps for issues occurring during recording.

Troubleshooting

In the Recording Mode

Troubleshooting steps for issues occurring during recording.

In the Playback Mode

Troubleshooting steps for issues occurring during playback.

Troubleshooting

In the Recording and Playback Modes

Troubleshooting common issues across both recording and playback modes.

Troubleshooting

When Operating Using the "Memory Stick"

Troubleshooting specific issues related to Memory Stick operations.

Troubleshooting

Others

Troubleshooting for miscellaneous issues not covered in specific modes.

Self-Diagnosis Display

Warning Indicators and Messages

Warning Indicators and Messages

Troubleshooting

In the Recording Mode

Troubleshooting steps for issues occurring during recording.

Troubleshooting

In the Recording Mode

Troubleshooting steps for issues occurring during recording.

In the Playback Mode

Troubleshooting steps for issues occurring during playback.

Troubleshooting

In the Recording and Playback Modes

Troubleshooting common issues across both recording and playback modes.

Troubleshooting

When Operating Using the "Memory Stick"

Troubleshooting specific issues related to Memory Stick operations.

Troubleshooting

Others

Troubleshooting for miscellaneous issues not covered in specific modes.

Self-Diagnosis Display

Warning Indicators and Messages

Warning Indicators and Messages

Using Your Camcorder Abroad

Using Your Camcorder Abroad

Guidelines for operating the camcorder in different countries.

Simple Setting of Clock by Time Difference

How to adjust the clock based on time differences.

Maintenance Information and Precautions

Moisture Condensation

How to deal with and prevent moisture condensation issues.

Maintenance Information and Precautions

Maintenance Information

Instructions on cleaning the LCD screen and video heads.

Maintenance Information and Precautions

Removing Dust from Inside the Viewfinder

How to clean dust from the camcorder's viewfinder.

Maintenance Information and Precautions

Precautions

General precautions for camcorder operation, handling tapes, and care.

Maintenance Information and Precautions

Connection to Your PC

How to connect the camcorder to a PC for data transfer and editing.

AC Power Adaptor

Safety precautions and notes regarding the use of the AC power adaptor.

Maintenance Information and Precautions

Battery Pack

Important notes and precautions regarding the use and care of the battery pack.

Specifications

Technical Specifications

Quick Reference

Identifying the Parts and Controls

Identifies and explains the function of various camcorder buttons and components.

Identifying the Parts and Controls

Video Control Buttons

Explains the function of the video control buttons.

Identifying the Parts and Controls

Attaching the Shoulder Strap

Instructions on how to attach the shoulder strap.

Identifying the Parts and Controls

Notes on the Intelligent Accessory Shoe

Information about the intelligent accessory shoe and its usage.

Identifying the Parts and Controls

LANC Control Jack

Explains the function of the LANC control jack.

Identifying the Parts and Controls

Remote Commander

Explains the functions of the remote commander and its buttons.

Identifying the Parts and Controls

To Prepare the Remote Commander

How to prepare the remote commander by inserting batteries.

Identifying the Parts and Controls

Operation Indicators

Explains the various operation indicators on the LCD screen and viewfinder.

Identifying the Parts and Controls

Operation Indicators

Explains the various operation indicators on the LCD screen and viewfinder.

Quick Function Guide

Functions to Adjust Exposure (in the Recording Mode)

Lists functions for adjusting exposure settings during recording.

Quick Function Guide

Functions to Adjust Exposure (in the Recording Mode)

Lists functions for adjusting exposure settings during recording.

Related product manuals