EasyManua.ls Logo

Sony Digital8 DCR-TRV120 User Manual

Sony Digital8 DCR-TRV120
132 pages
To Next Page IconTo Next Page
Page #1 background imageLoading...
Page #1 background image
Digital
Video Camera
Recorder ti
Operating Instructions
Before operating the unit, please read this manual thoroughly,
and retain it for fi_tt_re reference.
Owner's Record
The model and serial numbers are located on tile bottom. Record tile
serial number in tile space provided below. Refer to these numbers
whenever you call upon your Sony dealer regarding this product.
Model No. DCR.TRV Model No. AC
Serial No. Serial No.
DCR-TRV320
I_i®i_®DHandgcam
C't_'n'°"T'u_0
0 "_
MEMORY 5TICK _M
Digital8
DCR-TRV120/TR V320
@2000 Sony Corporation
Question and Answer IconNeed help?

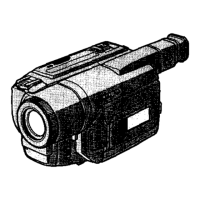
Do you have a question about the Sony Digital8 DCR-TRV120 and is the answer not in the manual?

Sony Digital8 DCR-TRV120 Specifications

General IconGeneral
Video FormatDigital8
Optical Zoom20x
ViewfinderColor
LCD Screen Size2.5 inches
Image StabilizationElectronic
MicrophoneStereo
USBNo
FireWire (IEEE 1394)Yes
Battery TypeNP-F330 InfoLITHIUM
Image Sensor1/4" CCD
Recording MediaHi8 Tape
ConnectivityComposite video/audio

Summary

Operating Instructions

Owner's Record

Section to record camcorder model and serial numbers.

Welcome and Safety Information

Welcome Message

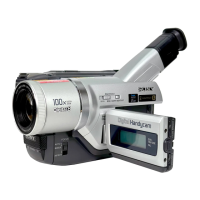
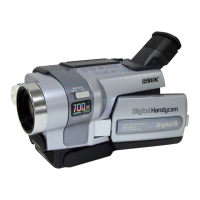
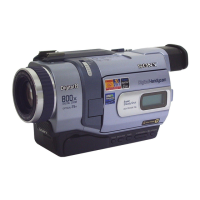
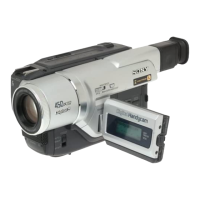
Congratulatory message on purchasing the camcorder.

Safety Warnings

Important warnings to prevent fire or shock hazards.

FCC Compliance Statements

FCC compliance statements for specific models.

FCC Notes and Electrical Safety

FCC Compliance Notes

Details on FCC rules and interference.

Electrical Safety Caution

Warning to prevent electric shock when inserting the plug.

Checking Supplied Accessories

Quick Start Guide

Connecting Power Cord

Instructions for connecting the camcorder to a power source.

Inserting Cassette

Step-by-step guide for inserting a cassette into the camcorder.

Basic Recording and Playback

Recording a Picture

Basic steps to start and stop recording a picture.

Monitoring Playback on LCD

How to play back recorded tapes and monitor on the LCD screen.

Manual Usage and Model Differences

Using This Manual

Guidance on how to read and understand the manual's instructions.

Camcorder Model Differences

Comparison of features between DCR-TRV120 and DCR-TRV320 models.

Camcorder Care Precautions

Preparing the Power Supply

Installing the Battery Pack

Steps for installing and removing the battery pack.

Charging the Battery Pack

Battery Performance Data

Charging Times

Table detailing charging times for different battery packs.

Recording Times

Table detailing recording times with different battery packs.

Battery Playing Times

Connecting to a Wall Outlet

Inserting a Cassette

Recording Basics

Recording a Picture

Fundamental steps for recording a picture with the camcorder.

Adjusting LCD Screen and Modes

LCD Screen Adjustments

How to adjust LCD brightness and mirror mode.

Using the Zoom Feature

Recording with Viewfinder

Understanding Recording Indicators

Explanation of indicators shown on the LCD screen and viewfinder.

Shooting Special Lighting Conditions

Back Light Feature

Using the Back Light feature for backlit subjects.

NightShot Feature

Using the NightShot feature for recording in dark places.

Advanced Night Shooting Modes

Super NightShot

Using Super NightShot for enhanced low-light recording.

Self-Timer Recording

Checking Recorded Content

END SEARCH / EDITSEARCH / Rec Review

Using functions to check recorded scenes and transitions.

Playback Basics

Playing Back a Tape

Steps for playing back recorded tapes using the camcorder's controls.

Display Function and Data Code

Display Function

Using the DISPLAY button to show/hide screen indicators.

Data Code Function

Understanding and using the data code feature for recording information.

Various Playback Modes

Viewing Recording on TV

Using AV Cordless IR Receiver

Advanced Recording Operations

Tape Photo Recording

Recording still images onto tape using the Tape Photo recording feature.

Self-Timer Tape Photo Recording

Printing Still Images

Using the Wide Mode

Using the Fader Function

Applying and Cancelling Fader Effects

Fader Function Notes and Limitations

Using Special Effects: Picture Effect

Using Special Effects: Digital Effect

Applying and Adjusting Digital Effects

Digital Effect Function Notes

Using the PROGRAM AE Function

PROGRAM AE Mode Notes and Limitations

Adjusting Exposure Manually

Focusing Manually

Superimposing a Title

Title Settings and Limitations

Making Your Own Titles

Editing Stored Titles

Inserting a Scene

Advanced Playback Operations

Playing Back with Picture Effects

Applying picture effects during playback of recorded tapes.

Playing Back with Digital Effects

Enlarging Recorded Images (PB ZOOM)

Locating Scenes with Zero Set Memory

Searching Recordings by Date

Date Search

Automatically searching for recordings based on date changes.

Date Search Function Notes

Searching for Photos

Photo Search/Photo Scan

Finding and previewing still images recorded on tape.

Photo Scan Feature

Editing

Dubbing a Tape (A/V Cable)

Dubbing tapes using the A/V connecting cable.

Dubbing with i.LINK Cable

Analog to Digital Signal Conversion

Recording Video or TV Programs

Recording with A/V Cable

Recording video or TV programs onto a camcorder tape.

Recording TV Programs with i.LINK

Inserting Scenes from VCR (Insert Editing)

Insert Editing Procedure and Notes

Customizing Your Camcorder

Changing the Menu Settings

Step-by-step guide to navigate and change menu settings.

Menu Item Settings: Auto Shutter, Zoom, SteadyShot, N.S. Light

Menu Settings: Audio and Playback

HiFi Sound, TBC, DNR, Audio Mix, PB Mode, A/V to DV Out

Configuration options for audio, tape playback, and signal conversion.

Menu Settings: LCD, Quality, Protection

LCD, Quality, Print Mark, Protect, Delete All, Format

Customizing LCD, image quality, protection, and memory stick operations.

Menu Settings: Recording and Data

Rec Mode, Audio Mode, Remain, Data Code

Adjusting recording modes, audio settings, and data display.

Menu Settings: Clock and TV

Clock Set, Auto TV On, TV Input, Demo Mode

Configuring clock, TV settings, demo mode, and display size.

Menu Settings: World Time and Indicators

World Time, Beep, Commander, Display, Rec Lamp, Indicator

Customizing world time, alerts, remote control, and indicators.

Resetting Date and Time

Memory Stick Operations

Introduction to Memory Stick Use

Overview of Memory Stick functions for storing still images.

Before Using Memory Stick

Important precautions and guidelines before using the Memory Stick.

Memory Stick Formatting and Compatibility

Inserting and Ejecting Memory Stick

Selecting Image Quality Mode

Image Quality Settings and Capacity

Memory Photo Recording

Memory Photo Recording Notes

Continuous Shooting and Memory Stick Full

Continuous Shooting Settings and Notes

Self-Timer Memory Photo Recording

MEMORY MIX Operations

Superimposing Still Images

Superimposing still images from Memory Stick onto moving images.

MEMORY MIX Modes

Chromakey, Luminance Key, Overlap

Using MEMORY MIX modes like CHROM, LUMI, and OVERLAP.

MEMORY MIX Settings and Limits

Recording Tape Images as Still Images

Recording Images from TV/VCR as Still Images

Memory Stick Operations: Photo Save

Photo Save Function Notes

Memory Stick Operations: Memory Photo Playback

Memory Photo Playback: Index Screen

Viewing Memory Stick Images on PC

Copying Memory Stick Images to Tapes

Copying to Tapes: Notes and Limitations

Enlarging Memory Stick Images (Memory PB ZOOM)

Memory Stick Slide Show Playback

Slide Show Viewing and Operation Notes

Memory Stick Operations: Image Protection

Memory Stick Operations: Deleting Images

Deleting All Memory Stick Images

Deleting Images: Notes and Write-Protect Tab

Memory Stick Operations: Print Mark

Additional Information

Digital8 System Overview

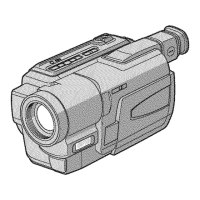
Explanation of the Digital8 system and usable cassette tapes.

Digital8 and Hi8/8mm Tape Playback

About i.LINK

i.LINK Connectivity and Requirements

Changing the Lithium Battery

Lithium Battery Replacement Procedure

Step-by-step guide for changing the camcorder's lithium battery.

Troubleshooting

Recording Mode Problems

Solutions for common problems encountered during recording.

Troubleshooting: Playback and Image Issues

Troubleshooting: Power, Battery, and Cassette Issues

Troubleshooting: Memory Stick Functionality

Troubleshooting: Remote Commander and Display Issues

Self-Diagnosis Display

Warning Indicators

Warning Messages

Using Your Camcorder Abroad

Maintenance and Precautions

Moisture Condensation

Information on preventing and handling moisture condensation.

Cleaning LCD Screen and Video Heads

Removing Dust from Viewfinder

Camcorder Operation and Handling Precautions

AC Power Adaptor and Battery Pack Precautions

Specifications

Quick Reference

Camcorder Parts Identification

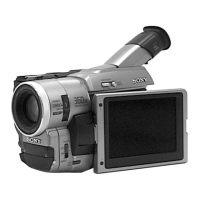
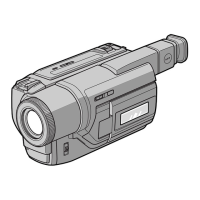
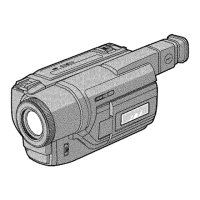
Diagram and labels identifying key camcorder components.

Camcorder Controls Identification

Video Control Buttons and Switches

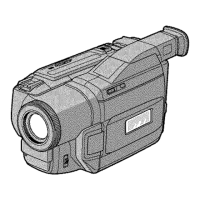
Labels for video control buttons, switches, and ports.

Camcorder Buttons and Jacks

Buttons and Viewfinder Controls

Labels for buttons, viewfinder, LCD screen, and jacks.

Camcorder Accessories and Shoe

Accessory Shoe and Buttons

Labels for accessory shoe, buttons, and Memory Stick lamp.

Camcorder Ports and Compartments

Jacks and Compartments

Labels for eject button, access lamp, Memory Stick compartment, and various jacks.

Remote Commander Identification

Operation Indicators and Display Window

Quick Function Guide

Related product manuals