EasyManua.ls Logo

Sony DCR-TRV140 User Manual

Sony DCR-TRV140
148 pages
To Next Page IconTo Next Page
Page #1 background imageLoading...
Page #1 background image
©2002 Sony Corporation
Model No. -TRV Model No. AC-
Serial No. Serial No.
Operating Instructions
Before operating the unit, please read this manual thoroughly,
and retain it for future reference.
Owner’s Record
The model and serial numbers are located on the bottom. Record the
serial number in the space provided below. Refer to these numbers
whenever you call upon your Sony dealer regarding this product.
3-072-317-14 (1)
Digital
Video Camera Recorder
DCR-TRV140
DCR-TRV140
CCD-TRV107/TRV108/TRV308/TRV408/
TRV608

Table of Contents

Other manuals for Sony DCR-TRV140

Question and Answer IconNeed help?

Do you have a question about the Sony DCR-TRV140 and is the answer not in the manual?
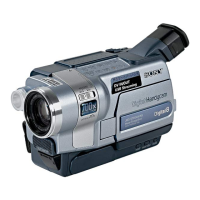
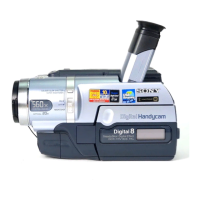
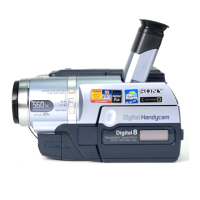
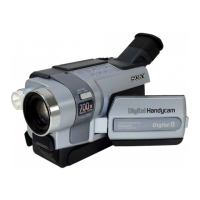
Sony DCR-TRV140 Specifications

General IconGeneral
Digital zoom560 x
Optical zoom20 x
Focal length range3.6 - 72 mm
Sensor typeCCD
Total megapixels0.5 MP
Optical sensor size1/4 \
Aperture range (F-F)1.4 - 2.9
Display diagonal2.5 \
Minimum illumination1 lx
Built-in microphoneNo
Weight and Dimensions IconWeight and Dimensions
Depth102 mm
Width90 mm
Height197 mm
Weight860 g

Summary

Operating Instructions

Safety Warnings

General Warning

Instructions to prevent fire or shock hazard by avoiding rain or moisture.

Regulatory Information

Canadian Safety Caution

Specific safety caution for Canadian users regarding electric shock.

Main Features Overview

Checking Supplied Accessories

Quick Start Guide

Getting Started Procedures

Initial setup steps including power, date, time, and cassette insertion.

Connecting the Power Cord

Step-by-step guide to connect the power cord.

Basic Recording Procedure

Basic steps for starting video recording.

Inserting a Video Cassette

Instructions for loading a video cassette into the camcorder.

Editing Operations

Tape Dubbing and Editing

Procedures for dubbing tapes and editing specific scenes.

Dubbing a Tape via A/V Cable

Connecting camcorder to VCR for tape dubbing via A/V cable.

PC Connection

USB Streaming Function

Viewing and capturing images via USB connection to a computer.

Preparing the Power Supply

Installing the Battery Pack

Procedure for inserting and removing the camcorder battery.

Charging the Battery Pack

Instructions for charging the camcorder's battery pack.

Connecting to a Wall Outlet

Guide for powering the camcorder directly from a wall outlet.

Setting the Date and Time

Inserting a Cassette

Recording a Picture

Recording Basics

Playing Back a Tape

Advanced Recording Operations

Advanced Playback Operations

Easy Dubbing

Digital Program Editing

Customizing Your Camcorder

Troubleshooting

Self-Diagnosis Display

Warning Indicators and Messages

About the InfoLITHIUM Battery Pack

About i.LINK

Maintenance and Precautions

Maintenance Information

Specifications

Quick Reference

Related product manuals