3
DP-RF6000
SECTION 1
GENERAL
This section is extracted
from instruction manual.
LOCATING THE CONTROLS
Front Panel of the Processor
CHG RF DTS
DOLBY DIGITAL DOLBY PRO LOGIC MPEG-2 AAC
6
3
1
2
45
L
A
T
I
G
I
D
G
O
L
A
N
A
A
M
E
N
I
C
F
F
O
C
I
S
U
M
N
O
F
F
O
T
C
E
L
E
S
T
U
P
N
I
T
C
E
F
F
E
N
O
I
S
S
E
R
P
M
O
C
7 8
1 Contact pin
2 Charging lever
3 COMPRESSION switch
4 INPUT SELECT switch
5 EFFECT switch
6 CHG indicator
! " #!!
7 RF indicator
! $ " %! & !#
8 DECODE MODE indicators
Rear Panel of the Processor
AT T
TUNE/ID SET
LLINE IN
DIGITAL IN DIGITAL OUT
(THROUGH)
R
0dB -8dB
DC IN 9V
12 3 456
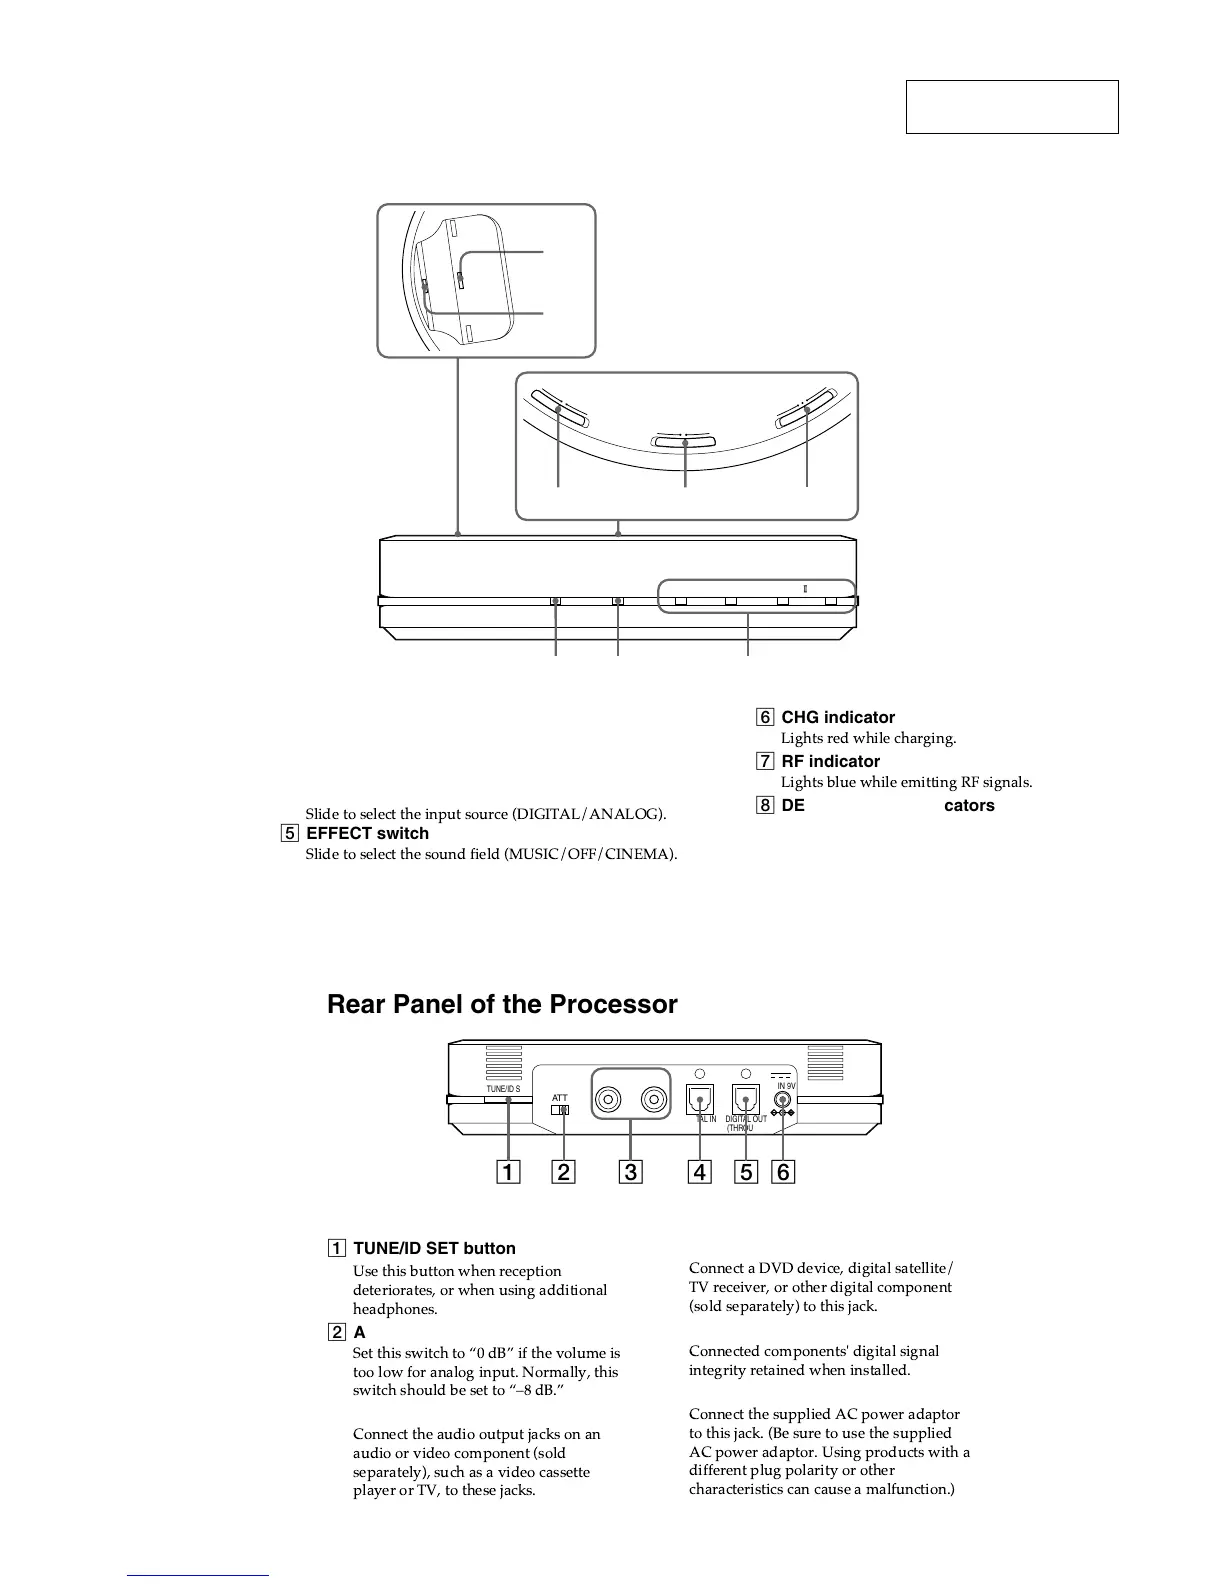
1 TUNE/ID SET button
Use this button when reception
deteriorates, or when using additional
headphones.
2 ATT (attenuator) switch
Set this switch to Ò0 dBÓ if the volume is
too low for analog input. Normally, this
switch should be set to ÒÐ8 dB.Ó
3 LINE IN jacks
Connect the audio output jacks on an
audio or video component (sold
separately), such as a video cassette
player or TV, to these jacks.
4 DIGITAL IN jack
Connect a DVD device, digital satellite/
TV receiver, or other digital component
(sold separately) to this jack.
5 DIGITAL OUT jack
Connected components' digital signal
integrity retained when installed.
6 DC IN 9V jack
Connect the supplied AC power adaptor
to this jack. (Be sure to use the supplied
AC power adaptor. Using products with a
different plug polarity or other
characteristics can cause a malfunction.)