5
GB
Preparations
]
]
}
}
]
}
]
}
Please be sure to carry out the procedures described in
“Setting up the commander” on page 6 after inserting the
batteries.
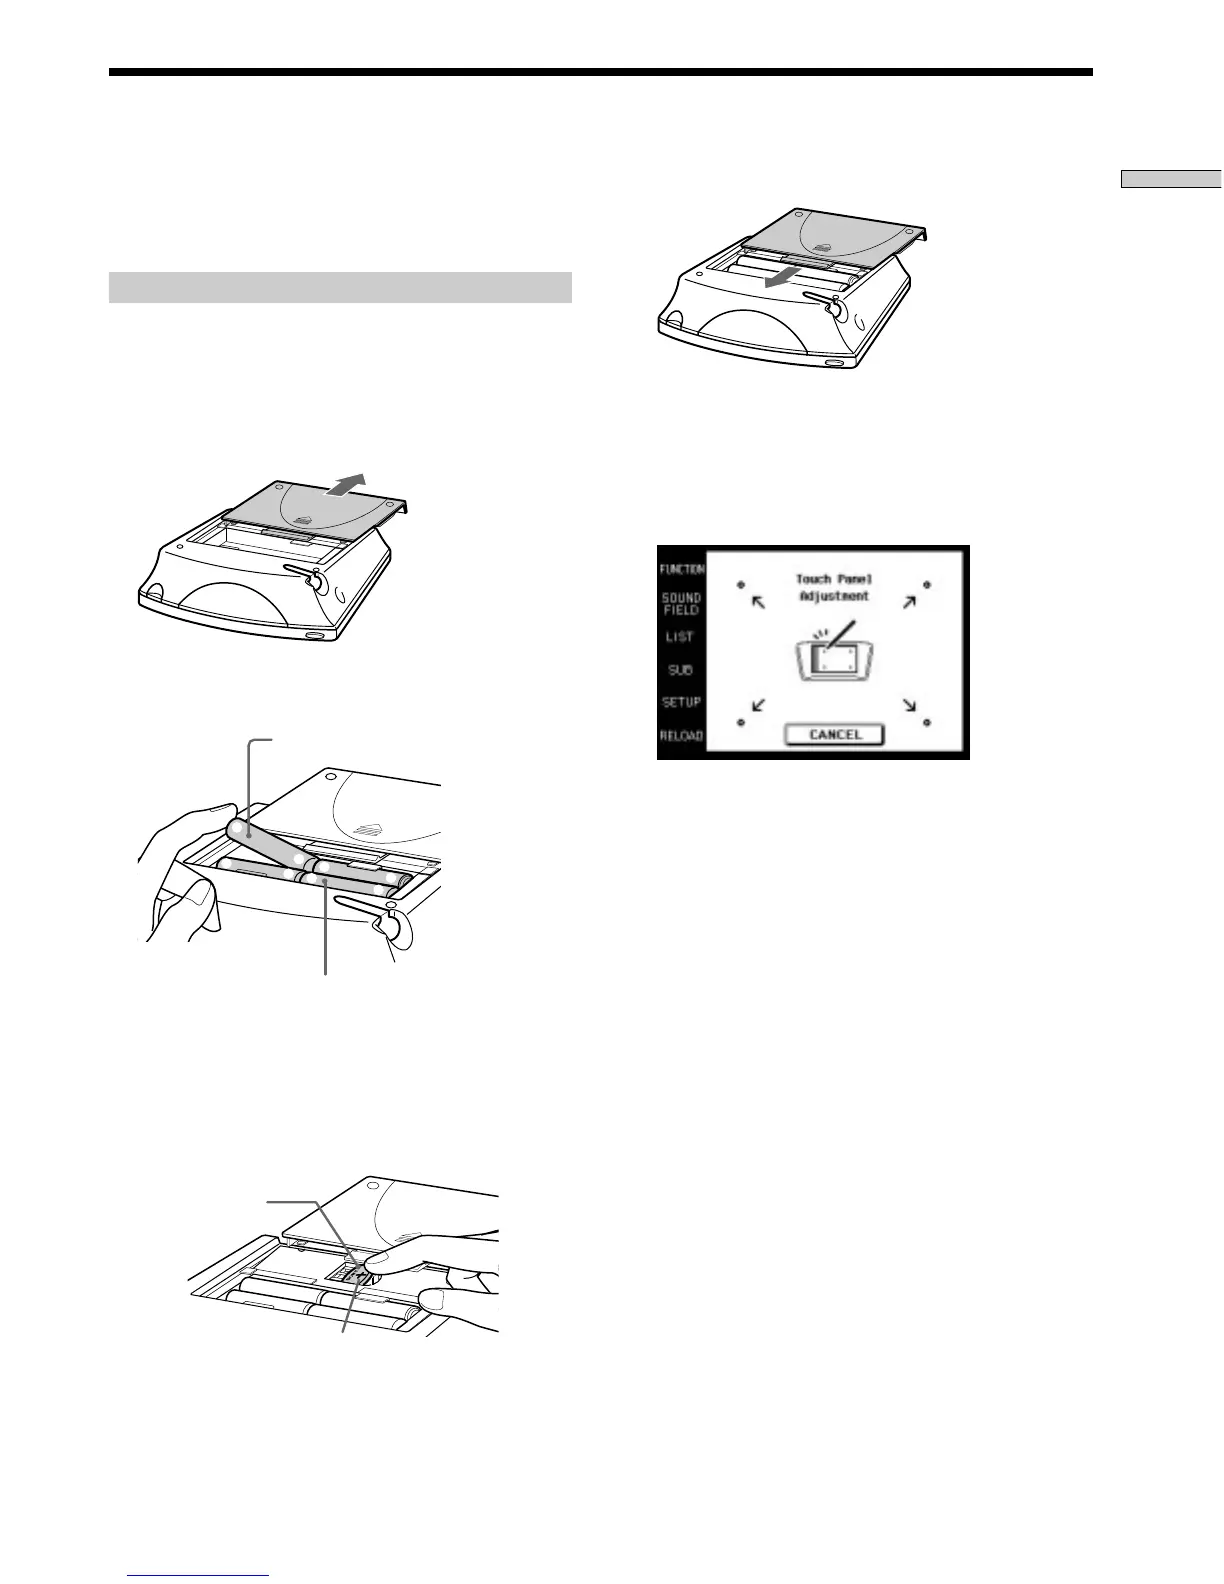
Inserting batteries into the commander
Insert the four size-AA (LR6) alkaline batteries (for
commander operation) and the lithium battery (for
preservation of the commander’s internal memory).
1 Remove the battery compartment cover.
2 Insert the alkaline batteries.
3 Insert the lithium battery.
After wiping the lithium battery thoroughly with a
dry cloth, insert it into the compartment with the
positive (+) pole side facing up.
Preparing the Commander
4 Close the battery compartment cover.
After inserting the batteries, touching the touch panel
turns on the light and displays the touch panel (LCD)
adjustment screen. Follow the procedure on the next
page for touch panel adjustment and initial
communication.
Notes
• The LCD lights up when touched.
• VOL +/–, MUTING and SLEEP can be used even when the
LCD is not lit.
• Pressing BACK LIGHT/COMMANDER OFF turns the
backlight on or off. Holding it down for about 2 seconds turns
the LCD off.
• If the commander is not used for 10 seconds, the LCD turns off
automatically (Auto Off function).
Push in direction of
arrow
Always insert the negative (–) pole
side of batteries first.
Size-AA alkaline batteries
Coin shaped lithium
battery CR2032
Positive (+) pole side up