EasyManua.ls Logo

Sony VPC Series - User Manual

Sony VPC Series
3 pages
Print Icon
To Next Page IconTo Next Page
Loading...
VPCEB Series Optical Disk Drive
Replacement Instructions
P/N 989201349 Rev. C 1/3
Prepare the Computer
CAUTION: Make sure the
computer is turned off, the lid is
closed, and the AC Adapter is
disconnected. Failure to do so can
result in damage to the computer.
Step 1. Place the computer upside
down on a protected surface with the
front edge facing you.
Battery Pack Removal
Step 2.
1) Slide the left battery tab to the
unlock position.
2) With your right thumb, slide the
right battery tab to the left and hold.
3)
Lift the battery with your left thumb
using the notch at the bottom to
remove.
Optical Drive Removal
(Steps 3-6)
Step 3. The Optical Disk Drive (ODD)
is located on the left side of the unit
as shown.
These easy instructions are intended to guide you through the replacement process.
Before you begin, place your notebook computer on a clean or covered surface to avoid
damage to the computer's case.*
Follow the ESD (Electrostatic Discharge) damage prevention instructions:
o Hold parts by the edges, away from exposed circuitry when possible.
o Do not walk around excessively as this promotes static build-up.
Before you begin, remove any jewelry you may be wearing to prevent scratches to the surface
of your notebook computer.*
The appearance of the electronic components shown in the illustrations may be different from
the components shipped. This slight difference does not affect the accuracy of these
instructions.
* Sony is not responsible for damage caused by incorrect handling of the notebook computer.
IMPORTANT!
PLEASE READ BEFORE YOU START
Lift to remove
2
.
3
.
1
.
Question and Answer IconNeed help?

Do you have a question about the Sony VPC Series and is the answer not in the manual?

Summary

Prepare the Computer

Battery Pack Removal

Steps to remove the battery pack from the notebook computer.

Optical Drive Removal

Steps 3-6 guide the removal of the optical disk drive from the unit.

ODD Disassembly

ODD Disassembly (Steps 7-9)

Steps for disassembling the optical disk drive by removing brackets.

ODD Assembly

ODD Assembly (Steps 10-13)

Steps for assembling the optical disk drive, including bezel attachment.

ODD Installation

ODD Installation (Steps 14-16)

Steps for installing the optical disk drive back into the notebook computer.

Overview

This document provides detailed replacement instructions for the Optical Disk Drive (ODD) in Sony VPCEB Series notebook computers. It is designed to guide users through the process of safely removing an old ODD and installing a new one. The instructions emphasize careful handling and adherence to specific steps to prevent damage to the computer and its components.

Function Description:

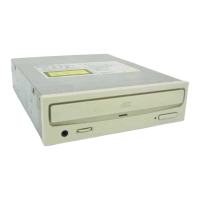
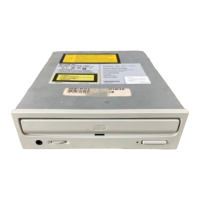
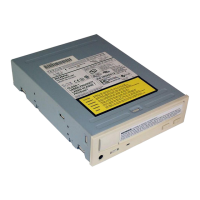
The primary function of this document is to facilitate the replacement of an Optical Disk Drive in a Sony VPCEB Series notebook. The ODD is a crucial component for reading and writing data to optical media such as CDs and DVDs. The replacement process involves disassembling parts of the notebook to access the ODD, detaching the old drive, transferring brackets and bezels to the new drive, and then reassembling the components. The instructions are presented in a step-by-step format with accompanying illustrations to ensure clarity and ease of understanding for the user.

Important Technical Specifications (Implied):

While the document does not explicitly list technical specifications for the ODD itself (e.g., read/write speeds, interface type), it implicitly refers to several aspects relevant to the replacement:

  • Compatibility: The instructions are specifically tailored for "VPCEB Series" notebooks, indicating that the replacement ODD must be compatible with this particular series.
  • Physical Dimensions and Mounting: The instructions detail the removal of two (2) screws securing the ODD Bay, four (4) side screws securing ODD brackets, and the alignment of bezel tabs with ODD tab holes. This implies that the replacement ODD must conform to specific physical dimensions and mounting points to fit correctly within the notebook chassis and integrate with existing brackets and bezels.
  • Component Transfer: The process requires transferring "ODD Brackets" and "bezel" from the old ODD to the new one. This suggests that the new ODD might be a bare drive without these external components, relying on the original parts for proper fit and aesthetic integration. The instructions highlight identifying "tabs on the bezel and tab holes located on the ODD" and ensuring "all brackets should sit flush" with "stamped letters located on the brackets should all be facing the same direction," underscoring the precision required for component alignment.
  • Electrical Connection: Although not explicitly detailed, the process implicitly involves an electrical connection for the ODD to function, which is established when the ODD assembly is slid into the computer.

Usage Features:

The document is designed for user-friendliness, incorporating several features to assist the user:

  • Step-by-Step Instructions: The replacement process is broken down into logical, numbered steps, making it easy to follow.
  • Clear Illustrations: Each significant step is accompanied by a photograph or diagram, visually guiding the user through the process. These illustrations show the location of screws, how to handle components, and proper alignment.
  • Safety Precautions: The document begins with crucial safety warnings, including:
    • Placing the notebook on a clean/covered surface to prevent damage.
    • Following ESD (Electrostatic Discharge) prevention instructions, such as holding parts by edges and avoiding excessive walking to prevent static build-up.
    • Removing jewelry to prevent scratches.
    • A prominent "CAUTION" box emphasizes turning off the computer, closing the lid, and disconnecting the AC Adapter before starting to prevent damage.
  • Important Notes and Tips: Specific notes are included to highlight critical details, such as:
    • "Put aside the ODD Bay screws to re-secure the ODD Bay later in the procedure."
    • "Put the ODD Brackets and screws aside for transfer to the new ODD."
    • "NOTE: Identify tabs on the bezel and tab holes located on the ODD."
    • "NOTE: All brackets should sit flush. The stamped letters located on the brackets should all be facing the same direction."
  • Component Identification: The instructions guide the user in identifying specific components like the ODD Bay screws, ODD brackets, bezel tabs, and tab holes.
  • Handling Instructions: Guidance is provided on how to handle components, such as "gently pull towards the left to remove the ODD" and "carefully press the bezel into place."
  • Confirmation Steps: Steps like "Make sure the new ODD is seated flush on the edge of the computer" ensure proper installation.

Maintenance Features:

The document itself serves as a maintenance guide, enabling users to perform a specific repair. While it doesn't describe ongoing maintenance of the ODD, it facilitates the replacement of a faulty unit.

  • CRU Kit: The mention of a "CRU kit" (Customer Replaceable Unit kit) implies that Sony provides a package containing the new ODD and potentially necessary tools (like the "enclosed magnetic screwdriver") specifically for user-performed replacements.
  • Return Instructions: The final step, "Return the old ODD to Sony following the included shipping instructions," indicates a process for returning the defective part, which is common in warranty or exchange scenarios. This suggests a structured approach to managing replaced components.
  • Self-Service Empowerment: By providing these detailed instructions, Sony empowers users to perform the ODD replacement themselves, potentially reducing the need for professional repair services and associated downtime.

In summary, this document is a comprehensive, user-centric guide for replacing the ODD in Sony VPCEB Series notebooks. It prioritizes safety, clarity, and precision, ensuring that users can successfully complete the replacement process with minimal risk of damage.

Sony VPC Series Specifications

General IconGeneral
BrandSony
ModelVPC Series
CategoryCD/CDR Drive
LanguageEnglish

Related product manuals