#EMG2000 MAGNUM™ DC LED Lightbar
EMG2000-DC 10.15
6
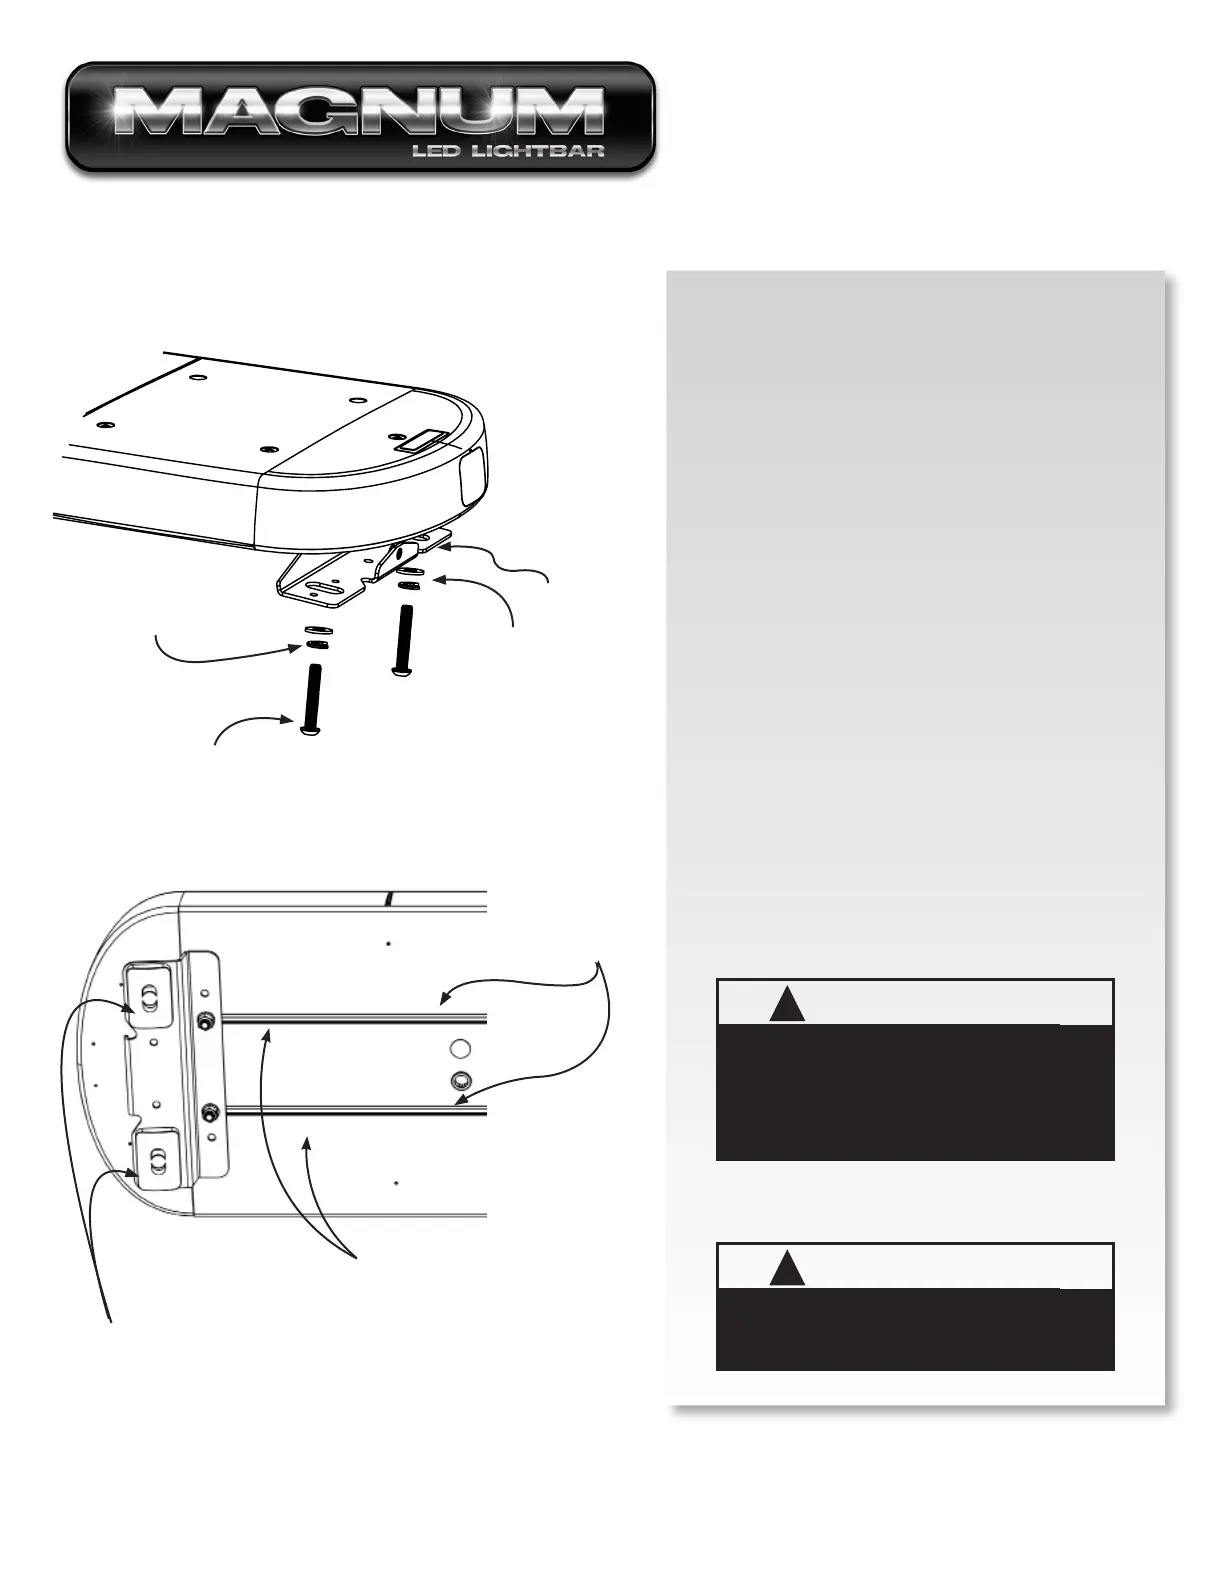
1. Locate the permanent hardware kit that is included.
2. Slide 5/16 carriage bolts into extrusion t-slots. Place mounting
foot onto slots and tighten foot with washer and nut, ensuring the
use of either a lock washer or lock nut.
3. Temporarily place lightbar in its correct position on the roof of the
vehicle. The bar should be positioned about the center of the
vehicle B pillar. Determine the appropriate position of the mounting
feet brackets on the lightbar to the vehicle roof and reposition
mounting feet as needed.
4. Remove the rubber feet.
5. Measure and/or mark the 2 holes in roof to match mounting feet
locations. See warning messages below. Drill holes for ¼" bolts (F
drill).
6. Install hardware as shown in image to the left.
7. Route cables into vehicle. Use supplied rubber grommet in roof
for sealing/ protection of wires. It is recommended that silicone be
placed around grommet to ensure roof sealing.
FIXED HEIGHT BRACKETS PERMANENT
MOUNTING
!
WARNING
Route wires only in locations that are not subjected to
potential wear. Make sure to avoid routing wires in the
deployment area of your air bag. Refer to your vehicle’s
owner’s manual for airbag deployment zone.
!
WARNING
Care must be taken when drilling through the roof of the
vehicle not to drill into any existing wiring and not to drill
through the headliner or support members of the vehicle.
Check both sides of the mounting service prior to drilling.
De-burr any holes and remove any metal shards or remnants.
Install grommets into all wire passage holes.
Extra Low & Permanent Mounting Foot
T-Slots for adjustability
for correct roof fit
T-Slot Gasket location
Remove Rubber Feet 2x
2x 1/4"-20 x 1"
Hex Head Screw
2x 1/4" Lock
Washers
2x 1/4" Flat
Washers
2x 1/4"-20
Square Nuts
 Loading...