– 16 –
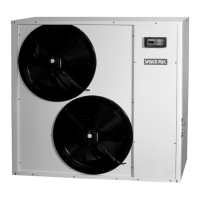
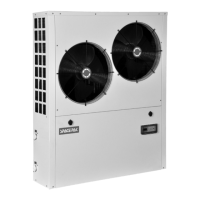
Model LAHP48 Air to Water Heat Pump — Installation, Operation & Maintenance Manual
BEFORE Starting The Unit
Electrical shock hazard — Disconnect all
electrical power before proceeding with the
following. Verify that the system and all components
have been installed in accordance with this manual
and all applicable codes and instructions. Inspect
the SpacePak heat pump and all other system
components. All components should be in good
condition and operational. Inspect the water piping
for any signs of leakage.
Repair all system leaks. Leakage will cause pressure to drop,
preventing the heat pump from operating. Leaks also allow
introduction of excess make-up water, whether filled
automatically or manually. Check system pressure, the pressure
should be at least 12-15 PSIG with heat pump/chiller not in
operation. Check all wiring connections to ensure terminal
connections are tight and all wiring is in place.
Starting The SpacePak LAHP
Start In Heating Mode
1. When the pump has stopped, change the thermostat to Heating
and raise the set point above current room temperature.
2. This initiates a call in heating mode. The pump symbol will
begin flashing.
3. After 1 to 2 minutes, the pump symbol will change to constant
display, and the pump will begin circulating.
4. Assuming the water is outside of the heating temperature
range (below 120
0
F) the refrigeration system will initiate and
the 1, or 3, or both numerals will begin flashing.
5. After 1 to 2 minutes, the 1, or 3, or both numerals will change
to constant, the compressor symbol will turn on and one or
both compressors will start.
6. Observe for any alarms, errors, or faulty operation (noises,
vibration, etc).
Start In Cooling Mode (If Applicable)
1. Apply power to the unit.
2. The display (Figure 1) should show the start sequence — uC2,
then 2.0, then the current water temperature. No other symbol
should appear.
3. When the display shows only temperature, lower the thermo-
stat setpoint below the current room temperature.
4. This begins a call for cooling, and the pump symbol will begin
to flash.
5. After 1 to 2 minutes, the pump symbol will change to constant
display, and the pump will begin circulating.
6. Assuming the water is outside of the cooling temperature range
(above r01 setpoint) the refrigeration system will initiate and
the numeral 1 will begin flashing on display.
7. After 1 to 2 minutes, the 1 numeral will change to constant,
the compressor symbol will turn on and the compressor will
start.
8. Observe for any alarms, errors, or faulty operation (noises,
vibration, etc.).
9. When operation is deemed satisfactory, raise the thermostat
set-point or turn it off.
10. The pump will run for approximately two minutes after the
compressor shutdown.
Anti-freeze Cycle
Should the water temperature drop to 34°F* during periods
of non-use, the pump will start and the anti-freeze heater (if
connected) will energize and continue to operate until the
temperature reaches 39°F*.
If the water temperature continues to fall and reaches 32°F*, the
Alarm symbol and Fault Code AL will be displayed, and the unit
will automatically start in heating mode. It will continue to run
until the water temperature reaches 37°F*.
This provides the maximum level of protection in
all cases, but may use energy unnecessarily when
a suitable concentration of glycol anti-freeze is
installed. When freeze protection is sufficient, these
values can be adjusted to lower temperatures.
Contact technical support for guidance (Section 2)
in reconfiguring, however it must be understood that
the installer is responsible for ensuring sufficient
freeze protection to the lowest temperature allowed.
24-Hour Follow-up
Approximately 24 hours after start-up and testing, return to the
installation to verify proper operation. Perform the following
checks.
• Check system pressure. Add additional glycol/water mixture
if needed to restore pressure. (Pressure can drop as air is
removed from the system by the air vents.)
• Sample the glycol/water mixture in the system. Verify inhibitor
and glycol levels. Inspect the piping and components to
ensure there are no leaks. Repair any leaks immediately.
• Close the isolation valves on either side of the y-strainer at
the SpacePak heat pump return connection. Remove the
screen and inspect for sediment. Clean if necessary.
• If the strainer has become clogged with sediment, determine
whether the system needs to be drained, cleaned and
re-filled. Excessive sediment accumulation in the strainer will
reduce flow and cause the unit to shut down.
• Cycle the system on heating and cooling. Verify that all
components operate correctly.
*These are factory default setpoints. Please see Section 2 to
adjust in the field.
Section 8: Start-up And Test (continued)