OPERATIONOPERATION 2120
yOUTH SKATES
To watch the How-To video, visit sparxhockey.com/loadyouth.
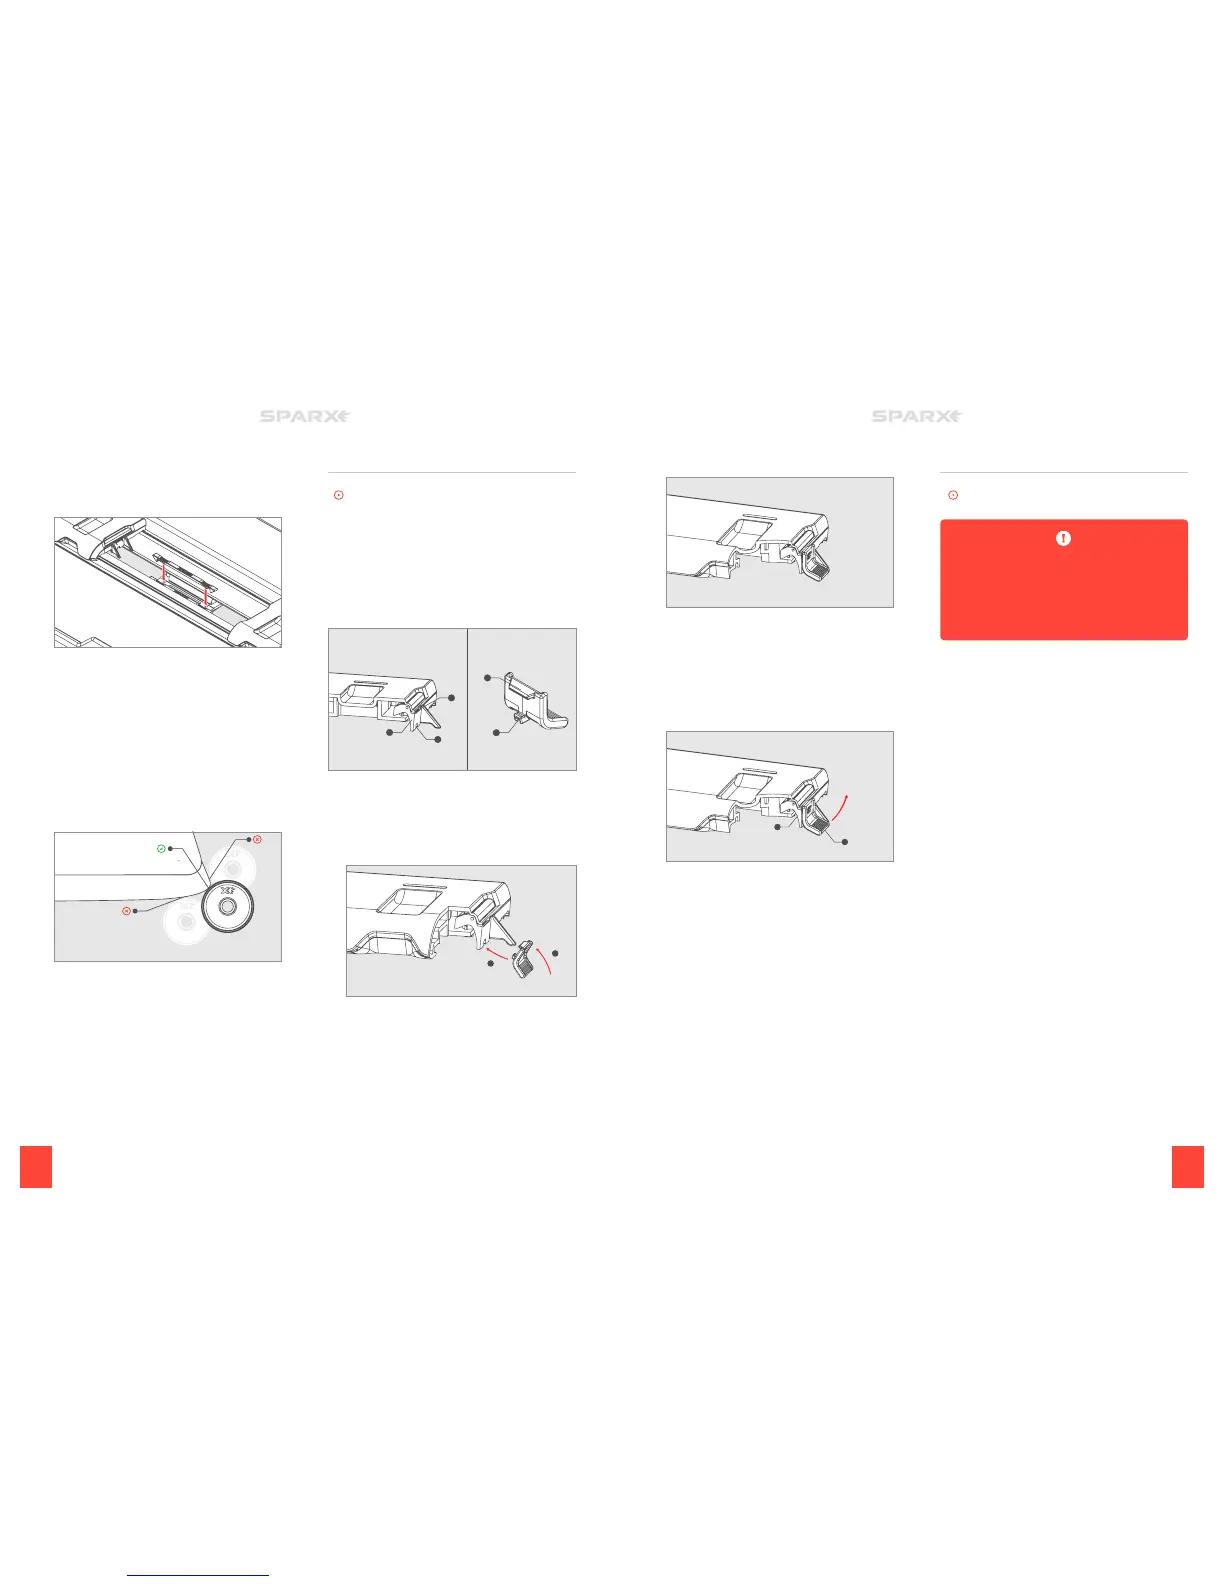
Before loading a youth skate of size 12 or smaller, Youth Skate
Adapters must be installed onto each Protective Slot Cover. On the
adapter, locate the Upper Anchor Tab (A) on the top of the adapter
and then the Lower Anchor Tab (B) on the bottom.
Below is a cross-sectioned Protective Slot Cover. Locate the
recessed slot (C) and the tab cut out (D) on the Protective Slot
Cover Switch (E).
1 INSTALL YOUTH SKATE ADAPTERS
Press the Lower Anchor Tab (B in figure above) into the tab cut
out (D in figure above). Once it is in, press up firmly on the top
of the Youth Skate Adapter until the Upper Anchor Tab clicks
in place.
B
D
E
A
C
1
2
1 INSTALL THE GOALIE RISERS
Align the Anchor Pins of the Goalie Risers to the Anchor Slots
of the Skate Clamp. Once aligned, press down firmly until you
feel the Goalie Risers snap into place.
2 CONTINUE THE SHARPENING PROCESS
Refer to “Loading a Skate” in the Operation section of the
manual. When adjusting the Grinding Ring Height, refer the
graphic in step 3.
3 ADJUST THE GRINDING RING HEIGHT
Refer to “Adjusting the Grinding Ring Height” in the Operation
section of the manual using the figure below as your guide
where the desired contact point is A, contact point B is too
high and contact point C is too low.
5 CONTINUE THE SHARPENING PROCESS
Refer to “Sharpening Skates” in the Operation section
of the manual.
6 REMOVE THE GOALIE RISERS
Pull up on each end of the Goalie Risers to remove from the
Skate Clamp.
A
B
C
A
SHARPENING NEW STEEL
To watch the How-To video, visit sparxhockey.com/newsteel.
Before loading new steel, try taking a dark colored
marker and running it down the bottom surface of the
skate blade. To ensure you have sharpened the entire
blade, inspect the blade after running the cycles and
if the sharpening is complete, all of the marker on the
skating surface will be removed.
1 LOAD THE SKATE
Follow the instructions in “Loading a Skate” in the Operation
section of this manual.
2 ADJUST GRINDING RING HEIGHT
Follow the instructions in “Adjust the Grinding Ring Height” in
the Operation section of this manual.
3 SELECT 1 CYCLES
Using the
l
Left and
r
Right Buttons, select
1
on the
Cycle Counter.
4 CONTINUE THE SHARPENING PROCESS
Refer to the Operation section of the manual.
Below is how an installed Youth Skate Adapter will look.
2 CONTINUE THE SHARPENING PROCESS
Refer to ”Load the Skate” in the Operation section of
the manual.
3 REMOVE YOUTH SKATE ADAPTERS
Press up on the lip (A) of the Youth Skate Adapter until it clicks
out from the Protective Slot Cover Switch (B).
A
B