OPERATIONOPERATION 1918
UNLOADING A SKATE
To watch the How-To video, visit sparxhockey.com/unloadskate.
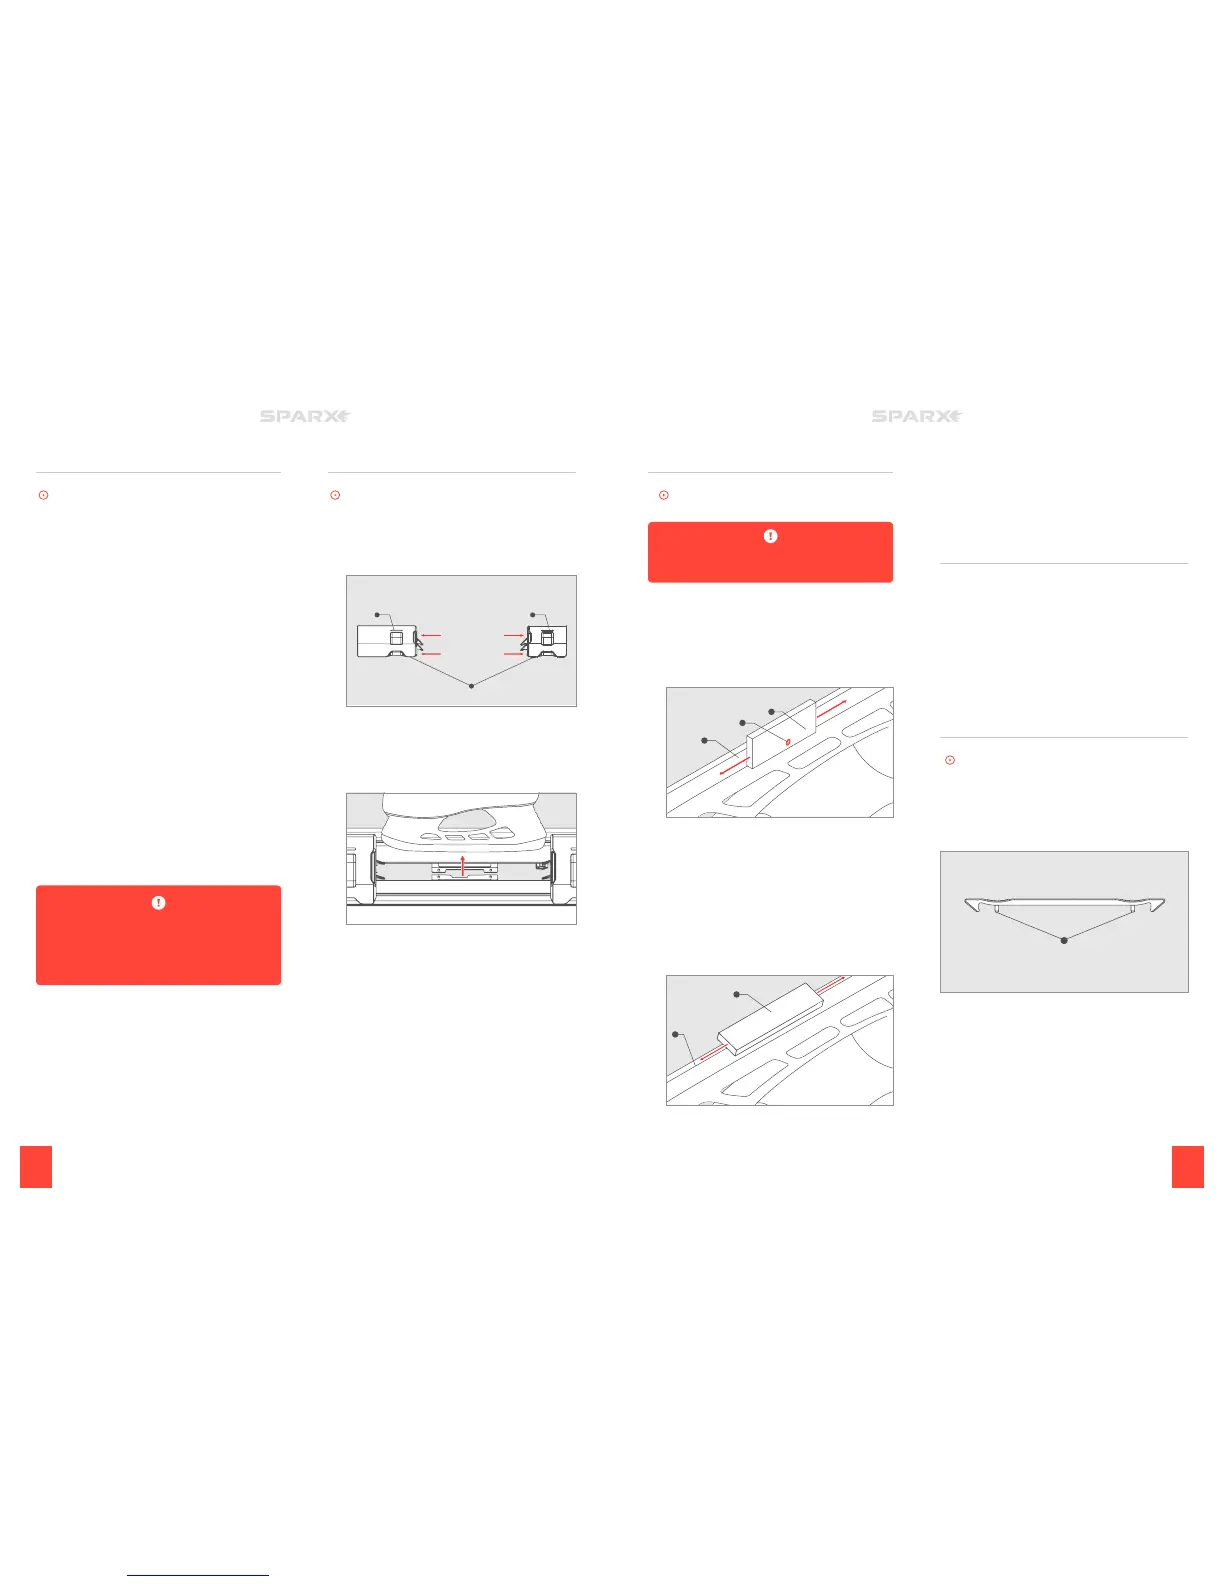
1 DISENGAGE PROTECTIVE SLOT COVERS
Move both Protective Slot Covers (A) away from the skate. The
safety light on each cover (B) will illuminate.
2 REMOVE THE SKATE
Press and hold down the Clamp Lever to open the Skate
Clamp. Remove the skate from the Skate Clamp and release the
Clamp Lever.
B B
A
SHARPENING SKATES
To watch the How-To video, visit sparxhockey.com/sharpening.
Once you have loaded the skate, closed the Protective Slot Covers,
and adjusted the height of the Grinding Ring, you are ready to begin
sharpening.
To cancel the cycles at any point during the sharpening, press the
n
Cancel Button once. This will send the Carriage back to its home
position at the end of its current pass.
1 BEGIN SHARPENING
Press the
p
Play Button. Once the button has been pressed, it
will change from white to blue and the sharpening process will
begin.
Upon pressing the
p
Play Button, the Air Filter fan and grinding
motor will turn on. The Cycle Counter will flash with the current
cycle number until that cycle (out and in) is completed. The
sharpener will continue to run until all cycles have been performed.
At the completion of the final cycle, the end of sharpening is marked
by a “cycle complete” tone and the case LEDs will turn green. The
fan will continue to run for an additional 30 seconds after the final
cycle completes.
ADDITIONAL CYCLES
If additional cycles are desired, you can reset the cycle count and
press the
p
Play Button again.
If the Grinding Ring skips when it first makes contact with
the blade, the Grinding Ring’s height is too high. When
properly set, the Grinding Ring should make a smooth
transition onto the skate blade.
EDGE DEBURRING
To watch the How-To video, visit sparxhockey.com/deburr.
We recommend using protective gloves when
deburring the skate blade.
1 DEBURR THE BLADE WITH THE STONE
Press the Honing Stone (A) against the face of the skate blade
(B). Do not put pressure on the side of the stone closest to the
blade edge. With light pressure, press down on the lower side
of the stone (C) and slowly run the stone back and forth along
the length of the blade for four full passes.
2 REPEAT ON THE OPPOSITE SIDE
Turn the skate over. Repeat step 1 on the opposite side of
the blade.
3 DEBURR THE BLADE WITH THE STROP
Press the Leather Strop (A) against the edge of the skate blade
(B) at a 45 degree angle. With light pressure, slowly run the
strop back and forth along the length of the edge for four full
passes
B
C
A
A
B
4 REPEAT ON THE OPPOSITE SIDE
Turn the skate over. Repeat step 3 on the opposite edge of
the blade.
POWERING Off
1 LOCATE THE POWER INPUT PORT
On the back of the sharpener, locate the Power Input Port.
2 TURN OFF THE SHARPENER
Toggle the Power Input Port switch to the o position (I=on,
0=o).
GOALIE SK ATES
To watch the How-To video, visit sparxhockey.com/loadgoalie.
Before loading a goalie skate, you must first install the Goalie
Risers onto the Skate Clamp (one Goalie Riser on each side of the
Skate Clamp). Each Goalie Riser has two Anchor Pins (A) as shown
below.
A
 Loading...