ADJUSTING THE GRINDING
RING HEIGHT
To watch the How-To video, visit sparxhockey.com/ringheight.
For every pair of skates sharpened, you must assess
the height of the Grinding Ring and adjust if necessary.
We will first introduce a few new concepts, and then move into the
actual adjustment. We want to first define an intersection zone,
where the vertical face of the blade (B) meets the nearly horizontal
face of the blade (C).
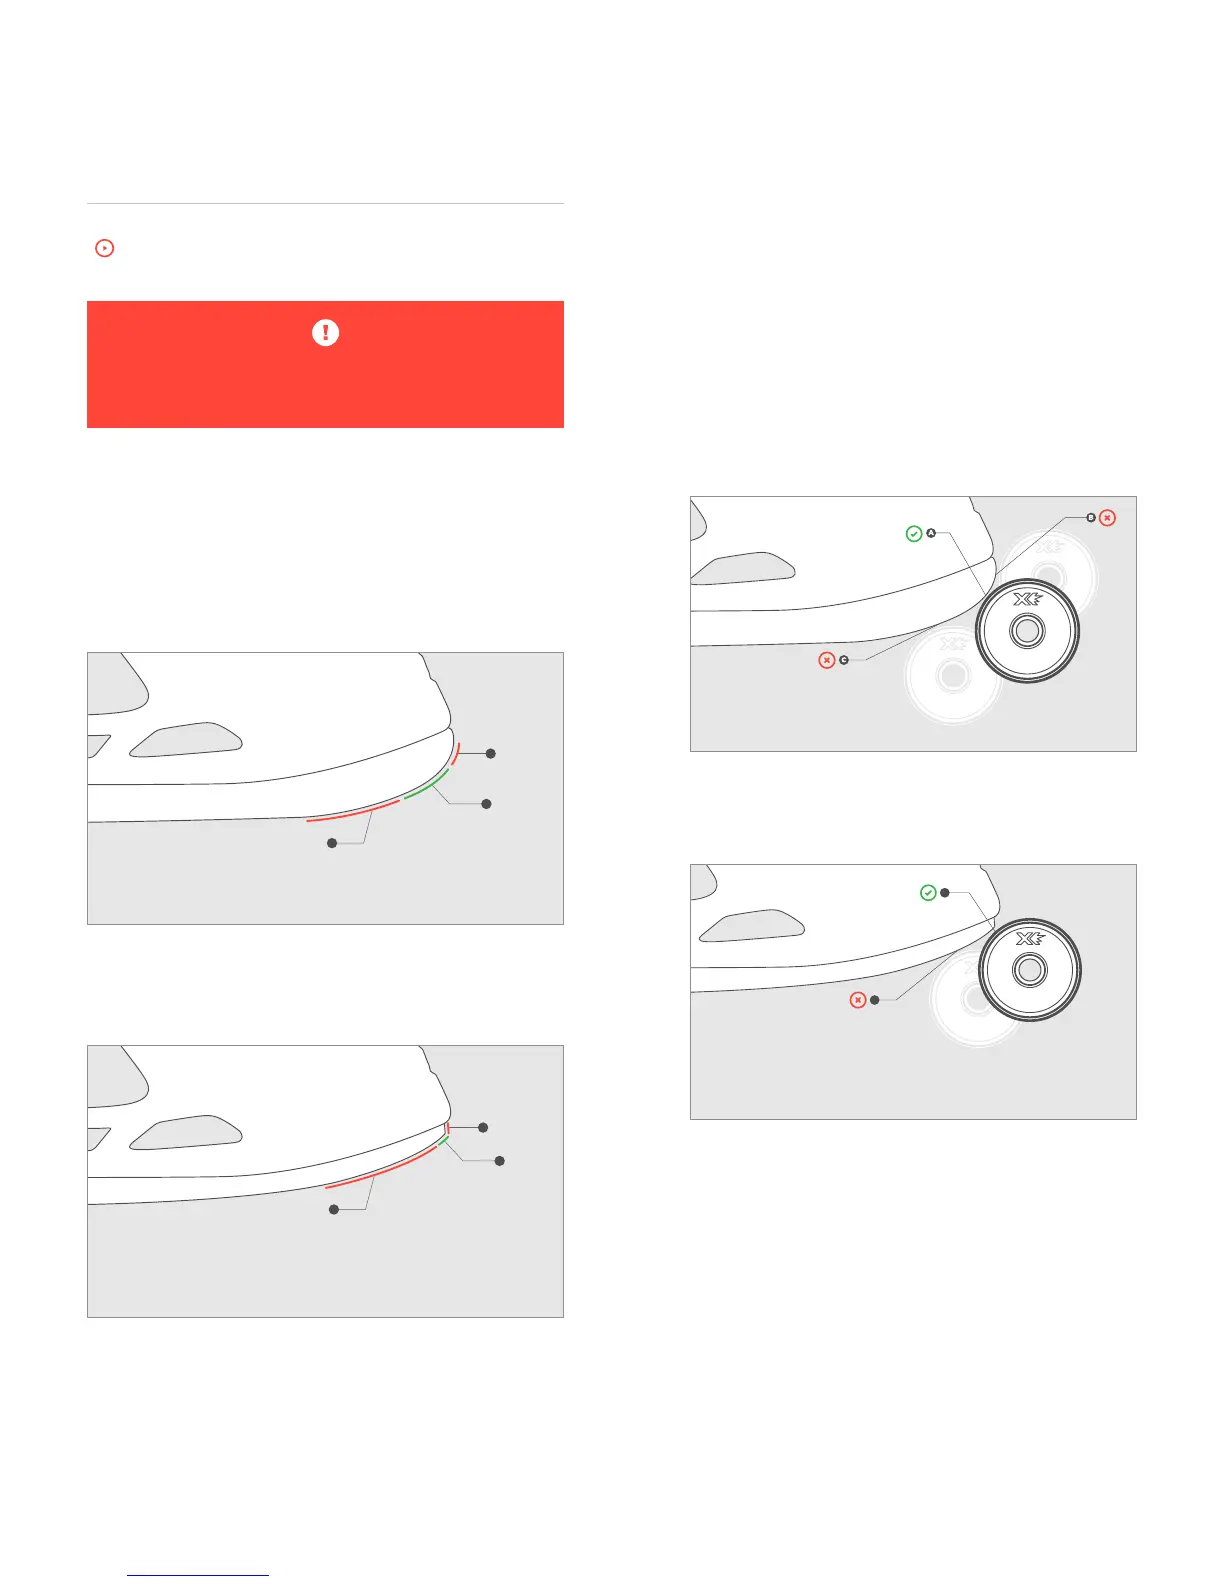
This zone can be a curved section of blade (A) like that shown in the
figure below or in some cases, it can be a point where surfaces (B)
and (C) meet.
When the intersection zone is a curved surface (A as shown above)
the Grinding Ring can safely initially contact the blade anywhere in
this region (A).
A
B
C
When the intersection zone is a point, which is more common with
skates that have been sharpened multiples times (A as shown above),
the first contact between the Grinding Ring and the blade should be
just below the point.
A
B
C
1 INITIATE MOVE MODE
Press the
m
Move Button on the Keypad. This will set the
Grinding Ring into Move Mode and allow you to control
its movement.
2 INSPECT THE CONTACT POINT
Use the
l
Left and r Right Buttons to touch the Grinding
Ring to the skate blade. Inspect its contact point and be sure it
is in the desired position. In the graphic below you will see an
example of a contact point that is too high (B) and too low (C).
A Grinding Ring contacting in the right zone is shown below as
A. If the Grinding Ring is not in a desired position, follow step 3.
If the Grinding Ring is in a desired position, skip to step 6.
If the skate blade is worn down the graphic below shows a
contact point that is too low (B) and a Grinding Ring contacting
the blade at the proper point (A).
B
A