3 MOVE THE CARRIAGE INTO POSITION
Using the
l
Left and
r
Right Buttons on the Keypad, back
the Grinding Ring o the toe of the skate blade 1/4 inch.
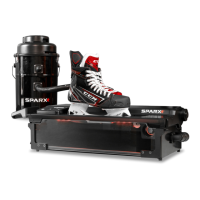
4 ADJUST THE GRINDING RING HEIGHT
Open the Glass Door. Locate the red
h
Height Adjustment
Knob (A). Turn the knob left to raise the height or right to
lower the height until the Grinding Ring is at the desired height.
The knob is labeled 1-8, with 8 being the highest setting for the
Grinding Ring and 1 being the lowest setting.
5 INSPECT THE CONTACT POINT
Close the Glass Door. Once the Glass Door has been closed,
using the
l
Left and r Right Buttons, touch the Grinding Ring
to the skate blade. Inspect its contact point and be sure it is
in its desired position. Repeat steps 4 and 5 until the Grinding
Ring makes contact at the desired position.
6 END MOVE MODE
Press the
m
Move Button again to send the Grinding Ring back
to its home position.
A
A
SELECTING THE NUMBER
OF CYCLES
To watch the How-To video, visit sparxhockey.com/cycle.
When the sharpener moves the Grinding Ring out and back over the
skate blade once, it is called a cycle.
The Sparx™ Sharpener comes set automatically to a standard
4
four cycles with all standard Radius Ring™ and FIRE Ring™ Grinding
Rings. We recommend trying four cycles to start and moving higher
or lower as needed. Typically, we have found that four cycles will
handle normal wear and tear (and even small nicks) from one to four
hours of skating between sharpenings. For brand-new steel or when
changing Grinding Ring hollow depths, we recommend using the
1
10-cycle setting to ensure you completely reset the skating surface
of the blade. See Sharpening New Steel at the end of the Operation
section.
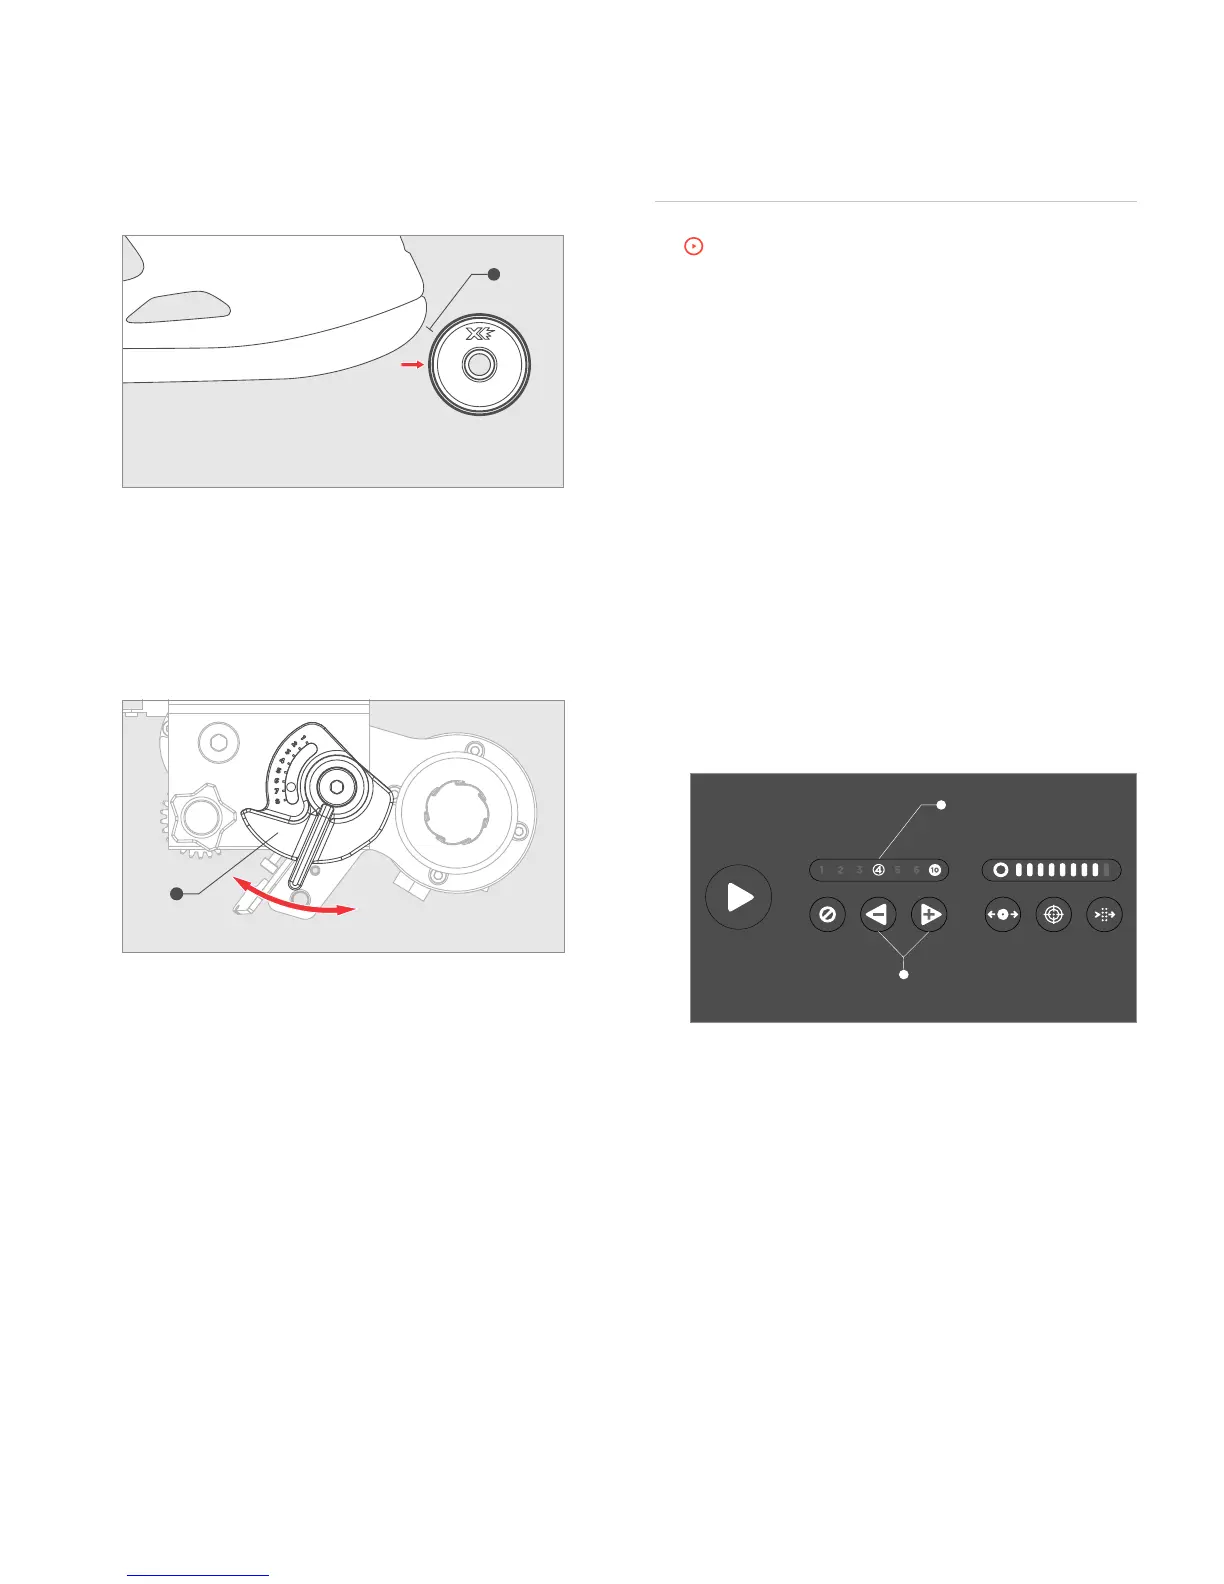
1 ADJUST THE CYCLE COUNT
Use the
l
Left and
r
Right Buttons (A) on the Keypad to
adjust the number of cycles desired. The number of cycles
selected will be illuminated on the Cycle Counter (B).