This document is a self-installation kit guide for a Spectrum Receiver, designed to help users connect and activate their new television services. The guide emphasizes a simple, three-step process to get users connected and enjoying their new services quickly. It also provides an option to watch an instructional video for those who prefer visual guidance, accessible at spectrum.net/setuptv, which also offers other helpful installation tips.
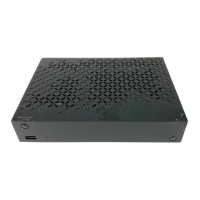
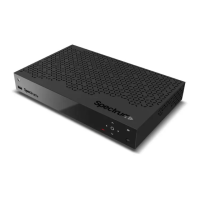
The "Here's What's Included" section provides a clear visual and textual inventory of all components necessary for the installation. This includes the Spectrum Receiver itself, which is the central device for accessing television services. Accompanying the receiver are essential cables: a coax cable for connecting to the cable outlet, an HDMI cable for connecting to the television, and a power cable to supply electricity to the receiver. For power, two batteries are included, specifically for the remote control. In some cases, a coax splitter may also be included, which is necessary if the cable outlet needs to be shared with other services like internet or voice. The remote control is also prominently featured, with a detailed diagram showing its various buttons and functions, indicating its role in navigating the receiver's interface and controlling the television.
The installation process is broken down into three main steps: "Connect Receiver," "Activate Receiver," and "Start Watching TV."
Step 1: Connect Receiver
This step details the physical connections required to set up the Spectrum Receiver.
- Connecting the Coax Cable: The first instruction is to connect one end of the coax cable to a cable outlet and the other end to the receiver. A crucial note is provided regarding the use of a coax splitter: if the cable outlet is shared with a modem for internet or voice service, a splitter should be used. Users are directed to spectrum.net/splitter for more information on this. This highlights the importance of proper signal distribution for multiple services.
- Connecting the HDMI Cable: Next, users are instructed to connect one end of the HDMI cable to the receiver and the other end to their TV. This connection is vital for transmitting high-definition video and audio from the receiver to the television. The diagram illustrates the HDMI port on the back or side of the TV, labeled "HDMI 1," and the corresponding port on the receiver.
- Connecting the Power Cable: The third connection involves the power cable. Users are told to connect the power cable to the receiver and then plug the other end into an electrical outlet. This provides the necessary power for the receiver to function. The diagram shows the power cable connecting from the receiver to an electrical outlet, which is depicted as a standard wall socket.
- Installing Remote Batteries: The final part of Step 1 involves the remote control. Users need to remove the battery cover from the included remote and insert the batteries, ensuring they are facing the correct direction. This prepares the remote for immediate use after the receiver is powered on and activated. The guide also mentions that if there are additional receivers, these steps (A through D) should be repeated for each one, indicating support for multi-room setups.
The diagrams accompanying Step 1 are highly illustrative, showing the cable outlet, the back of the Spectrum Receiver with its various ports (Cable In, Network, USB, HDMI, Digital Audio, Analog Audio, Power), the HDMI connection to the TV, and the power connection to an electrical outlet. This visual aid helps users correctly identify ports and make the right connections.
Step 2: Activate Receiver
Once the physical connections are made, the next step is to activate the receiver.
- Account Number: Users are advised to have their account number readily available, noting that it can be found on their included letter. This is a key piece of information required for the activation process.
- Online Activation: The primary method for activation is online. Users are instructed to visit spectrum.net/selfinstall from either a smartphone or a computer. This flexibility allows users to use their preferred device for the activation process.
- Following Instructions: After accessing the website, users need to select "Get Started" and follow the on-screen instructions. This suggests a guided, user-friendly online activation process that walks them through the necessary steps to bring their receiver online. The diagrams show both a smartphone and a laptop screen displaying "spectrum.net/selfinstall," reinforcing the multi-device compatibility for activation.
Step 3: Start Watching TV
With the receiver connected and activated, the final step is to begin watching television.
- Receiver Power: Users must ensure the receiver is turned on using the remote control. This is a prerequisite for any signal to be sent to the TV.
- TV Input Selection: The next instruction is to turn on the TV and select the correct HDMI source using the "INPUT" or "SOURCE" button on the TV or TV remote. This is a common step for any device connected via HDMI, as TVs often have multiple input ports. The diagram shows a TV and a media console, implying the receiver is typically placed near the TV.
Tips for Watching TV:
The guide provides several helpful tips to enhance the user experience:
- Guide Loading Time: It notes that it may take up to 20 minutes for the guide to show all channel information. This manages user expectations, preventing frustration if the guide doesn't populate instantly.
- Channel Lineup: For local channel lineups, users are directed to spectrum.net/channels. This provides a convenient way to access specific channel information relevant to their service area.
- Receiver Placement: A practical tip is to avoid placing anything on top of the receiver. This is generally good practice for electronic devices to ensure proper ventilation and prevent overheating, which can impact performance and longevity.
Optional: Program Remote to Control Your TV
This section provides instructions for programming the Spectrum remote to control other devices, such as a TV or DVD player, offering a unified control experience.
- Device Power: First, users need to turn on the device (TV, DVD player, etc.) they wish to control with the remote.
- Entering Programming Mode: On the remote, users must press and hold the button corresponding to their device (e.g., "TV," "DVD") along with the "OK/SEL" button for three seconds. An LED light on the remote will turn on, indicating that the device is ready to be programmed.
- Finding the Code: Within 30 seconds, users should point the remote at the device and press the "CH+" or "CH-" button. They continue pressing "CH+" or "CH-" until the device turns off. This process cycles through a database of codes until the correct one is found.
- Testing the Remote: After the device turns off, users should check if the remote has been programmed successfully by pressing the "POWER" button to turn on their device.
- Saving the Code: Finally, users press the corresponding device button (e.g., "TV") to complete programming the remote. An LED light will blink twice to confirm that programming is complete.
- Troubleshooting: A note advises that if the remote is unable to control the device after following these steps, users should visit spectrum.net/click for additional instructions, indicating further support resources are available.
Have Questions?
This section serves as a support hub for users who encounter issues or have further inquiries.
- Online Support: Users are directed to spectrum.net/support for general assistance and to learn more about their services.
- Phone Support: For those who cannot find what they are looking for online, a customer service number is provided: (855) 632-7020. This ensures multiple avenues for support.
Returning Equipment?
This final section addresses the process for returning equipment, which is important for avoiding additional charges.
- Return Information: Users are instructed to visit spectrum.net/equipment-return to view their options for returning equipment. This provides clear guidance on how to manage their equipment if they need to upgrade, downgrade, or cancel services.
Overall, the manual is designed to be comprehensive yet easy to follow, with clear instructions, helpful diagrams, and multiple support options. It aims to empower users to self-install their Spectrum Receiver efficiently and effectively, minimizing the need for professional assistance. The language is straightforward, avoiding technical jargon where possible, and focuses on practical steps for setup and use.