IM-P077-02 ST Issue 610
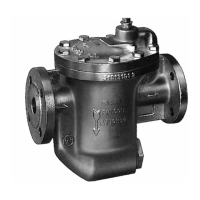
Under most conditions the trap will discharge condensate with a blast type action. Under
low load and/or low pressure applications the discharge may tend to 'dribble'. Condensate
is discharged at steam temperature so due care must be given to the site of the discharge.
5. Operation
Note: Before actioning any maintenance programme observe
the 'Safety information' in Section 1.
Warning
The body/cover gasket and strainer cap gaskets contain a thin stainless steel
support ring which may cause physical injury if not handled and disposed of
carefully.
6.1 General information
Before undertaking any maintenance on the trap it must be isolated from both the supply line
and return line and any pressure allowed to safely normalise to atmosphere. The trap should
then be allowed to cool. When reassembling, ensure that all joint faces are clean.
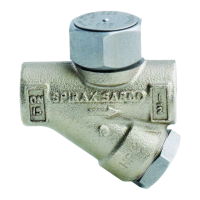
6.2 How to fit the valve and seat assembly (refer to Fig. 3):
- Undo the cover bolts and nuts and remove the cover from the body.
- Unhook the bucket from the valve lever.
- Remove the valve guide plate by undoing the two screws.
- Remove the seat from the cover.
- Ensure all jointing faces are clean and then screw in the new seat to the recommended
torque (see Table 1). Use a small amount of jointing paste on the threads.
- Fit a new valve guide plate with two screws supplied and refit the new lever. Ensure that
the valve and seat are aligned correctly before finally tightening the guide plate screws.
- Hook the bucket to the lever and ensure gasket faces on the body cover are clean.
- Using a new cover gasket refit the cover to the body ensuring the small ferrule is positioned
correctly. Tighten the cover bolts/nuts to the recommended torque (see Table 1).
6.3 How to clean/replace the strainer screen (refer to Fig. 3):
- Undo the strainer cap and remove the screen and gasket.
- Clean or replace the strainer screen.
- Ensure threads are clean.
- Refit a new strainer cap gasket and locate the screen in the strainer cap.
- Screw into the body and tighten to the recommended torque (see Table 1).
6. Maintenance