Tsupport@itwcp.co.uk
www.itwcp.co.uk
Technical Helpline UK: 0800 731 4924
Technical Helpline ROI: 1 800 882 388
Pulsa Operator Guide
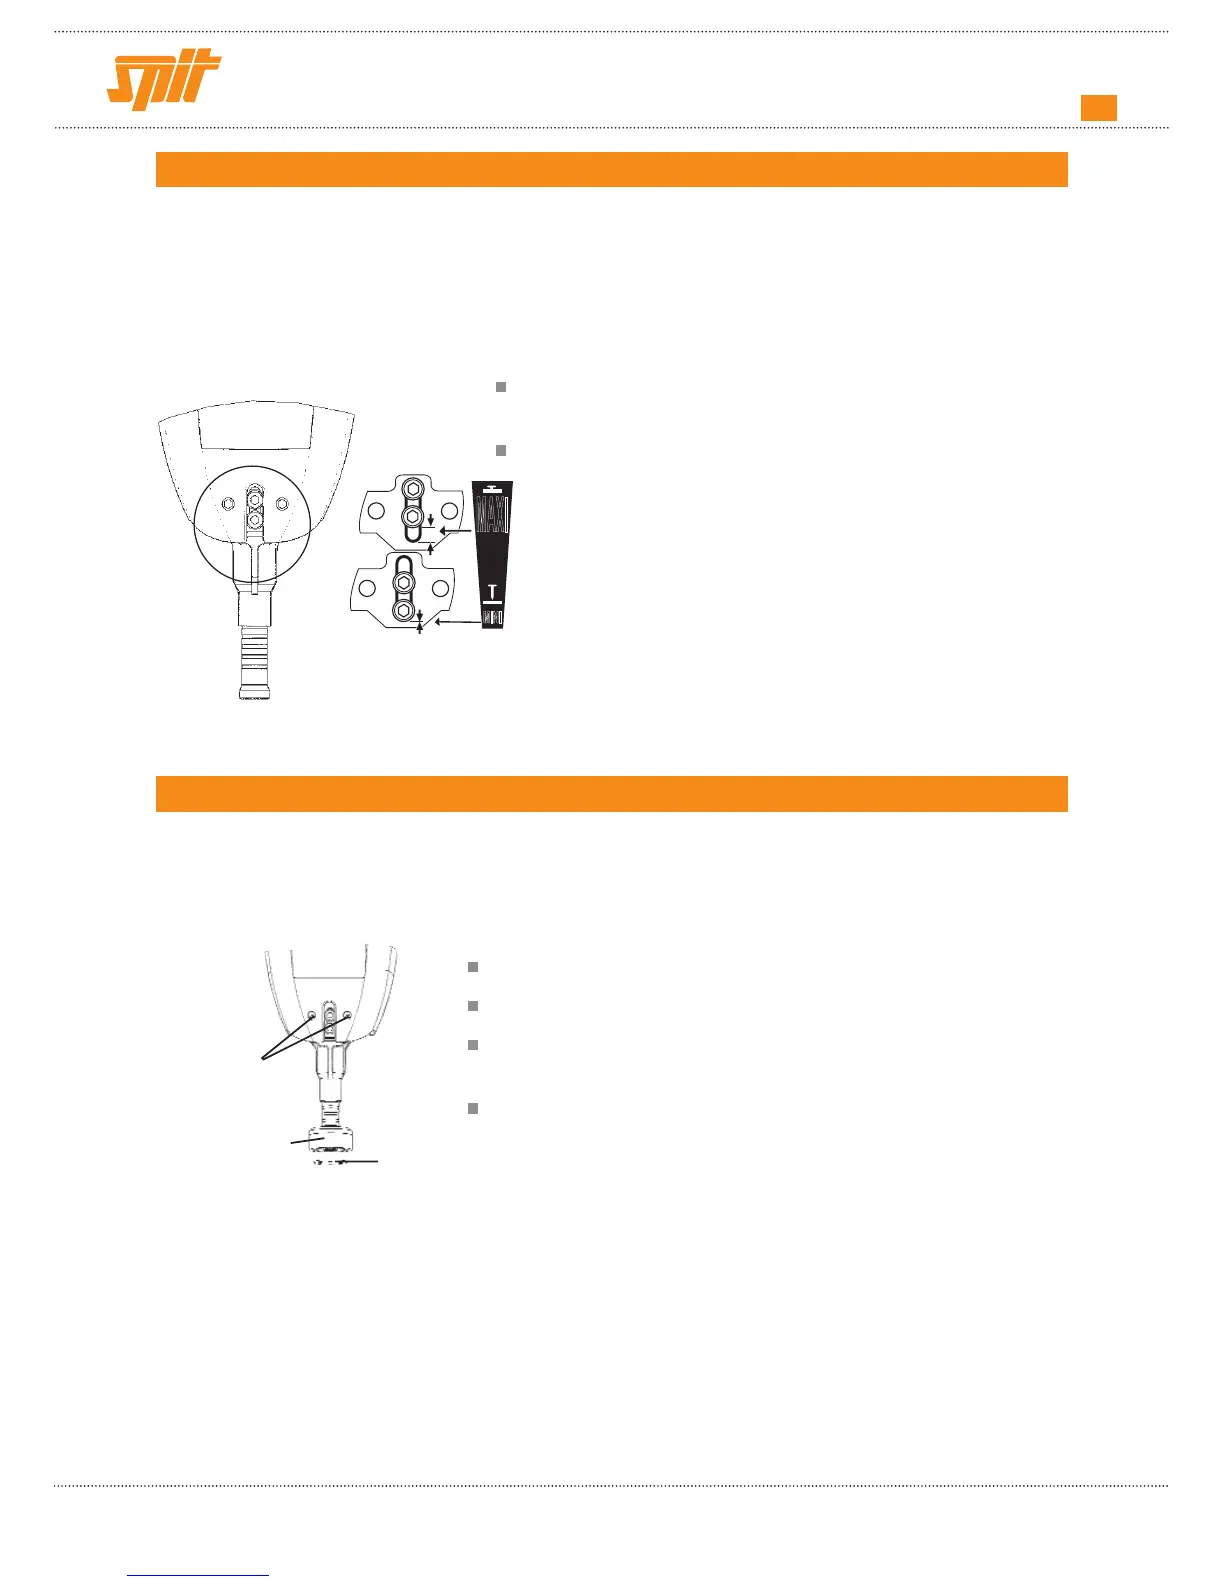
Adjusting the nail insertion depth
Using the metal washer holder (700P)
Certain applications may require use of the metal washer holder (this
accessory is not supplied with the unit).
This washer is mounted instead of the standard pin guide.
Remove the nail magazine (see drawing above).
Unloosen the 2 screws by 3 to 4 turns.
Replace the standard pin guide with the metal washer
holder pin guide.
Retighten the 2 screws.
The tool automatically adjusts its power to suit the base material.
However, certain applications may require a special setting for the tool pin guide.
Setting the pin guide :
Loosen the screw using the hexagonal wrench supplied with
the unit.
W ith the wrench mounted onto the screws, slide :
• to the up position for maximum nail insertion (Fig. 1).
•
to the down position for minimum nail insertion
(Fig. 2)
.
(Fig. 1)
(Fig. 2)
screws
nosepiece
metal washer